Categories
Kill Team Miniatures Warhammer 40k

Warhammer 40k 10th Edition USRs in readable font size, and my binder

After trying to play my first 10th Edition 40k game out of my phone, which was handy about 1/3 of the time and a pain in the ass the other 2/3 of the time, I put some time into prepping for my second game.

I thought about coil-binding the core rules, but didn’t feel like schlepping myself to a FedEx Office store to do that. My laziness got me thinking about the convenience of a 3-ring binder, since I could add more than just the core rules and keep everything organized with tabs — plus have the flexibility of altering its contents later on.

So I made a binder.

There’s a link to download this USR reference sheet below

This is a 1/2-inch Avery Durable View binder, which in addition to being fairly tough has two features I love: slanted D-rings, which make snagging and binding up much less likely; and clear cover overlays to accommodate inserts on the front, back, and spine. My laser printing can print on both sides of the page, which keeps the binder slim.

Three rings to bring them all, and in the bright greenness bind them

Here’s what’s in — and on — my binder:

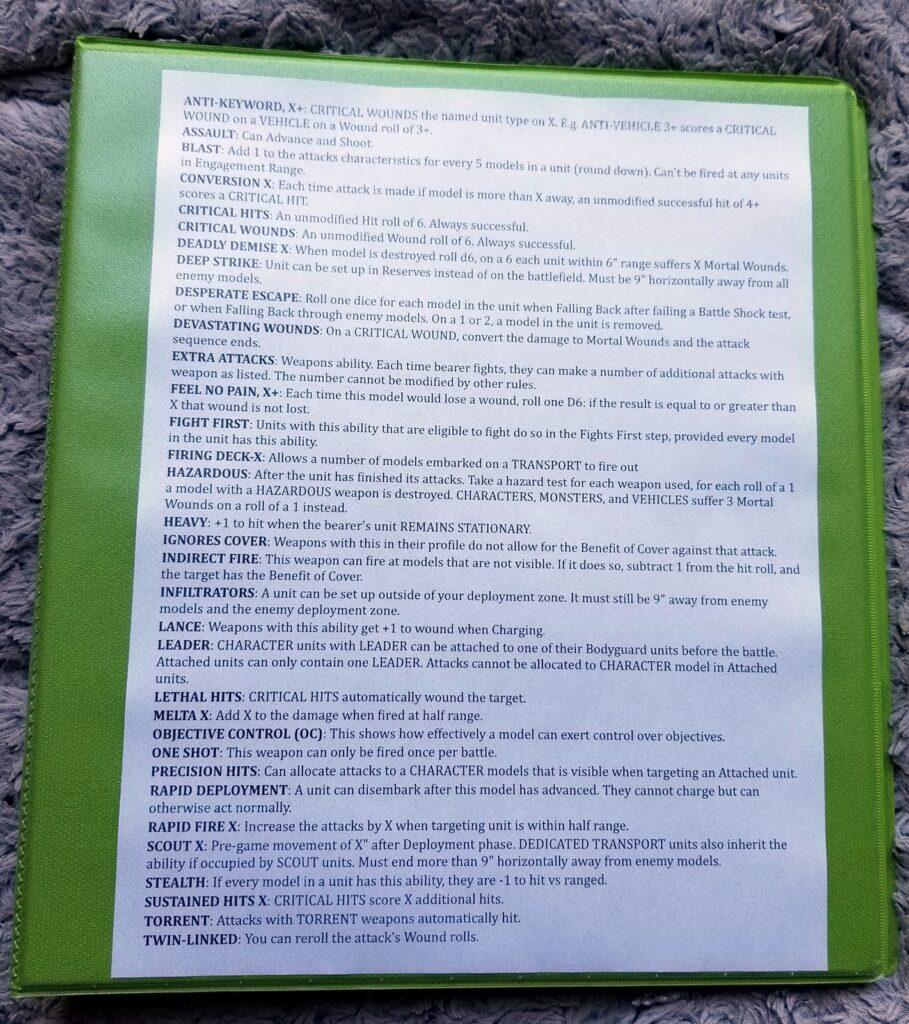
  • Outside cover: A one-page USR reference sheet based on the list originally created by Team Hivemind, now on version 1.1. My version prioritizes my aging eyes: It uses the largest font size possible with maximum legibility even under less-than-ideal lighting. (You can download the much prettier original version directly from Team Hivemind.)
    • I trimmed the occasional non-essential word to make everything fit on one page.
    • I originally had the old Rogue Trader cover here, but during play we referenced the USRs so often that I replaced it with this reference sheet.
  • First section: Two rules references, one from Reddit and the official Quick Start. They present the same info slightly differently, and I find both to be handy to have.
  • Second section: The free core rules. I love that GW has gone this route!
  • Third section: Datacards for my current army, including the Detachment rules, faction Stratagems, and the core Strategems. I highlighted the weapon options that are modeled on my minis. These are also all available for free from GW now.
    • The official card packs are pretty, but given the nature of 40k and errata I’d rather just print — and write on — my own freebies.
  • Fourth section: Datacards for units I’m not currently using but have already highlighted to match my minis, followed by the current Munitorum Field Manual (just in case we need to check points). The MFM is also free from GW. It’s version 1.2 as of this writing, downloadable from Warhammer Community.
  • Back cover: The little chart from the core rules showing the Strength vs. Toughness table, which I reference all the time during play.
I love the new datacard format! It’s so clean and simple

And that’s it! It’s a pretty simple setup, but it’s a million times easier to reference during play than the app, or even a large core rulebook. (I do love the app for list building, though!) I don’t own a copy of one of the newer slimmed-down rulebooks, but given that my binder includes those rules plus play aids customized to my needs I’m pretty confident I’d still prefer the binder.

Nice and big for my aging eyes

Binders aren’t sexy, but they’re versatile, customizable, cheap, and effective. Despite wholeheartedly embracing other digital tools and media, I keep using binders for stuff because they’re often the right tool for the job.

Tracking stuff

Playing Kill Team at home, it’s been easy enough to use different-colored dice to track CP and VP for each player, and just set them off to the side where they never get bumped.

But playing 40k on a giant table we circle constantly, in the middle of a crowded game shop, with limited “side space” available? I swear I spent at least a quarter of the game accidentally bumping the dice we were using to track CP and VP.

So this morning I ordered two of these killer all-in-one trackers from schoonerlabs on Etsy. They feature little bump-proof dials for CP, VP, and current turn, plus Kill team combat gage measurements, in a single tool with high legibility that works for both 40k and KT. Slick!

Digging Yore? Check out my book!

The Unlucky Isles [affiliate link], the first system-neutral guidebook for my Godsbarrow fantasy campaign setting, is available in print and PDF.
Categories
Blood Angels Space Marines Kill Team Miniature painting Miniatures Warhammer 40k

Hobby philosophy: old and new paint jobs

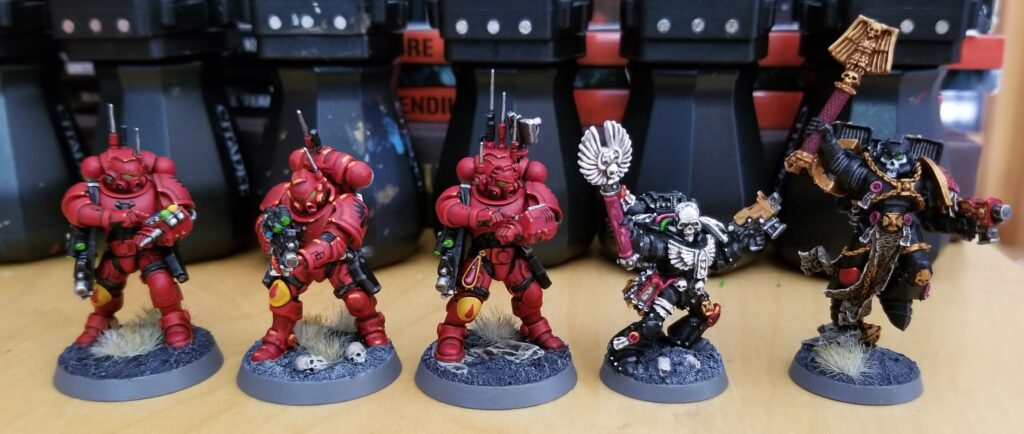
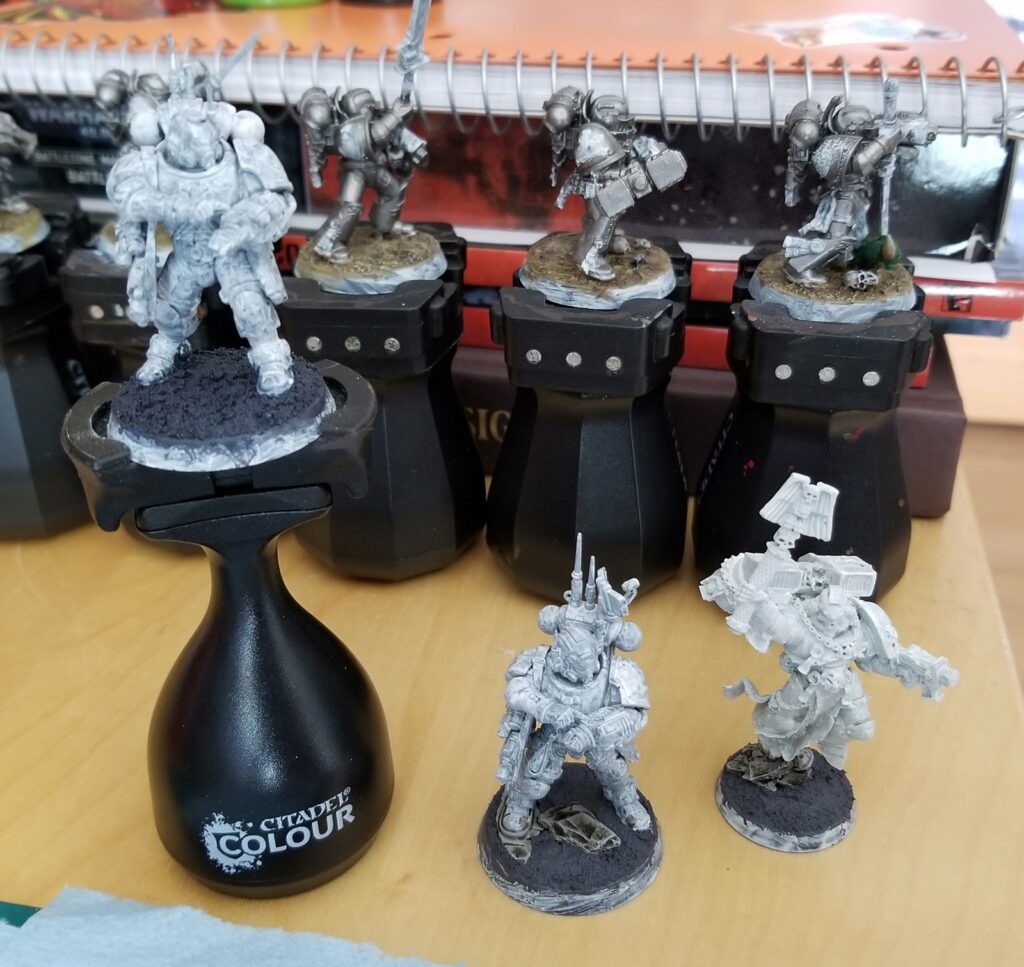
Here’s a little old/new paint job comparison. It’s not night and day, but I can see the benefit of experience!

From left to right, the Infiltrators are July 2023, May 2020, July 2023; Chaplains are July 2020, July 2023.

I put in a couple sleepless nights getting the three new models ready for a 40k game. It was great to get back to painting Blood Angels!

The biggest changes are attempting proper edge highlighting, pin washes rather than all-over washes on armor, and being sparing with the final highlights. My brush control isn’t where I’d like it to be yet, but it has improved.

Thinking about how these will look in play, older paint jobs mixed with newer ones, reminded me of something I wanted to get up here on Yore for posterity.

A few years back I saw a post on Twitter that has quietly become one of my miniature-painting hobby touchstones. (I wish I’d taken a screenshot!)

It was a photo of thousands of points of 40k models from the same faction, some of which were quite clearly painted differently than the rest.

The poster noted that those were his older models, and that instead of being frustrated they didn’t match he looked at it like this: It’d be sad if they didn’t look any different, because that would mean he’d never made any progress as a painter.

I love that.

Digging Yore? Check out my book!

The Unlucky Isles [affiliate link], the first system-neutral guidebook for my Godsbarrow fantasy campaign setting, is available in print and PDF.
Categories
Blood Angels Space Marines Kill Team Miniature painting Miniatures Warhammer 40k

New baseline Blood Angels color guide

I committed to learning to pin wash when I started painting BattleTech minis again, and since my first outing I’ve added it to my toolkit. That also means it’s time for an updated Blood Angels color guide, since pin washing is a big part of my Space Marine painting process now.

Old/new comparisons: Infiltrators (left) are July 2023, May 2020, July 2023; Chaplains are July 2020, July 2023

The pin wash on their armor takes a lot longer than an all-over wash, and requires a level of focus that feels closer to what I put in when I’m highlighting. But the payoff is worth it: It’s easy to neaten up messy bits using my base coat color; it preserves the redness of Mephiston Red, which means I don’t need as many highlights to bring back the red (as I did with my old approach); and the shading gets to do more of its work.

2023 general Blood Angels color guide

As always, these recipes are based on the Citadel studio recipes with some tweaks, and nothing is drybrushed unless noted. Highlighting is a mix of edge and point highlights.

  • Red: Mephiston Red > Agrax Earthshade pin wash> Evil Sunz Scarlet > Fire Dragon Bright.
    • Be sparing with the orange highlights.
  • Gold: Retributor Armour > Reikland Fleshshade all-over wash > Auric Armour Gold > Liberator Gold.
  • Black, including 99% of armor gaskets: Abaddon Black > Eshin Grey > Dawnstone.
    • For grey armor gaskets (like on Chaplains and Death Company dudes, who have black armor): Mechanicus Standard Grey > Nuln Oil all-over wash > Dawnstone.
  • Metal: Leadbelcher > Nuln Oil all-over wash > Ironbreaker > Stormhost Silver. Notes for specific metal stuff below.
    • Go easy on the Stormhost, a little goes a long way for stuff like guns.
    • Cylindrical things: Do a volumetric highlight with the Ironbreaker, hitting just the top surface, then follow up with a tiny bit of Stormhost.
    • Jump pack forward vents: These are a pain in the dick to highlight, so I just do one light drybrush of Ironbreaker (with a tiny brush) and call it good.
  • Eye lenses: Moot Green > Agrax Earthshade pin wash > Moot Green.
  • Scope lenses: Pick one:
    • Blue: Caledor Sky > Temple Guard Blue in a crescent from 2 o’clock to 8 o’clock > dot of White Scar at 11 o’clock.
    • Green: Moot Green > 50/50 Moot Green/White Scar in a crescent from 2 o’clock to 8 o’clock > dot of White Scar at 11 o’clock.
  • Bolter rounds visible in magazines: Warplock Bronze > Agrax Earthshade all-over wash > Brass Scorpion.
  • Purity seal wax: Screamer Pink > Carroburg Crimson all-over wash > Pink Horror > Emperor’s Children.
  • Parchment and cloth: Rakarth Flesh > Agrax Earthshade all-over wash, but keep it light on the flats > Pallid Wych Flesh > White Scar.
    • Writing: Scribble on the parchment freehand with Abaddon Black
  • White: Celestra Grey > Drakenhof Nightshade all-over wash > Ulthuan Grey > White Scar.
  • Yellow: Averland Sunset > Agrax Earthshade pin wash > Flash Gitz Yellow.
  • Most leather: Khorne Red > Agrax Earthshade all-over wash > Wazdakka Red > 50/50 blend of Wazdakka Red/Kislev Flesh.
    • If it’s textured (like on the old-school resin Chaplain with Jump Pack), replace the highlights above with a single step: Wazdakka Red drybrush.
  • Purple gems: Screamer Pink > Agrax Earthshade pin wash > Pink Horror in a crescent from 2 o’clock to 8 o’clock > Emperor’s Children in a smaller crescent over the Pink Horror area > dot of White Scar at 11 o’clock.
    • Also applies to tiny screens, just with different colors.
  • Jump pack jets: Caledor Sky > Drakenhof Nightshade all-over wash > Temple Guard Blue > Baharroth Blue.

Going forwards I’ll probably just update this guide rather than writing a new one for every type of unit.

Digging Yore? Check out my book!

The Unlucky Isles [affiliate link], the first system-neutral guidebook for my Godsbarrow fantasy campaign setting, is available in print and PDF.
Categories
Blood Angels Space Marines Kill Team Miniature painting Miniatures Warhammer 40k

The paint-play-paint motivation cycle (and a Chaplain color guide)

“I’ll get to play with these” has been a powerful motivator since I got rolling in 2020, and I’ve always speculated that “I played and I like/didn’t like X, I need to paint some Y for my next game” would be similarly powerful.

Kill Team has produced that cycle for me, except instead of X being my team and Y being something new for my team, Y is just more teams. Every time I play, especially when I’m “curating” the whole experience in home games (providing the board, terrain, minis, rules, etc.), I want more options available.

That cycle has now kicked into gear with my Blood Angels, my largest and oldest 40k army. I’ve played two short games, enough to get an idea of what I like in play and what I wish I could field, and now that I’ve got a larger game — 1,000 points! — on the calendar for this week, I’m scrambling to paint three minis so I can field them right away.

Helix gauntlet and comms array Infiltrators on the left, Chaplain on the right

I want a sixth Infiltrator to form a complete kill team (joining the five I already have painted), and he and a seventh have the wargear I didn’t model on my Infiltrator squad because it wasn’t free in 8th or 9th and I needed the points. Now that it’s free, and I’ve seen that Infiltrators are fun to play, the helix gauntlet and comms array should come in handy.

I had to kitbash the helix gauntlet, which doesn’t come in the kit. Google turned up a great idea on Funnyjunk, of all places: use the comms array guy’s arm, shave down a couple of grenades for the medical lights, and add a needle. I had an extra comms arm; I trimmed off an Infiltrator backpack antenna for the needle.

I’ve also shied away from fielding my Death Company lads because of their mechanics: They’re not as good without a Chaplain, but they have jump packs and my Chaplain, Arrius, does not. So it’s time to paint a jump-chap, and hey I have this resin guy just hanging around…

Hello, resin, my old “friend”

Chaplain with jump pack color guide

Same base as my other Blood Angels, of course, and as always these recipes are based on the GW studio recipes with some tweaks. Nothing is drybrushed unless noted.

  • Armor: Abaddon Black > Eshin Grey > Dawnstone
  • Metal: Leadbelcher > Nuln Oil all-over wash> Stormhost Silver
  • Armor gaskets and helmet tubing: Mechanicus Standard Grey > Nuln Oil all-over wash > Dawnstone
  • Gold: Retributor Armour > Reikland Fleshshade all-over wash > Auric Armour Gold > Liberator Gold
  • Skull mask: Celestra Grey > Drakenhof Nightshade all-over wash > Ulthuan Grey > White Scar
  • Eyes: Moot Green > Agrax Earthshade pin wash > Moot Green
  • Purity seal wax: Screamer Pink > Carroburg Crimson all-over wash > Pink Horror > Emperor’s Children
  • Parchment: Rakarth Flesh > Agrax Earthshade all-over wash > Pallid Wych Flesh > White Scar
    • Then scribble on it freehand in very fine Abaddon Black
  • Crozius handle: Khorne Red > Agrax Earthshade all-over wash > Wazdakka Red > 50/50 blend of Wazdakka Red/Kislev Flesh
  • Knee pad, shoulder pad, bolt pistol housing: Mephiston Red > Agrax Earthshade pin wash > Evil Sunz Scarlet > Fire Dragon Bright
  • Jump pack jets: Caledor Sky > Drakenhof Nightshade all-over wash > Temple Guard Blue > Baharroth Blue

It’s been ages since I painted a purity seal, and I’ve forgotten what color I used to scribble the freehand “writing” on the parchments. This time I wrote it down!

Digging Yore? Check out my book!

The Unlucky Isles [affiliate link], the first system-neutral guidebook for my Godsbarrow fantasy campaign setting, is available in print and PDF.
Categories
Blood Angels Space Marines Kill Team Miniatures Warhammer 40k

Kill Team game four: Blood Angels vs. Veteran Guardsmen

Most of my wargaming has been done with folks I already knew, or if it was with folks I didn’t know it was in the context of a convention (where that’s kind of the norm). Until today, I’d somehow never actually met up to play a game with a stranger before.

My local shop, Mox Boarding House, has a Discord server where folks arrange games. Jason and I set up a match online and met up to play on July 9th. I suggested the Seize Ground because it’s a straightforward classic (and my go-to for introducing folks to the game).

I brought the same team I’d played two days before, my Blood Angels Tactical Marines: leader with a bolter, 3 grunts with bolters, 1 heavy bolter guy, and Mr. Plasma. Jason brought 10 Veteran Guardsmen, which is too many for me to remember all their special roles — but they were all painted like Catachan/Vietnam War/Predator dudes, and modeled after ’80s action icons. Awesome!

(I confirmed beforehand that it was cool to take and share these pics.)

I like deploying in three two-man teams. It’s served me pretty well every time.
The rad ’80s action warriors deployed.
Our board layout using the shop’s terrain library (which is pretty danged nice).
First blood (ahem). This Guardsman got his ass shot off…within range of the medic. The variety of the Guard roles is really nifty.

Through clever deployment and play, Jason kept every Guardsman but that one completely out of harm’s way in turn one. Lots of conceal orders in cover meant zero uses of Bolter Discipline and zero overwatch shots for me.

A steady advance, claiming objectives.

Jason’s sniper ascended to a vantage point in turn one, advanced to a firing position in turn two, and was a menace. He could fire with a conceal order, and short of me abandoning my approach (all Bolter Discipline, a steady advance to his side of the battlefield) and scrambling up there there wasn’t a damn thing I could do about it.

Next to him, also perfectly concealed and still 100% active? The spotter, who called in a guided missile strike in turn two and an airstrike in turn three.

The source of about a third of my problems.

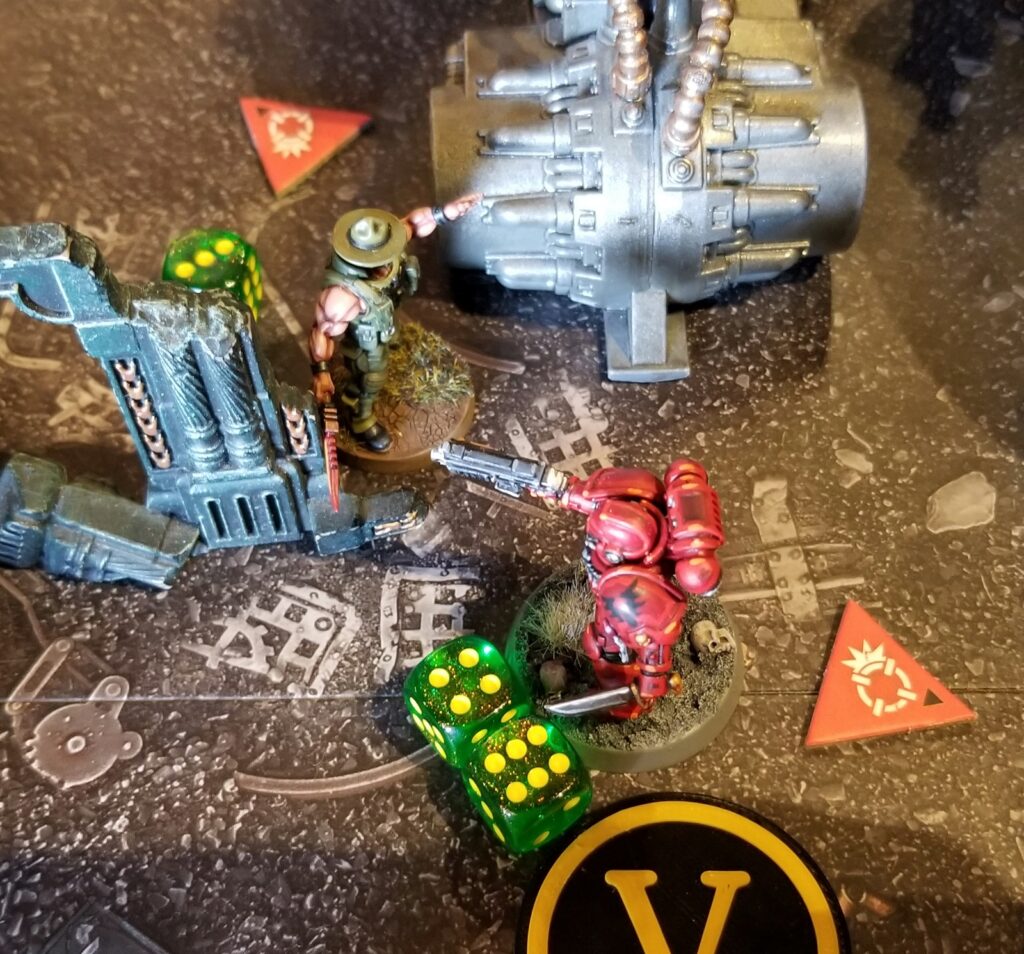
This was my first encounter with a melta gun — ever! — and now I want one in every squad. Jason used the Confidant Guardsman to pair up Rambo (on the right) with the melta dude, and that melta straight-up deleted my leader.

The Guardsmen are individually fragile, but they have a ton of neat tools in their bag of tricks.

My leader moments before he got microwaved.
Towards the end of turn two.
Lesson learned: Do not, under any circumstances, engage Sgt. Slaughter and his chainsword in melee combat.
Near the end of the game.

I haven’t had a dud game of Kill Team yet, and this one was no exception. Jason is a super nice dude and a cagey opponent, and this match was a blast.

Tactical Marines are straightforward in ways I can wrap my head around, and their relentless consistency allows them to apply a lot of pressure. I’m learning that an apparently slow first turn, which has been a feature of both of my last two games with this team, isn’t necessarily an ill omen.

As long as I’m taking good firing positions and controlling objectives while moving up, I can maintain that pressure — and the opportunities for most of the squad to double-shoot all at once will come.

Although looking at the other Space Marine fire team options, the way I play these guys I should really paint up a team of Intercessors — who can only take various bolters, punch better in melee, and have more wounds — and run them as an all-Bolter Discipline force.

Digging Yore? Check out my book!

The Unlucky Isles [affiliate link], the first system-neutral guidebook for my Godsbarrow fantasy campaign setting, is available in print and PDF.
Categories
Blood Angels Space Marines Kill Team Miniatures Tyranids Warhammer 40k

Kill Team battle report: Blood Angels vs. Tyranids

Reagan and I got together on July 7th for our second match, Tyranids (him) vs. Blood Angels (me) playing the Secure Archaeotech mission.

I’m not sure I have the stamina to post a battle report for every game I play, but as long as I do and it’s fun I’m going to keep doing it. It’s just so damned exciting actually seeing my little war mans running around and getting played with!

The ‘nids are the first team I’ve painted up explicitly for Kill Team, so for now they only come in one version: 3 Tyranid Warriors (venom cannon plus melee, weaponbeast, and deathspitter/melee) and 4 Genestealers (2 scything/rending, 3 double rending).

This was my second outing with my Blood Angels, and I’d fought against them once, so I knew what I wanted: Bolter Discipline. My plan was to buy that ploy every single turn, so I had my leader with a bolter, 1 heavy bolter guy, 3 grunts with bolters, and 1 plasma gunner. (In hindsight, against a team where 5/8 have an invulnerable save, I should just have foregone plasma for a sixth bolter.)

Board layout is definitely more art than science, but take three — with input from both of us — was the most fun setup yet.

I put something like 25-30 hours into reworking my Genestealers and painting up the Warriors so they’d be ready for today. Having an upcoming match on the calendar is a great painting motivator!

This meeting of G.R.O.S.S. (Get Rid Of Slimy Space marines, shout out to my fellow Calvin and Hobbes fans) is now called to order.
My squad during deployment.
Reagan’s tendril of Hive Fleet Balaur deploys in conga line formation.
Marines move up.
Angry space bugs approach, ominously
Stepping out for the first shot of the game. I need to name this guy at some point.

For the entire first Turning Point, I felt like I was living Aliens. I’d built the Tyranid team, so I had a good idea how fearsome they were. Six dudes against eight of these multi-limbed monstrosities felt like it could only go one way (badly for the six dudes).

Reagan held me, if memory serves, one dead Genestealer and nearly zero shots on his entire team, and I don’t think I got a single overwatch shot. This felt like a perfect first turn for the bugs, and it was super frustrating to play against (in a fun way!).

A Tyranid Warrior advances.

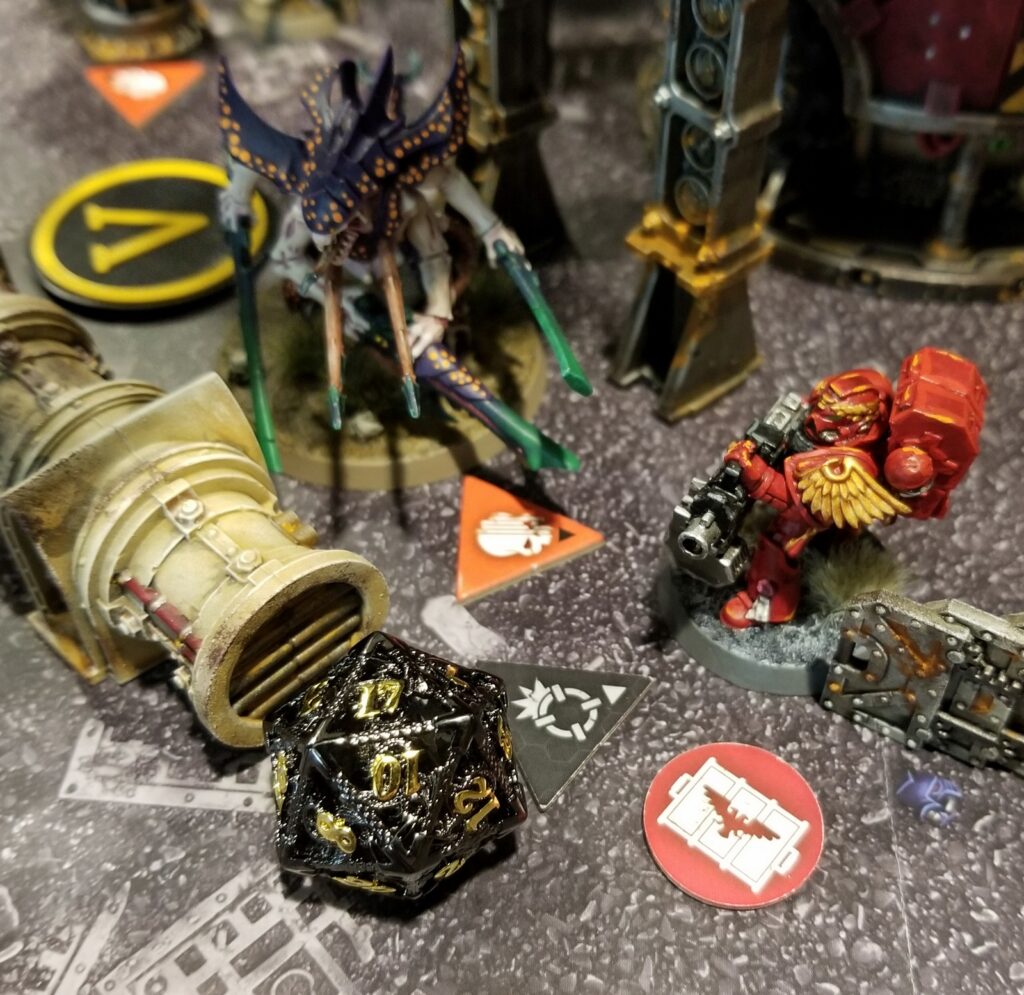
I adore the way base size matters in Kill Team. I figured the Tyranids — on 50 mm bases — would be easy to shoot, but maybe also have good lines of sight for shooting because their heads were so high.

What hadn’t considered, and what Reagan immediately figured out, was that it’s really easy to keep a model on a 50 mm base with a conceal order in cover, denying the shooty red lads all their shooty.

The conga line breaks up.
A Marine is about to have a bad day.
Bolter Discipline, step up to ensure zero cover, dakka dakka dakka.
One heavy bolter, 17/18 wounds on the Warrior!
This felt very tactical, very Space Marine-y: spread out but with good reason, taking cover and vantage points, advancing with purpose.
Venom cannon vs. plasma. At scale, that cannon is like 12 feet long!
The venom cannon continues to put in the work.
One of our final confrontations, Reagan’s leader vs. a Marine who was carrying one objective and hovering around another.

My die rolls were consistently good, while a surprising number of Reagan’s rolls really stank. If he hadn’t been rolling cold, this could easily have turned into a win for the bugs.

Pretty much every time a bug got into melee, a Marine got deleted. I stood off as best I could, and in hindsight (as in I’m realizing it right now, as I write this post!) those early activations when I couldn’t shoot much weren’t such a bad thing. They set me up for a pivotal turn two, when advancing on my dudes meant getting shot a whole bunch.

Kill Team is really hitting every mark for me, and it’s a 9/10 game well on its way to being a 10/10.

Digging Yore? Check out my book!

The Unlucky Isles [affiliate link], the first system-neutral guidebook for my Godsbarrow fantasy campaign setting, is available in print and PDF.
Categories
Blood Angels Space Marines Miniatures Warhammer 40k

Mini 40k battle report: first game of 10th Edition

I’ve gone from painting and not playing to, at least for now, doing a fun amount of both. It’s great!

On July 2nd, Shay and I kicked the tires on 10th Edition with an old-school combat patrol game: half-size map, 500 points a side (rather than the new bespoke Combat Patrol mode in 10th).

Here’s how this one went:

Blood Angels return to their waiting voidship, ready to be anointed with sacred oils.

Battle-brother: Brother Dolos, you’ve returned victorious! How went the battle against the foul xenos?

Brother Dolos: Actually, they were Dark Angels.

Battle-brother: You do know we’re on the same side, right?

Brother Dolos: […]

Battle-brother: No doubt they had fallen to chaos. Such a tragedy! And where is our beloved chapter master, Commander Dante?

Brother Dolos: Feigns shock. You mean he’s not here? He was right behind me a moment ago, that’s so weird.

Our board setup. Shay taught me about ensuring gaps wide enough for the largest models, in this case my Rhino.

Shay fielded a squad of Deathwing Terminators led by a Captain in Terminator Armour, and two squads of bikers.

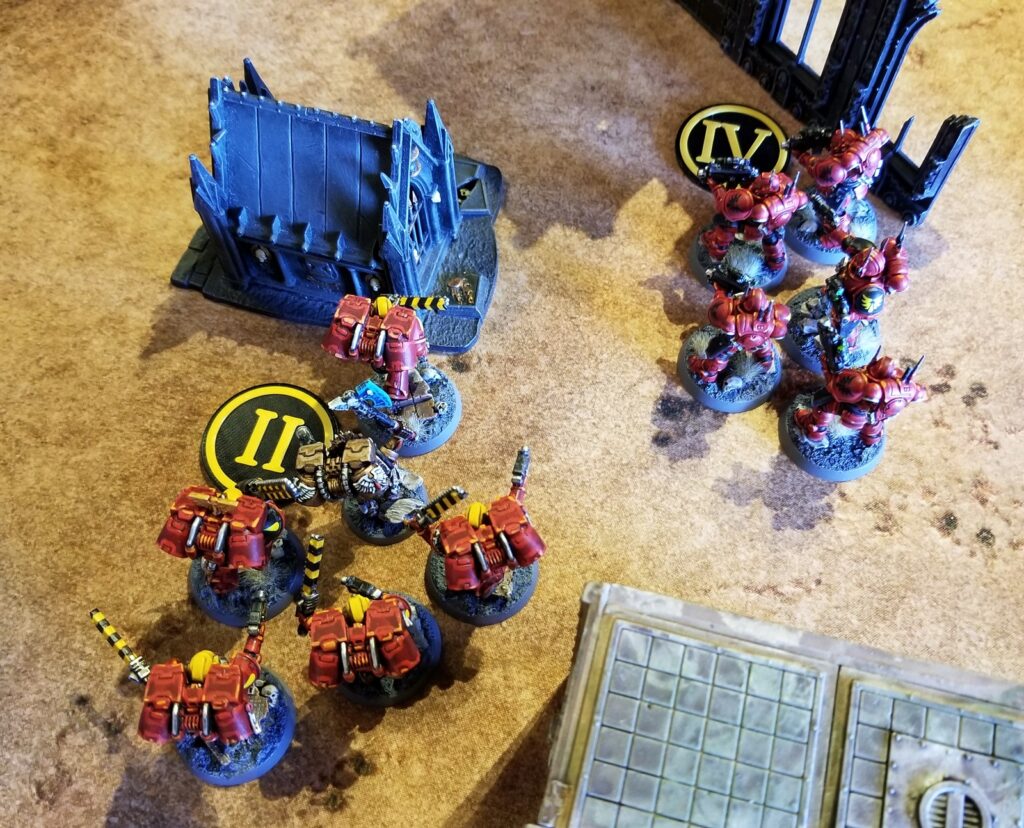
My goal was to field as many units I hadn’t tried yet as possible, so I rolled out with Commander Dante leading Squad Adamo, Assault Marines with Jump Packs; Squad Cain, Scout Snipers; Squad Dolos, Infiltrators; and the Rhino Relentless.

Deployment, with Dante and his Assault Marines in reserve.

We got a few things wrong, notably placing two pairs of objectives that were too close together.

Squad Dolos deployed next to an objective, which was pretty much my whole strategy: Everything I fielded except the Rhino could deploy on an objective rather than in my deployment zone.
Shay’s rad bikers.
I knew from our first match how brutal these Deathwing Terminators were going to be in battle.
This is just as intimidating in person.
Dante and his squad take the field. Poor placement on my part allowed them to be shot at immediately, a portent of things to come.
Squad Cain mostly camped this objective, but they got a few long-range shots in.
The board towards the end of the game, with Dante and his squad making an ill-advised advance.
In one round, Shay’s Terminators annihilated Commander Dante and what was left of his squad. Like I said: brutal!

Despite him dying in what was essentially a skirmish of no strategic import, I was thoroughly impressed by Commander Dante. He’s more expensive than some entire squads, but his pistol, Perdition, and the Axe Mortalis both put in some serious work.

We called this game for time. It was a ton of fun, just like our previous match.

40k app thoughts

I tried using just the app for this game — no hard copy reference material at all. While it was great for building my list, it’s pretty bad for referencing most units during play since it doesn’t truncate their options down to the actual wargear you selected. Every weapon profile appears on the unit, and that can lead to a lot of scrolling back and forth.

The rules reference is pretty solid, although finding one specific thing can be a challenge. About half the time I looked something up, it would have been much faster to be flipping through a book.

Since BattleScribe looks like it’s never going to update to 10th Edition, I need to find a way to solve these two issues for my next 40k game. I might print out and coil-bind the free core rules, print this awesome quick reference from Reddit, and then print out my datasheets and annotate them with my wargear choices.

Given the current state of the 40k app, the availability of free datasheets and points, and the simplicity of list building now that unit sizes are fixed and wargear options are simplified, I wouldn’t pay a subscription fee for the app as it stands now. If they address how army lists work as a play reference, I’d consider it depending on the pricing.

Digging Yore? Check out my book!

The Unlucky Isles [affiliate link], the first system-neutral guidebook for my Godsbarrow fantasy campaign setting, is available in print and PDF.
Categories
BattleTech Kill Team Miniature painting Miniatures Warhammer 40k

Miniature painting maxims that have helped me for the past three years

I like maxims and I like self-reflection. This post combines the two: a little look at some of the maxims that have served me well over the past three years of painting, and some reflection on them — especially in light of actually getting to play.

Any progress is progress

Since I got properly into miniature painting in 2020, I’ve done something to make forward progress on miniatures every single day. Sometimes I’ll go months where I’m literally scraping one tiny piece of mold line just to check that box, but those periods are banking the fire so that it doesn’t go out entirely. This isn’t my only hobby, and when something else is bringing me more joy I do that instead.

But it all adds up. Never stopping means always moving forward, sometimes in tiny increments and sometimes in fevered painting frenzies, and eventually painted forces and terrain start to emerge and multiply.

John C. Maxwell had it 100% right: “Little progress is better than no progress at all.”

I need the prospect of play for motivation

My motivation to paint isn’t solely dependent on playing — I painted for three years before playing my first game with models I’d painted — but it’s a huge factor. I enjoy painting for its own sake; the act itself is fun. But knowing that I’ll be able to play a game with all the stuff I’m painting is the X factor that keeps me coming back to the painting table.

Every time I’ve had a game on my calendar, I’ve kicked into painting overdrive. I spent hours before my first Kill Team game wrapping up the combat gauges and barriers, and then did the same thing again before my second game — a 6.5-hour push to finish a piece of terrain.

It’s almost comical how much “I get to use this stuff!” motivates me.

Paint for arm’s length

I’ve always said that I paint my minis for viewing at arm’s length. That doesn’t mean I phone it in: It takes me five hours to take the average model from sprue to varnished and ready to play. That number likely sounds appallingly low to some painters and appallingly high to others, but it’s the right number for me.

I do get closer than arm’s length to all my minis during play, of course. There’s real joy in getting an eyeball right up behind a tiny head to see what’s in the unit’s line of sight! But much of the game is played at arm’s length.

I also use a magnifier when I paint — though as infrequently as possible. Under good magnification, every miniature I paint needs hours more work than I can give it if I ever want to finish. But if I don’t magnify, I can better balance doing my best and actually finishing stuff.

Write everything down

I’ve been writing painting notes and color guides since 2020, and it’s paid off so many times. Just this past week I finished a terrain piece I’d started in, like, 2021. I could tell where I’d left off and knew how to finish it in a way that was consistent with my existing pieces because I’d written it all down.

I get a lot of mileage out of color guides other folks share, so I also like sharing mine in a format that I hope is easy to follow.

It has to get to the table

So many of my creative endeavors owe a debt to Voltaire: “Perfect is the enemy of good.”

I try to do my best work on every model, but also balance that with eventually finishing the fucking thing. I paint partly to paint and partly to play, so I want my stuff to get to the table…which it can’t if I take a million hours on every model and lose all my motivation to keep going.

Spray terrain, but not figures

I’ve been burned by spray varnish a few times over the years, so when I started painting in 2020 I committed myself to avoiding rattle cans. I brush on my primer (Vallejo matte white) and sealant (Vallejo matte), even though it takes longer, because I have complete control, zero dependence on the weather outside, and a 0% chance of having the temperature or humidity ruin a model.

The exception is terrain, which I spray with Citadel’s primer/base coat rattle cans. Here in Seattle the weather’s only good for spraying minis about 1/3 of the year, so I tend to spray a raft of terrain in the summer and then stash it for future use.

I also made an exception for an army which it seemed silly not to spray: Custodes, which I base-coated gold in one 2,000-point batch. Which leads me to…

Don’t paint in large batches

I told myself not to do this early on, and I’ve only broken this rule once — to my detriment. I have a 2,000-point Custodes army which is 100% based in gold, and has its gold shaded, with a handful of figures further along than that…and it’s largely sat just like that for more than 18 months. Every time I get them out, I feel exhausted at the prospect of working on them.

My usual process is to base coat the whole model, which narrows down from “paint it all” to “paint what’s still white” as I progress, and then to touch up the base coat before shading. Having batch-painted my Custodes torpedoed both of those stages: I hate looking at a solid gold model and hunting for the stuff to paint over, and I hate painting base coats next to shaded work.

Five models is a good number for me to be working on simultaneously at any given stage of the process, or ten at the most. Like right now on my painting mat I’ve got three Tyranid Warriors at the wash stage, five Grey Knights that need priming, and four crates I just varnished. When I want to work on minis, I have three manageable batches from which to choose.

Try not to be hard on myself

I’m notoriously hard on myself about my paint jobs. I have to make a conscious effort not to be, especially as I gain experience and my detail work improves.

But actually playing with my painted minis has made it significantly easier not to sweat it. During the four games I’ve played with my models to date (BattleTech, 40k, Kill Team x2), not once have I been disappointed with my work or thought, “Man, I wish I’d painted that better.”

I’m not thinking about the imperfections, I’m just having a blast playing a game with my opponent and enjoying a table full of painted stuff.

The Rule of Cool still rules

When I assemble a mini, the Rule of Cool prevails — from wargear choices to pose, I do whatever I think is cool. I do look at the rules and let them inform some of my choices, and I’ve noticed an uptick in that after actually playing (which makes sense), but Rule of Cool usually trumps optimal loadouts.

Similarly, I often like big, sprawling, dramatic poses…which are a real detriment in Kill Team, for example, because they make the model easier to see from more angles. But in play? I’ve never once thought, “I wish I’d made that dude more boring so he’d be harder to shoot.”

The same goes for wargear choices. For example: Both of my Tactical Marine fire team leader choices for Kill Team have a pistol and a melee weapon, and after two games I kind of wish at least one of them had a Bolter instead. But I’d rather just paint up a third leader than fret about my Rule of Cool-driven choices.

Painted models are worth the effort

This is Miniature Painting 101, but it wasn’t obvious to me until I actually played. Almost all of my wargaming until this year has been played with unpainted minis or cardboard tokens/models, plus the occasional game with factory prepainted models.

When everything on the table is painted, my mind is there. I immerse myself and try to live the battle no mater whether stuff is painted or not, but it’s much easier, and unlocks a higher level of immersion, when everything is painted. And I’d take any player’s best efforts over any factory prepaint; the personal investment also makes a difference.

That investment is key for me, too. I feel invested in my army — the one I sweated over for an average of five hours per model, trying to push my skills and stay motivated — in a way that’s unlike my investment in any other style of game.

That’s all I can think of for now. Happy painting!

July 14, 2023 update: I forgot one, naturally — and it’s a biggie. I gave it its own post, but TL;DR it boils down to your old and new paint jobs not matching up being a good thing.

Digging Yore? Check out my book!

The Unlucky Isles [affiliate link], the first system-neutral guidebook for my Godsbarrow fantasy campaign setting, is available in print and PDF.
Categories
Blood Angels Space Marines Deathskulls Orks Kill Team Miniatures Warhammer 40k

Second Kill Team match: Seize Ground, Orks vs. Marines

Hot on the heels of my first match — the first-ever Kill Team game for Lark and me — on June 23rd my friend Reagan came over for a game.

He didn’t have a strong preference for a team, so suggested he play the Marines. We built our teams from my available options, and I set the board up for the Seize Ground mission. This layout used everything I learned from my first board, plus an additional piece of terrain.

We skipped equipment (learning game!), but did use secondary objectives.

The board after initial deployment, Skrudd’s Krumpas on the left and Squad Karios on the right
Deployment from my side
Reagan’s initial deployment

This game was when I started seeing Kill Team as a series of decisive moments. Sometimes you know it’s decisive and plan around it, and other times it’s not revealed to have been decisive until the match has ended. This one one of those moments: Reagan parking his Missile Launcher Marine behind cover with a clear lane of fire caused my problems for the entire game!

So many booms

The pressure from Reagan’s Marines was relentless. I don’t think I landed a single shot on them in the first TP, and I didn’t land many in the second. His positioning walled me off from his half of the board.

Mr. Pink Hair survived more rockets than I expected (my picture stinks, but I wanted to commemorate the moment)
Pretty sure this is during the second Turning Point

Playing as the Orks, it was hard to poke my head out because every time I did a Marine shot that Ork’s ass off. Lark had the same experience. I resolved to push through that as best I could so my guys could get properly stuck in. TP one was figuring out potshots were going to lose me the game, TP two was getting into position for charges.

Advancing on the Missile Launcher Marine’s position was one of my most decisive plays
Plasma + vantage point: just as brutal for my Orks as it was for Lark’s Orks in my previous game

The board was much more cluttered and engaging this time around. We agreed it might even be too cluttered in places, especially where the gaps were too narrow for bases. It’s hard to think about every angle when setting up the table (art, not science). I learned some good stuff to take into my next setup.

Getting stuck in

I can’t remember the VP tally at the end of the first Turning Point, but it was either tied or Reagan had a slight lead. In the second, I held him to a 0-0 tie for that round’s scoring. I lost Orks in both rounds.

Turning Point three was where I clinched the game, taking out 5/6 of his Marines while I still had enough bodies scattered about to claim objectives — the fruits of my careful second turn getting into position. Orks in close combat are pretty fearsome.

The death toll partway through the third Turning Point
Board state in Turning Point three, with the Plasma Marine on the board’s central vantage point — a devastating position, but also very exposed
My best roll of the game, a shot with my Rokkit Launcha
My MVPs, although they spent the early game mostly hiding; in Turning Point three, they put in the work
Skrudd and a Boy claiming two objectives; if Skrudd had died, this battle would have gone differently (and he got close!)
The final showdown between Sergeant Karios and an Ork Boy on the brink of death)
Board state at the end of the final Turning Point (three)

This game was a delight! Reagan and I have been friends for years, but I don’t think we’ve played a wargame together before. He’s a great opponent.

A second game really opened up some of the strategic and tactical depth Kill Team offers. I’m not even engaging the layer of “this team vs. that team means X,” or optimal play of my team, or the wider meta. But even just at my newb level, there’s a lot to chew on here.

Using secondary objectives was a lot of fun. Reagan almost scored one of his, but the turning tide of kill counts axed it. Out of our other five cards, we scored zero of them — but agreed they’d been fun to consider (and mess up) during play.

We got a few things wrong, but also tackled some corner cases and learned a lot during our game. I’m holding more Kill Team in my head now, which I like.

Another match is already on the calendar, and I’m furiously painting Tyranids and Grey Knights so our team options can go up from two to four.

Digging Yore? Check out my book!

The Unlucky Isles [affiliate link], the first system-neutral guidebook for my Godsbarrow fantasy campaign setting, is available in print and PDF.
Categories
Blood Angels Space Marines Deathskulls Orks Kill Team Miniatures Warhammer 40k

Our first Kill Team game: Deathskulls Orks vs. Blood Angels

One June 21st, Lark and I played our first game of Kill Team, and it was a blast. This was also the first time I’ve ever played a minis game where I’d painted everything on the table.

Skrudd’s Krumpas on the left, Squad Karios on the right

I got out all the valid options I had for two teams, Greenskins (two Boyz fire teams) and Astartes (one Tactical Marine fire team), Lark picked the Orks, and then we each knocked together a team in BattleScribe based mainly on which minis looked the coolest.

All of my model options for these two teams

Like playing BattleTech with my kiddo for the first time, this whole experience was an absolute joy. It would have been a joy even with Lego people and cereal boxes, but having everything painted was the cherry on top. We both found it immersive to play with painted minis — honestly, I’m still shocked how much of a difference it makes.

The final teams, Skrudd’s Krumpas vs. Squad Karios

A light battle report

We played a learning game, leaving out equipment and secondary objectives; I figured we had enough rules to think about for a first game without those. I set up the board based on feedback from r/KillTeam about my test layout, making sure both teams could deploy in cover, no single vantage point could dominate the board, and both halves were similar.

I picked Loot and Salvage for the mission, since it seemed straightforward: long-edge deployment, simple objectives.

The board setup

Lark took some of these photos, but we were just passing my phone back and forth so I’m not sure which ones. If it’s a good photo…it’s probably one of Lark’s!

Half of Srkudd’s Krumpas at deployment
The other half
Most of Squad Karios at deployment
My other two Marines
Plasma + vantage point seemed like a good idea
We tussled over this objective for about half the game

In this mission, you score 1 VP every time you loot an objective. Lark was really good at trading Gretchin for 1 VP (a good trade!). My Marine’s toughness kept all of them alive for the first Turning Point.

All tied up at the end of the first Turning Point, but no Marine casualties yet
Second Turning Point, Ork view
Second Turning Point, Marine view
Orks moving in
Ork Boyz with ‘eavy weapons

I had to pick Sergeant Karios as my leader — he was the first Blood Angel I finished back in 2020. I forgot he was in my case for my first 40k game, so this Kill Team match was the sarge’s first deployment.

One of the key fights in the second Turning Point
Squad Karios hogging objectives
This guy survived a lot of fire
This Boy and his Big Shoota put in the work
As did this Marine and his Heavy Bolter
Mr. Pink Hair cleaning out objective 5
Mr. Pink Hair (we both really liked this guy, and he was fun to paint)
I can’t remember who had a very bad day here, but based on the number of dice the shot had to be from Lark’s Big Shoota or my Heavy Bolter
Skrudd, near death but tough as nails

We called the game partway into the third Turning Point. We cleared every objective, but I cleared more in the second Turning Point.

End of the second Turning Point, during which Lark wiped out my Plasma guy

Lark and I both had a great time with this match, and we’re already looking forward to our next one. Lark’s a sharp kid with a real wargaming spirit, and an excellent opponent.

It’s been three months since we first planned to play, partly because I’m a pretty slow painter. Deciding not to wait until the teams we originally picked — Novitiates and Corsairs — were done, and instead to play with forces I already had on hand, was a good call. Playing trumps not playing!

Post-match thoughts

I missed some stuff in the rules, no surprise there. The biggest thing was not being able to select an action more than once during an activation — part of why we cleared all six objectives (18 loot actions) in less than three Turning Points. That’s what learning games are for, though, and after one play we both had a pretty solid grasp of the game.

With the benefit of hindsight and one play worth of experience, this match-up was a challenging one for Lark’s Greenskins. If I were to do it over with these two teams, I’d recommend that the player with less wargaming experience play the Marines: They’re good at everything, quite tough, and you don’t have a pile of models to worry about.

This board probably had too many relatively clear fire lanes (which also benefitted my Marines more often than it did Lark’s Orks), and felt like it needed one more piece of medium/large terrain. (When I set up the board for my second game, a couple days later, I worked on remedying that.) KT boards are more art than science, and I can see how every iteration will make it easier to spot the potential hang-ups in a given layout.

End-on view of our board for this game

Kill Team combines 40k and Necromunda into a tight, rich package that’s relatively easy to learn, quicker to play than 40k, and full of tactical and strategic depth.

I also dig that I’ve reached the point where I can provide all the stuff for a complete game: board, terrain, two teams, etc. I can’t do that with 40k, and won’t be able to for ages. All of that combines to make KT much easier to get to the table than 40k.

As I write this post I’ve already played a second KT game, also a blast. Kill Team is shaping up to be one of my favorite games.

Digging Yore? Check out my book!

The Unlucky Isles [affiliate link], the first system-neutral guidebook for my Godsbarrow fantasy campaign setting, is available in print and PDF.