Categories
Blood Angels Space Marines Deathskulls Orks Kill Team Miniatures Warhammer 40k

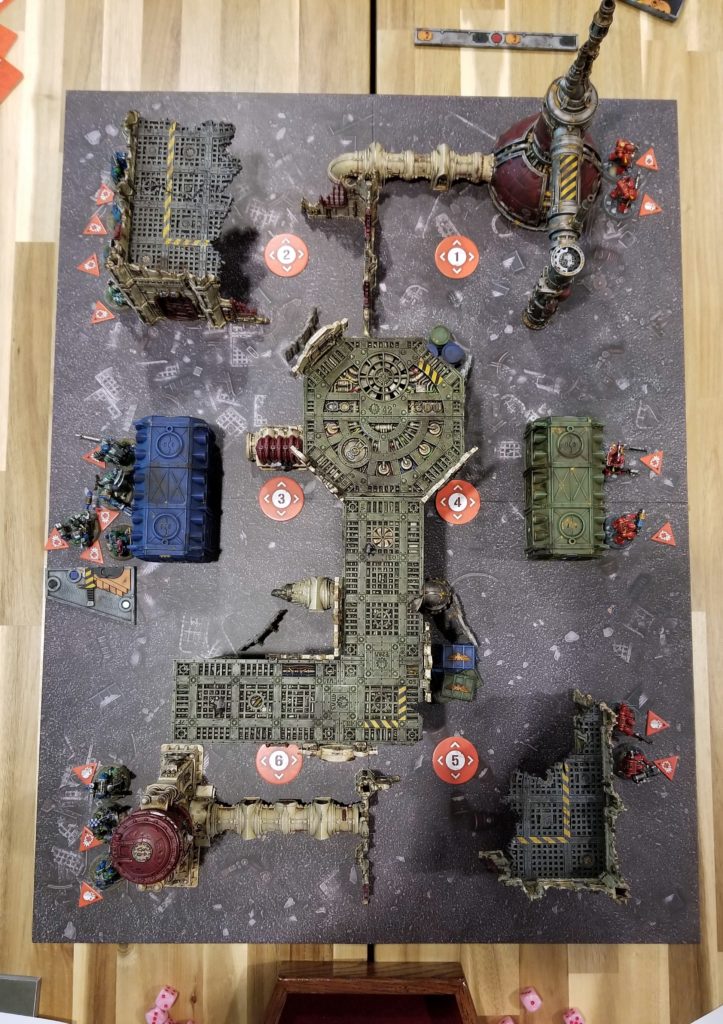
Second Kill Team match: Seize Ground, Orks vs. Marines

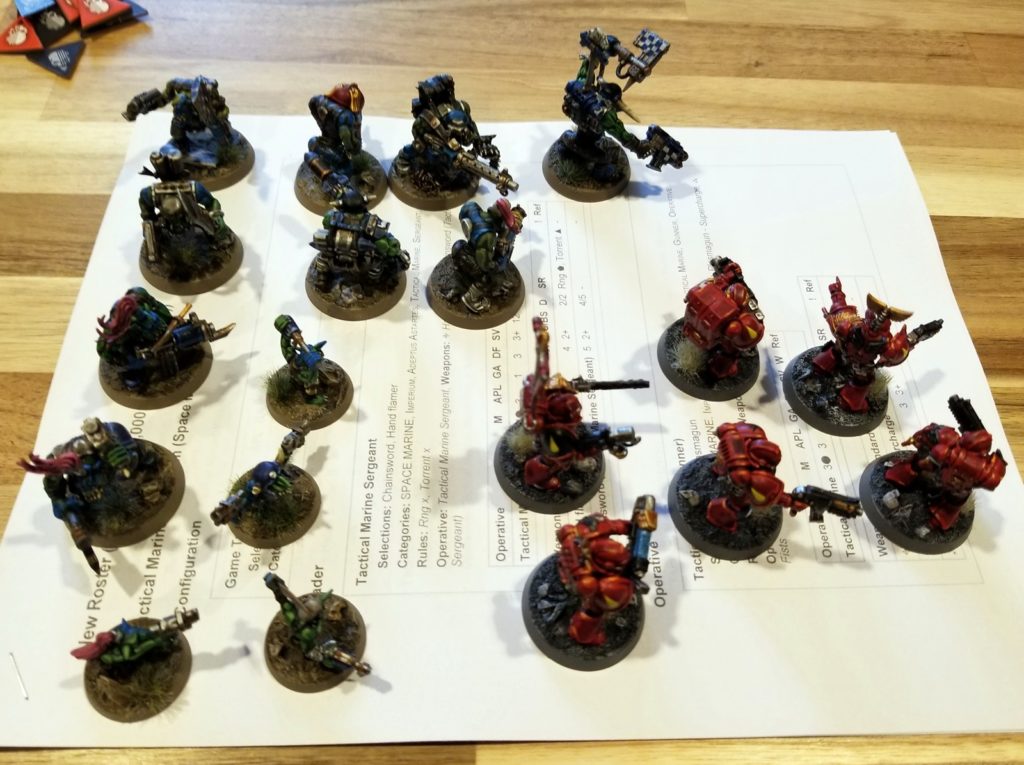
Hot on the heels of my first match — the first-ever Kill Team game for Lark and me — on June 23rd my friend Reagan came over for a game.

He didn’t have a strong preference for a team, so suggested he play the Marines. We built our teams from my available options, and I set the board up for the Seize Ground mission. This layout used everything I learned from my first board, plus an additional piece of terrain.

We skipped equipment (learning game!), but did use secondary objectives.

The board after initial deployment, Skrudd’s Krumpas on the left and Squad Karios on the right
Deployment from my side
Reagan’s initial deployment

This game was when I started seeing Kill Team as a series of decisive moments. Sometimes you know it’s decisive and plan around it, and other times it’s not revealed to have been decisive until the match has ended. This one one of those moments: Reagan parking his Missile Launcher Marine behind cover with a clear lane of fire caused my problems for the entire game!

So many booms

The pressure from Reagan’s Marines was relentless. I don’t think I landed a single shot on them in the first TP, and I didn’t land many in the second. His positioning walled me off from his half of the board.

Mr. Pink Hair survived more rockets than I expected (my picture stinks, but I wanted to commemorate the moment)
Pretty sure this is during the second Turning Point

Playing as the Orks, it was hard to poke my head out because every time I did a Marine shot that Ork’s ass off. Lark had the same experience. I resolved to push through that as best I could so my guys could get properly stuck in. TP one was figuring out potshots were going to lose me the game, TP two was getting into position for charges.

Advancing on the Missile Launcher Marine’s position was one of my most decisive plays
Plasma + vantage point: just as brutal for my Orks as it was for Lark’s Orks in my previous game

The board was much more cluttered and engaging this time around. We agreed it might even be too cluttered in places, especially where the gaps were too narrow for bases. It’s hard to think about every angle when setting up the table (art, not science). I learned some good stuff to take into my next setup.

Getting stuck in

I can’t remember the VP tally at the end of the first Turning Point, but it was either tied or Reagan had a slight lead. In the second, I held him to a 0-0 tie for that round’s scoring. I lost Orks in both rounds.

Turning Point three was where I clinched the game, taking out 5/6 of his Marines while I still had enough bodies scattered about to claim objectives — the fruits of my careful second turn getting into position. Orks in close combat are pretty fearsome.

The death toll partway through the third Turning Point
Board state in Turning Point three, with the Plasma Marine on the board’s central vantage point — a devastating position, but also very exposed
My best roll of the game, a shot with my Rokkit Launcha
My MVPs, although they spent the early game mostly hiding; in Turning Point three, they put in the work
Skrudd and a Boy claiming two objectives; if Skrudd had died, this battle would have gone differently (and he got close!)
The final showdown between Sergeant Karios and an Ork Boy on the brink of death)
Board state at the end of the final Turning Point (three)

This game was a delight! Reagan and I have been friends for years, but I don’t think we’ve played a wargame together before. He’s a great opponent.

A second game really opened up some of the strategic and tactical depth Kill Team offers. I’m not even engaging the layer of “this team vs. that team means X,” or optimal play of my team, or the wider meta. But even just at my newb level, there’s a lot to chew on here.

Using secondary objectives was a lot of fun. Reagan almost scored one of his, but the turning tide of kill counts axed it. Out of our other five cards, we scored zero of them — but agreed they’d been fun to consider (and mess up) during play.

We got a few things wrong, but also tackled some corner cases and learned a lot during our game. I’m holding more Kill Team in my head now, which I like.

Another match is already on the calendar, and I’m furiously painting Tyranids and Grey Knights so our team options can go up from two to four.

Out now: The Unlucky Isles

The Unlucky Isles [affiliate link], the first system-neutral guidebook for my Godsbarrow fantasy campaign setting, is now on DriveThruRPG.
Categories
Blood Angels Space Marines Deathskulls Orks Kill Team Miniatures Warhammer 40k

Our first Kill Team game: Deathskulls Orks vs. Blood Angels

One June 21st, Lark and I played our first game of Kill Team, and it was a blast. This was also the first time I’ve ever played a minis game where I’d painted everything on the table.

Skrudd’s Krumpas on the left, Squad Karios on the right

I got out all the valid options I had for two teams, Greenskins (two Boyz fire teams) and Astartes (one Tactical Marine fire team), Lark picked the Orks, and then we each knocked together a team in BattleScribe based mainly on which minis looked the coolest.

All of my model options for these two teams

Like playing BattleTech with my kiddo for the first time, this whole experience was an absolute joy. It would have been a joy even with Lego people and cereal boxes, but having everything painted was the cherry on top. We both found it immersive to play with painted minis — honestly, I’m still shocked how much of a difference it makes.

The final teams, Skrudd’s Krumpas vs. Squad Karios

A light battle report

We played a learning game, leaving out equipment and secondary objectives; I figured we had enough rules to think about for a first game without those. I set up the board based on feedback from r/KillTeam about my test layout, making sure both teams could deploy in cover, no single vantage point could dominate the board, and both halves were similar.

I picked Loot and Salvage for the mission, since it seemed straightforward: long-edge deployment, simple objectives.

The board setup

Lark took some of these photos, but we were just passing my phone back and forth so I’m not sure which ones. If it’s a good photo…it’s probably one of Lark’s!

Half of Srkudd’s Krumpas at deployment
The other half
Most of Squad Karios at deployment
My other two Marines
Plasma + vantage point seemed like a good idea
We tussled over this objective for about half the game

In this mission, you score 1 VP every time you loot an objective. Lark was really good at trading Gretchin for 1 VP (a good trade!). My Marine’s toughness kept all of them alive for the first Turning Point.

All tied up at the end of the first Turning Point, but no Marine casualties yet
Second Turning Point, Ork view
Second Turning Point, Marine view
Orks moving in
Ork Boyz with ‘eavy weapons

I had to pick Sergeant Karios as my leader — he was the first Blood Angel I finished back in 2020. I forgot he was in my case for my first 40k game, so this Kill Team match was the sarge’s first deployment.

One of the key fights in the second Turning Point
Squad Karios hogging objectives
This guy survived a lot of fire
This Boy and his Big Shoota put in the work
As did this Marine and his Heavy Bolter
Mr. Pink Hair cleaning out objective 5
Mr. Pink Hair (we both really liked this guy, and he was fun to paint)
I can’t remember who had a very bad day here, but based on the number of dice the shot had to be from Lark’s Big Shoota or my Heavy Bolter
Skrudd, near death but tough as nails

We called the game partway into the third Turning Point. We cleared every objective, but I cleared more in the second Turning Point.

End of the second Turning Point, during which Lark wiped out my Plasma guy

Lark and I both had a great time with this match, and we’re already looking forward to our next one. Lark’s a sharp kid with a real wargaming spirit, and an excellent opponent.

It’s been three months since we first planned to play, partly because I’m a pretty slow painter. Deciding not to wait until the teams we originally picked — Novitiates and Corsairs — were done, and instead to play with forces I already had on hand, was a good call. Playing trumps not playing!

Post-match thoughts

I missed some stuff in the rules, no surprise there. The biggest thing was not being able to select an action more than once during an activation — part of why we cleared all six objectives (18 loot actions) in less than three Turning Points. That’s what learning games are for, though, and after one play we both had a pretty solid grasp of the game.

With the benefit of hindsight and one play worth of experience, this match-up was a challenging one for Lark’s Greenskins. If I were to do it over with these two teams, I’d recommend that the player with less wargaming experience play the Marines: They’re good at everything, quite tough, and you don’t have a pile of models to worry about.

This board probably had too many relatively clear fire lanes (which also benefitted my Marines more often than it did Lark’s Orks), and felt like it needed one more piece of medium/large terrain. (When I set up the board for my second game, a couple days later, I worked on remedying that.) KT boards are more art than science, and I can see how every iteration will make it easier to spot the potential hang-ups in a given layout.

End-on view of our board for this game

Kill Team combines 40k and Necromunda into a tight, rich package that’s relatively easy to learn, quicker to play than 40k, and full of tactical and strategic depth.

I also dig that I’ve reached the point where I can provide all the stuff for a complete game: board, terrain, two teams, etc. I can’t do that with 40k, and won’t be able to for ages. All of that combines to make KT much easier to get to the table than 40k.

As I write this post I’ve already played a second KT game, also a blast. Kill Team is shaping up to be one of my favorite games.

Out now: The Unlucky Isles

The Unlucky Isles [affiliate link], the first system-neutral guidebook for my Godsbarrow fantasy campaign setting, is now on DriveThruRPG.
Categories
Deathskulls Orks Finished miniatures Kill Team Miniature painting Miniatures Tyranids Warhammer 40k

My 2021 and 2022 in miniature painting

In early 2021, I did a year-end retrospective photo for 2020 — the year I got back into miniature painting. I painted 97 miniatures that year, and I had a blast; returning to an old hobby I’d never quite clicked with (it’s complicated) was a perfect lockdown activity.

By contrast, 2021 saw my enthusiasm flagging. I started the year strong, but finished just keeping my hobby streak alive. I didn’t do a year-end photo.

2022 was about the same as 2022. I wasn’t planning to do a photo for last year, either, for pretty much the same reason: I figured it’d be disheartening.

But in December I got back into BattleTech, and also saw how close I was to finishing some killer 40k terrain pieces, and got excited to crank some stuff out. So I finished the year stronger than expected, and that led me to get off my butt and take retrospective photos for 2021 and 2022.

Everything I painted in 2021

In 2021, I painted Deathskulls Orks for my Waaagh!, Moonkrumpa’s Megalootas

I painted 15 models in 2021: two Killa Kans, Skraggit (left) and Stikkit (right); a Deff Dread, Facepeela; my Taurox Trukk conversion, Da Fancy Wun; and a squad of Boyz, Thragg’s Deff Ladz.

2021 was my first time trying an ambitious conversion, mashing together a Taurox with an Ork Trukk; I documented the whole process in a five-post series. (Here’s part one.) 2021 also marked the first time I used green stuff as well as the first time I magnetized any models. (Facepeela’s lower arms are magnetized.)

As I got these minis off the shelf for their photo, it was like seeing old friends. I’m not an amazing painter, but every mini I finished in 2021 brought me joy — and they still do. Skraggit and Da Fancy Wun are two of my favorite models I’ve ever painted.

Everything I painted in 2022

I set out to finish a Kill Team board’s worth of terrain in 2022, and while I didn’t quite get there I came pretty close.

All of the 40k terrain I painted in 2022, plus five Genestealers and a mantis

In 2022 I painted 25 models: 18 pieces of 40k/Kill Team terrain, 6 Genestealers (for Kill Team), and a giant mantis as a Christmas gift for Lark.

Terrain feels all fast and exciting at first, with a big ol’ sprayed-on primer and base coat in one, and a big ol’ wash. And then the details start to add up, and add up, and it’s not a breezy summer morning anymore. But it’s still fun!

I enjoy painting terrain. It’s a great palate cleanser, with big brushes and bold sections and — with the vibe I’m going for — plenty of excuses to weather with gusto.

It was also fun combining two 40k terrain lines, Manufactorum and Mechanicus, into what I think is a cohesive dystopian manufacturing facility. Both incorporate tea/bone and dark red, and I’ve built all my stuff to be durable, interoperable, and still offer a decent amount of customization for layouts and variations.

Here’s a top-down shot showing one possible layout.

Most of my finished 40k terrain

All of the walls/railings on the gantries are placed so that pieces can still connect in a couple places. Ladders are placed and oriented with the same goal in mind. And all the ground-level pipe connection points are tea/bone, so (hopefully) the two terrain sets blend into one another.

I guess technically I’m combining the Munitorum line as well, but those containers, crates, and barrels are so plug-and-play it hardly counts. I do them in colors not present in the other stuff, so they’ll stand out.

I’m glad I got all this stuff out an photographed it. 2021 and 2022 combined didn’t match my output in 2020, but I painted some stuff I’m proud of — and hopefully I’ll get to use it eventually.

And I got a surprise in January: Lark expressed an interest in playing 40k and Kill Team. I’m pretty sure I can cobble together two Kill Teams or two 500-point armies, so if I finish my last few pieces of terrain — a huge gantry/tank combo, another ruined building, a sacred radiator, and some scatter terrain — the two of us could get some games in this year. That would be awesome!

Out now: The Unlucky Isles

The Unlucky Isles [affiliate link], the first system-neutral guidebook for my Godsbarrow fantasy campaign setting, is now on DriveThruRPG.
Categories
Deathskulls Orks Finished miniatures Lightbox photos Miniature painting Miniatures Warhammer 40k

Mukkit’s Murda Mob: now a full complement of 3 Killa Kans

I started Killa Kans two and three — Stikkit and Skraggit — back in April, and finished them up on Thursday night. They join Mukkit, my final mini of 2020, to form Mukkit’s Murda Mob, which bring my Deathskulls army up to 591 points.

The Killa Kans kit is incredible — just absolutely packed with modularity and personality — and I had a great time with these two (as I did with my first Kan).

Waaagh!

Since I have a better lightbox now, I figured I’d roll Mukkit in as well and have the whole gang in one photoshoot.

Here’s the whole mob, at what I hope are their golden angles:

Mukkit’s Murda mob, L to R: Stikkit, Mukkit, Skraggit

I crossed my fingers when I painted each Kan a different shade of blue, but now that they’re all in one place I like that effect. In combination with my other units, it looks suitably hodgepodge for Orks.

And here’s each Kan individually:

Mukkit
Skraggit
Stikkit

…And then shots of the whole mob from all four sides.

Head-on
Left side
Rear view
Right side

The space-snail Skraggit is about to stomp on is from an Age of Sigmar kit, the Squig Herd. Wanting to use him prompted me to pose Skraggit mid-stomp, creating Skraggit as a character at the same time. Here’s his close-up:

Squeesh

I made a little slimy trail for him by forming a shallow trough in the texture paint, applying extra Agrax Earthshade to that area, and then skipping it when I drybrushed the rest of the base. It shows up best from above:

Slimy

Next up is my Oldhammer project: 10 vintage ’80s/’90s metal Boyz, include 2/3 of the Goffik Rok band, with a little light kitbashing to bring all their wargear up to a reasonable WYSIWYG standard for 9th Edition. Too rowdy to be led by a Boss Nob, they’re oldsters who don’t play by the rules — and love to play their looted ‘oomie instruments. Their draft name is Deff Metal Mayhem.

Out now: The Unlucky Isles

The Unlucky Isles [affiliate link], the first system-neutral guidebook for my Godsbarrow fantasy campaign setting, is now on DriveThruRPG.
Categories
Deathskulls Orks Finished miniatures Lightbox photos Miniature painting Miniatures Warhammer 40k

Putting my finished Taurox Trukk conversion in the new lightbox

I finished my Trukk! I built Da Fancy Wun back in February, and worked on lots of other stuff at the same time (painted 11 Boyz, built two Kans and a Dread, converted my Warboss)…but it still feels like I’ve been working on this Trukk forever. Back of the napkin, I’d say it took me somewhere between 35 and 45 hours from sprue to varnished and ready for the table.

This is the final post in a five-post series documenting this Trukk. Assembly is in part one and part two, the color guide is in part three, and a few WIP shots are in part four.

Many thanks again to Hobbyistgirl for her conversion (build process and painted Trukk), which was my inspiration to try this and my guide for large portions of the assembly process. Her Trukk is awesome!

Regular readers might notice that there’s no shot of Da Fancy Wun in casual light. That’s because I got a new lightbox (full rundown later in the post), and can now take photos good enough that they abrogate the need for a casual shot.

Da Fancy Wun, my converted Taurox Prime/Trukk, at its golden angle
Front view
Left side
Rear view
Right side
Top view

The Emperor’s eye grows larger

After a year-plus of steady painting, and some struggles with my first lightbox — notably taking photos without the lower half of each mini in shadow, and straining to squeeze full 10-model squads into it — I decided it was time to upgrade. I went from 12″x12″x12″ to 16″x16″x16″, which doesn’t sound like a big jump but is actually so large that I’m very glad it folds up nicely, and from one fixed ring of lights in the top to two repositionable light bars.

This FOSITAN lightbox (paid link) cost about $60 (three times what my smaller DUCLUS box cost), and it’s totally worth it.

Every interior surface is shiny silver, but dimpled so that it provides reflectivity without hotspots. You can shoot from the front or top, and the two light bars can clip onto the edges in either shooting configuration. Those bars also tilt, and if you want to diffuse the light when shooting from above there’s a translucent white square (with a hole in the middle) you can add between the bars and the object you’re photographing.

Unlike the DUCLUS, it doesn’t offer multiple color temperatures — but it does offer a lovely neutral white, and that was the only temperature I used on the old box anyway. The bars are dimmable and it includes several rather nice plastic backdrops; after a few test shots, I’m currently using the lowest setting and the grey backdrop.

I couldn’t resist reshooting Thragg’s Deff Lads, who I felt got especially short shrift in their lightbox session, along with a mixed-unit group.

Thragg’s Deff Ladz
Da Fancy Wun, the Deff Dread “Facepeela,” a boy from Thragg’s Deff Lads (left), a Boy from Skrudd’s Krumpas (rear), and one of Runt-eata’s Grots (right)

The only problem is that now I want to reshoot every lightbox photo I’ve taken, and that doesn’t sound like fun just now. So I probably won’t! But I’m going to enjoy better lightbox pics going forwards.

Da Fancy Wun brings me to a pretty respectable 476 points (9th Edition rules), with 35 models painted (32 infantry, 3 vehicles). Next up is probably two more Killa Kans.

Out now: The Unlucky Isles

The Unlucky Isles [affiliate link], the first system-neutral guidebook for my Godsbarrow fantasy campaign setting, is now on DriveThruRPG.
Categories
Deathskulls Orks Miniature painting Miniatures Warhammer 40k WIP it good

WIP it good: Ripfist, Skraggit, Stikkit, smoother magnetization, endlessly kitbashing Moonkrumpa

I’ve learned some lessons about drilling, magnetization, and efficient assembly over the past 14 months, and I applied all of them to “Ripfist” Gorg, my second Deff Dread for Moonkrumpa’s Megalootas.

Had I done things this way with “Facepeela,” his build would have gone much more smoothly!

Ripfist the Deff Dread and the two Killa Kans I just finished building, Stikkit (center) and Skraggit (left, about to stomp on an adorable monster snail from the AoS Squig Herd kit)

Drill bullet holes before assembly

Yeah, it works fine afterwards — but doing it first allows me to exert as much force as I like on the piece, while holding it wherever I like, without worrying about breaking an assembled miniature.

Magnetize before assembly, too

Soooo much easier this way! It involves drilling, so the above applies here as well. But working with a single loose piece also means less stuff I might accidentally glue together — and I can clean up the inside of the holes before putting the model together. My first Deff Dread, Facepeela, still has a couple shavings rattling around inside his body.

Ensure cross-compatibility

The whole point of magnetizing my two Deff Dreads (two…so far!) is to enable weapon-swapping one each model, but by matching polarities on both models I can also freely mix and match between them. While building Ripfist, I carefully checked (and re-checked, and re-re-checked, and re-re-re-checked) each magnet against Facepeela and the component of Ripfist that I was magnetizing.

I also paid attention to what went where. So Facepeela has his KMB on the right and Ripfist has his on the left. If I want one of them to have two KMBs, they’re both ready to accept that swap.

Facepeela (painted) and Ripfist’s pieces, ready to check magnet compatibility and get underway (and one of my busiest work area pics to date!)

Trim, clean up, glue

With larger models, I’m in the habit of clipping pieces off the sprue, tidying them up, gluing them, and then starting on the next section while the first section dries. But with the two Killa Kans I just built, I tried clipping 100% of the parts, then sanding/filing 100% of the parts, then gluing the model all at once — and dang, but that’s both easier and more fun!

Ripfist trimmed, sanded, and ready for section-by-section assembly

Moonkrumpa: never actually finished

It’s becoming a bit of a running personal joke that I’m constantly tinkering with Moonkrumpa. This time around the impetus was building the other Warboss in my army, “Bigtoof” Skragga (to get a Morkanaut into my list, I needed two detachments), and this incredible, dynamic sculpt screams Warboss in a way that Moonkrumpa doesn’t.

Even with Moonkrumpa 3.0’s height, banner poles, looted wargear, bulk, and customized base, it isn’t immediately clear at a glance which of the two is my Warlord. Based on an idea I saw on Reddit, I starting tinkering with him again.

Bigtoof (left) and Moonkrumpa (right)

Having done more kitbashing — and a full-fledged conversion — since I first built Moonkrumpa, I’m a bit more confident about it now. My bits box has more stuff in it, too.

This kitbash does mark the first time I’ve significantly altered the silhouette of the original model, and you could certainly argue that I’ve strayed from WYSIWYG wargear by adding a second claw — and I’m not sure how I feel about that! The original Big Mek in Mega Armour mini is bulky, but doesn’t have a huge “wingspan,” whereas — by design — my version sprawls to the top, front, and sides.

It’s not “suddenly, he’s Ghazghkull,” though, and it feels consistent with a rule of thumb I saw on Reddit: Your Warboss should be the largest infantry model in your army. To boot, I can always take the stratagem Da Biggest Boss for 1 CP (making him literally a bigger boss), or give him Super Cybork Body to represent the Killa Kan arm in game terms.

More importantly, it’s a fun kitbash, it brings me joy, and it’s exactly what the Mek leader of a Mek-driven Waaagh! should have going on.

Moonkrumpa 4.0

Now there’s no mistaking who’s in charge here:

Moonkrumpa (left) and Bigtoof (right)

As I was wrapping up this revision and re-kitbash, I looked at the time and realized that I’d been at it for five hours! But I couldn’t have done it all up front, when I first built Moonkrumpa, because I didn’t know as much about Orks, my army, or kitbashing when I started this army. Even though it’s meant more work modifying him after the fact, it’s been a fun process.

Hulkling update!

My bonsai tree, Hulking, dropped a few leaves during his first couple of days with me — which Alysia said was probably just because he was adjusting to the new environment. She was right. After a little adjustment period, not only is Hulkling not dead, he seems to be thriving.

A freshly watered Hulkling

I’ve had to prune new shoots several times, and more are always popping up. I’ve got a little routine for where to place him during the day for the right amount of sunshine, including rotating which side faces the window, and he seems quite content.

Out now: The Unlucky Isles

The Unlucky Isles [affiliate link], the first system-neutral guidebook for my Godsbarrow fantasy campaign setting, is now on DriveThruRPG.
Categories
Deathskulls Orks Miniature painting Miniatures Warhammer 40k WIP it good

WIP it good: Da Fancy Wun, my Taurox Trukk conversion

I finished Da Fancy Wun last night, so while the varnish is curing I figured I’d post the WIP photos I took along the way.

This is the final post in a five-post series documenting this Trukk. Assembly is in part one and part two, the color guide is in part three, and the finished product is in part five.

Bottoms of wheels base-coated, shaded, and varnished (so the paint won’t rub off the spikes while I work on the rest)
Clown car aesthetic coming together
The Squig is probably my favorite part of this Trukk
Fully base-coated, waiting for touch-ups (with my amateur green stuff kintsugi on the mug in the background)
Touched-up and ready for shading
With vehicles, I always start with the underside

There are three great milestones in any miniature-painter’s life: drinking your brush-rinsing water (I haven’t done this, but I’ve come closer than I’d like), shaking an open pot of paint (check!), and spilling an entire bottle of Citadel shade paint.

Inky ghost says hi
This was the point where I worried I’d gone too dark with my shading
Fully shaded, starting in on highlights

Overall I’m pretty happy with how Da Fancy Wun turned out. There are things I’d do differently on my next Trukk, but that’s always the case. I’m looking forward to getting it into my new, larger lightbox to see what it looks like up close.

Out now: The Unlucky Isles

The Unlucky Isles [affiliate link], the first system-neutral guidebook for my Godsbarrow fantasy campaign setting, is now on DriveThruRPG.
Categories
Deathskulls Orks Miniature painting Miniatures Warhammer 40k

Converted Taurox Trukk color guide

This Trukk — Da Fancy Wun — is an experiment in more than one way (it’s my first conversion!), and on the color front I’m trying two things: four recipes for blue on the same model (Trukk parts, Taurox body, the gunner’s armor bits, and the signature blue fender and gunner’s war paint); and splashes of colors that are uncommon or unseen in the rest of my army (so far), like gold and dark red, for a bit of a “rusty, ramshackle clown car” aesthetic.

This is the third post in a five-post series documenting this Trukk. Assembly is in part one and part two, a few WIP shots are in part four, and the finished product is in part five.

Da Fancy Wun fully base-coated and touched up, waiting for shading (March 2021)

I’ve pulled the Taurox Prime recipes straight from GW, twiddled a bit; most of the others are from GW’s site or White Dwarf. As always, shades/washes are in italics.

Worth noting: I painted, washed, and sealed the metal and rubber on the very bottom of all six tires (and let the sealant fully cure) before working on the rest of the Trukk, so as to avoid rubbing off the paint every time I set it down. This proved to be a good idea — and I wish I’d done the whole tire, not just the bottom, because I rubbed all the paint off many of the rivets on the tires over the course of painting the rest of the model.

Also worth noting: I highlighted the rubber portions of the tires before deciding how to weather them, and the weathering approach I chose basically erased all of those highlights. A step to skip next time!

  • Taurox body: Russ Grey > Agrax Earthshade > Thunderhawk Blue > Fenrisian Grey
  • Taurox gold: Retributor Armour > Agrax Earthshade > Gehenna’s Gold > Auric Armour Gold
  • Taurox red panels: Khorne Red > Agrax Earthshade > Wazdakka Red > Squig Orange
  • Trukk parts blue: Macragge Blue > Agrax Earthshade > Calgar Blue > Fenrisian Grey
  • Trukk tire rubber: Abaddon Black > Skavenblight Dinge > Stormvermin Fur
  • Trademark blue fender: Caledor Sky > Drakenhof Nightshade > Teclis Blue > Lothern Blue
  • Metal: Leadbelcher > Nuln Oil > Ironbreaker
  • Brass/bronze: Warplock Bronze > Agrax Earthshade > Brass Scorpion
  • White glyphs/decorations: Celestra Grey > Agrax Earthshade > Ulthuan Grey > White Scar
  • Ork gunner: From my Boyz color guide, skin #6 (Caliban Green base), blue #3 (Thousand Suns Blue base), black pants, brown shirt, and Zandri teeth/nails.
  • Squig skin and NOS tanks: Mephiston Red > Carroburg Crimson > Evil Sunz Scarlet > Wild Rider Red
  • Squig eyes: Averland Sunset > incidental but helpful Carroburg Crimson wash when I do the face > Yriel Yellow
  • Squig teeth and nails: Zandri Dust > Seraphim Sepia > Ushabti Bone > Screaming Skull
  • Squig gums: Screamer Pink > Carroburg Crimson > Pink Horror > Emperor’s Children
  • Fuel tank: Averland Sunset > Agrax Earthshade > Yriel Yellow
  • Headlights: Moot Green or Averland Sunset > Agrax Earthshade > Moot Green or Yriel Yellow
  • Roll bar wraps: Zandri Dust > Seraphim Sepia > Ushabti Bone > Screaming Skull
  • Severed head flesh: Rakarth Flesh > Druchii Violet > Pallid Wych Flesh > White Scar
  • Severed head hair: Dryad Bark > Agrax Earthshade > Gorthor Brown > Baneblade Brown
  • Weathering and embellishments: These steps all happen after the rest of the mini is 100% done (including highlights); not every Ork uses all of them:
    • Checks: Macragge Blue and Corax White; I wrote a little guide for these
    • Chipping: Apply dots of Leadbelcher on the high points, edges, and surfaces where paint would naturally have been worn off
    • Battle-damaged edges: Tiny dot/line of Rhinox Hide > mirror the same shape with a line underneath it of whatever blue base coat I used for that area (Warhammer TV reference video)
    • Bullet holes: Highlight the edges of the hole in the appropriate color (e.g. Calgar Blue), then apply Leadbelcher to make it look like the paint was blown away
    • Built-up rust In spots where it can accumulate over a long period, such as on and around bolts, apply thinned-down Skrag Brown
    • Rusty streaks: Thinned-down Skrag Brown > thinned-down Fire Dragon Bright (like I do on my 40k terrain)
    • Verdigris: Nihilakh Oxide
    • Grime: Sponge on Rhinox Hide
    • Caked-on grime: Typhus Corrosion
    • Dusty, dirty tires: Thinned-down 50/50 Dryad Bark/Zandri Dust > thinned-down Baneblade Brown in the deep crevices > Tyrant Skull drybrush > Seraphim Sepia pin wash to reestablish the crevices (I followed this Way of the Brush tutorial, but modified it based on my colors on hand and used water instead of Lahmian Medium; this approach isn’t ideal for the metal/rubber combo tires on the Trukk, though)

I have to varnish Da Fancy Wun in two stages — tires and undercarriage first, curing for 24-48 hours upside down, and then the rest — so it’s going to be a few days until I can get it into my (new!) lightbox for some photos. It’s been a fun ride!

Out now: The Unlucky Isles

The Unlucky Isles [affiliate link], the first system-neutral guidebook for my Godsbarrow fantasy campaign setting, is now on DriveThruRPG.
Categories
Deathskulls Orks Finished miniatures Lightbox photos Miniature painting Miniatures Warhammer 40k

At long last, Thragg’s Deff Ladz! Plus six variations on Ork skin

I built the first of Thragg’s Deff Ladz (my second mob of Boyz for my Deathskulls Ork army, Moonkrumpa’s Megalootas) on January 17th, and have chipped away at them slowly but surely for the past two months. Since I’ve mostly painted rank-and-file Orks so far, this 98-point unit brings me up to 356/2,000 points and 34 finished models.

Back in February, after I abandoned the notion that I was going to paint these lads in two batches; painting 11 minis at once kind of bogs me down, but I can’t argue with the logic of it

I’m not painting at the same pace in 2021 that I did in 2020. And that’s okay! Even if I only do 5-10 minutes in a given day, my hobby streak remains unbroken (today is day 387) and those few minutes are still more than the zero minutes I was putting in for many, many years.

Part of it is that after a year in isolation, the prospect of actually playing 40k still seems like it’s probably 8-12 months away. I’m still enjoying miniature painting as a hobby, but now I have one finished 2,000-point army — the goal of finishing a second feels less urgent. So I’m taking it easy, not gunning the engine and risking burnout.

Along the way, I also picked up a second paint rack. My whole paint library is now accessible, with room to spare. I’m an organized person, by and large, and this appeals to me greatly!

Man, I picked a weird-ass angle for this shot

Anyhoo, time for some Boyz! Let’s fire up the ol’ lightbox.

Get stuck in, you gits!

Thragg is in the center; my favorite in the mob is on the far right, biting that Space Marine dagger blade-in because Orks are not so bright
Rear view of the first five
The second batch; I also like the rightmost mini a lot
Rear view of the back six

And as always, a casual shot (a mix of natural and artificial light):

All 11 of Thragg’s Deff Ladz

Ork skin tones

With Thragg’s Deff Ladz complete, I’ve now used all six skin tone recipes that are currently in my main Ork color guide (plus 3/5 of the recipes I use for Deathskulls blue, and both of my teeth/nails options). The Ladz are a mix of two quite different schemes, one based on Castellan Green and the other on Caliban Green. I love the Caliban version; they start out super-dark green (with a black wash) and highlight up to a very cartoony look.

Now that I’ve tried them all, I took four photos showing each of the six colors, all in the same order (which is the order in which they currently appear in my color guide). So in terms of base paint > shade paint, that’s:

  1. Waaagh! Flesh > Biel-Tan Green
  2. Waaagh! Flesh > Athonian Camoshade
  3. Deathworld Forest > Athonian Camoshade
  4. Deathworld Forest > Biel-Tan Green
  5. Castellan Green > Athonian Camoshade
  6. Caliban Green > Nuln Oil
It took some doing to find one of each with no war paint on their left arms!
Same models, but in a full-body view
And again, but this time in a casual shot with different lighting
Same lighting, full-body view

Recipes 1 and 2 are almost identical to one another; ditto with 3 and 4; really, I have four major recipes with two variations. The variations only differ in which shade paint is used, and unless they’re side by side and you know to look for it that difference is hard to spot. But I like variety in my motley crew, and even just counting the four “main” recipes I’ve got quite a bit of it in my army (all tied together, I hope, by their shared palette of secondary colors and especially by their war paint).

Similarly, my blue recipe built on Kantor Blue is quite similar to the default Macragge Blue version (at least the way I wash and highlight them). But Thousand Suns Blue makes for a vibrant and quite distinctive finished product; I really like that one.

Next up is Da Fancy Wun, my Taurox/Trukk conversion, which is currently primed, partially painted, and waiting for the sealant on the bottom-most wheel spikes to cure.

Out now: The Unlucky Isles

The Unlucky Isles [affiliate link], the first system-neutral guidebook for my Godsbarrow fantasy campaign setting, is now on DriveThruRPG.
Categories
Deathskulls Orks Miniatures Warhammer 40k

Converting a looted Taurox Prime into an Ork Trukk, part 2


Part one
covered measurements (Trukk vs. Taurox), most of the cab, the chassis, and the axles and wheels. As before, the foundation of, and inspiration for, this conversion — my first — is the excellent work done by Hobbyistgirl on her Taurox Trukk conversion. I’ve diverged a bit from her build, and I’m diverging from it more in this second post.

This is the final second in a five-post series documenting this Trukk. Assembly started in part one, the color guide is in part three, a few WIP shots are in part four, and the finished product is in part five.

I want my converted Trukk to still look ramshackle (an actual game mechanic that means you can only do so much damage to the vehicle, as it’s so full of holes and gaps already), despite the pristine armored compartment for the driver. That starts with the engine compartment, which I’ve built around the idea that my Meks chopped off the front end of the Taurox and slapped in a big-block engine with a blower.

My finished Taurox Trukk conversion

Let’s get choppin’

First, I shimmed the spot where the engine will sit to make it the right height.

I think this shim is a piece of Trukk chassis
I added the exhaust pipes on the right side of the Trukk engine, but not the left

Then I cut and weathered the Taurox engine compartment panels and glued them in place. I used the Taurox exhaust pipes on both sides; on the left side, they’re intact. I also used the Taurox light on the left side, since I like asymmetry in my Ork stuff.

On the left side, I was able to keep the whole Taurox exhaust assembly

I didn’t notice the cool NOS attachment that’s supposed to go on the left side of the engine until it was too late; I’ve already partially blocked that spot. (No worries, though; I trimmed it a bit and jammed it on there later.)

Right side attached
Top of the engine compartment attached, and now you can’t see inside so there’s less to paint

I covered the unsightly gap, and the shim, with a bit of trimmed-down Trukk scrap.

Corrugated Ork scrap

Then I roughed up the grill from the Taurox and stuck it to the engine, alone with the Trukk bumper (attached exactly as the kit intends, since I left the front of the Trukk chassis intact in part one).

Taurox grill, Trukk bumper

I like the idea of my Orks being like, “Oi, let’s put dis bit back, hurr hurr,” and then sticking the grill back on because it’s funny.

Next I added the bed sides, armor, and roll bars per the Trukk instructions.

Stock Trukk bed parts, assembled per the instructions

DakkaDakka lists the Trukk’s height as 3″, and my converted Trukk is already 3″ high at the roll bars. I wasn’t sure I liked the boarding ramps, so this is a great excused to not use them as they’d make the Trukk much too tall. So instead I chopped them to roughly match the height of the bed sides.

Ork OSHA does not approve of these side panels

Next I added the turret, gunner, and Wreckin’ Ball. This pushed my Trukk up to about 3 1/2″ tall, which doesn’t seem like a huge deal. I forgot to take a photo of that stage, but I built those bits just like the stock Trukk; the Trukk turret is exactly the same diameter as the hole in the Taurox roof.

After that, it was time for greeblies, covering up holes, creating new holes, and weathering the Taurox bits so they don’t look too pretty. I also added a Squig, because I love Squigs and empty truck beds on miniatures look weird, and I stuck a sign with the Ork glyph for “danger” just below him.

Right side of the finished conversion
Front
Left side
Every pickup truck needs an angry dog in the back, right?

This was a really fun conversion, and a good choice for my first. Thanks to Hobbyistgirl’s WIP pics and guide, I had the confidence to give it a shot and a basis for diverging from her build where I wanted to achieve a different effect.

It’s about 1/2″ taller than the stock Trukk, but it’s the same width and length. The silhouette is roughly the same, although the cab is certainly more solid. I tried to make that section look as ramshackle as possible while still being recognizably a Taurox Prime. All in all, I did a pretty good job of hitting all of my initial design goals — not perfect, but I’m digging it.

After a bit of thought, I’m naming this Trukk Da Fancy Wun.

Out now: The Unlucky Isles

The Unlucky Isles [affiliate link], the first system-neutral guidebook for my Godsbarrow fantasy campaign setting, is now on DriveThruRPG.