
I wanted to keep my painting technique fairly consistent across my Space Hulk set so they’d all look similar despite being painted over a seven-year period, but now I’m ready to try some new techniques with my Blood Angels army.
One is a simple switch to a brush-on primer, rather than the spray-on stuff. Another is edge highlighting, likely in combination with drybrushing. I dabbled a tiny bit with highlights on my Terminators and liked it, and I love how it looks on minis I see online. I recognize that my skill as a painter will improve over the course of painting my army, but I want to start out with a baseline that’s likely to stay reasonably consistent over time.
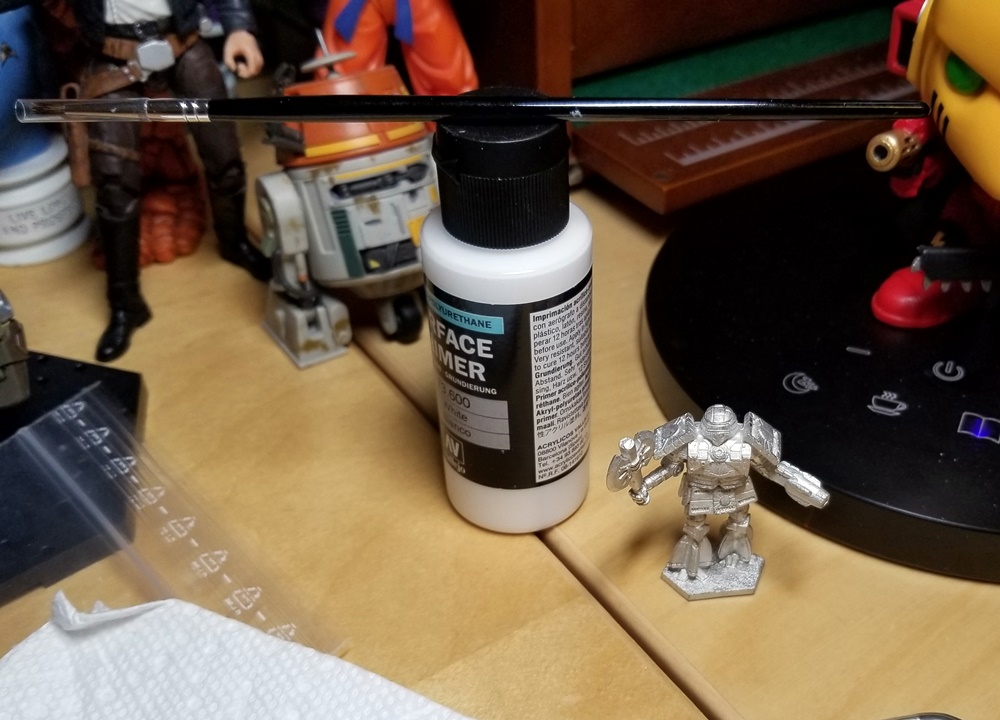
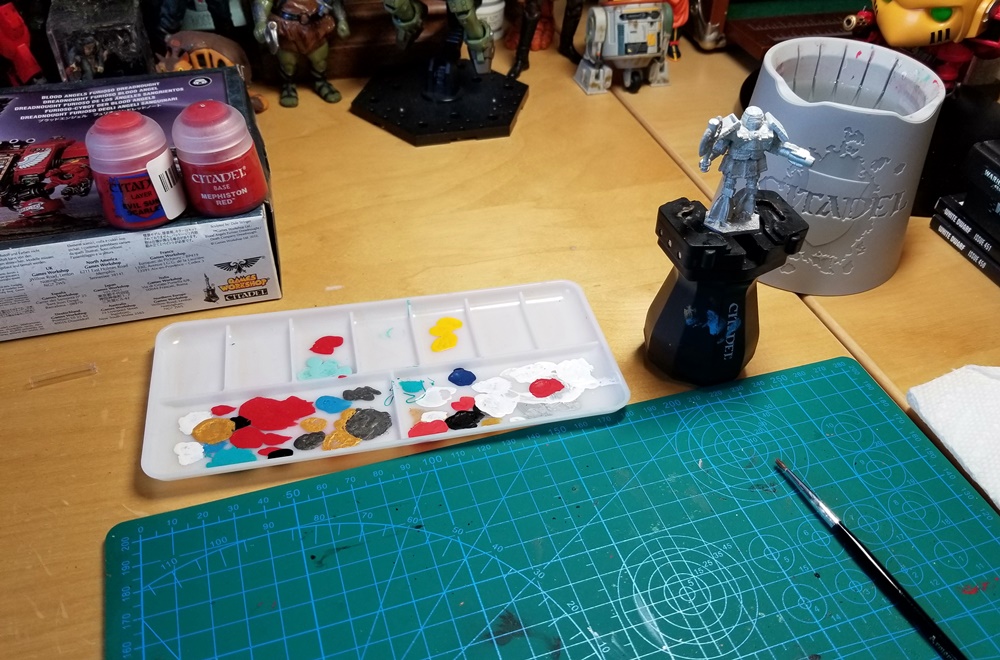
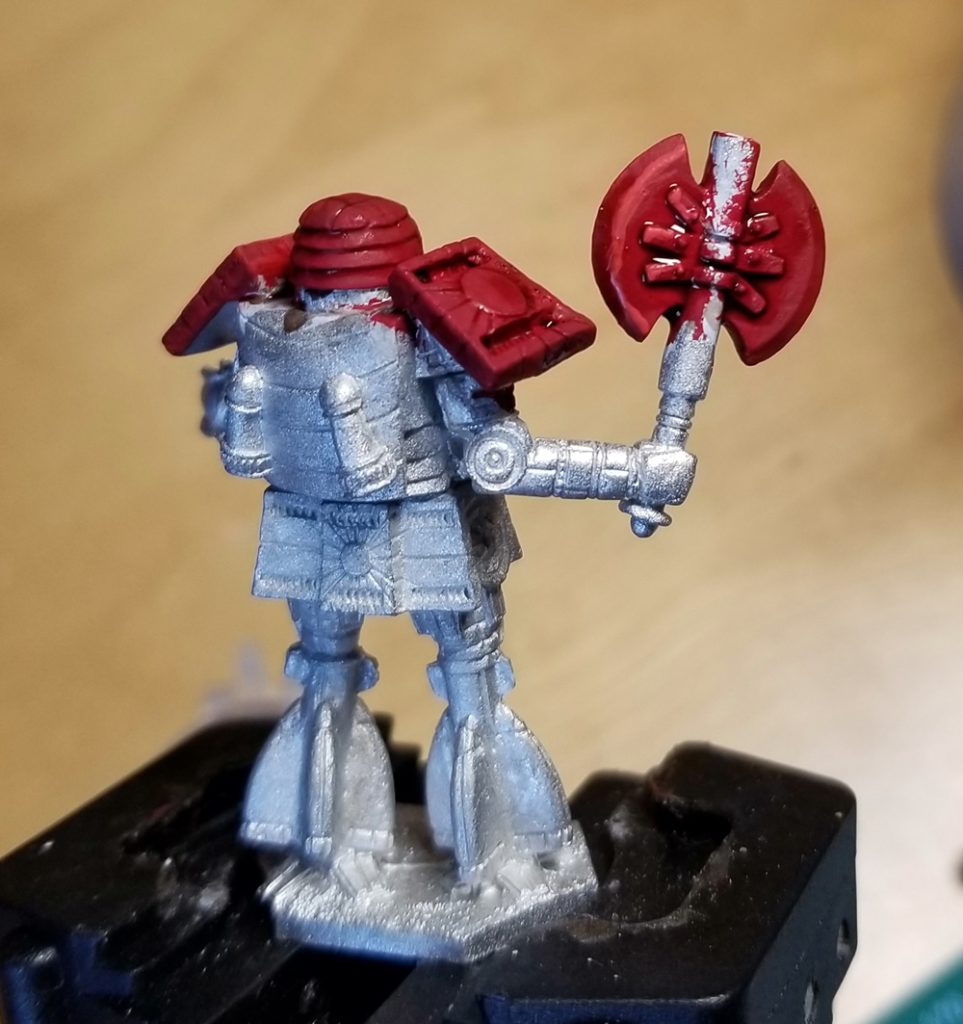
Since I’ve got a pile of old BattleTech mechs just sitting around, I figured I’d bust one out and use him as a test subject.
Earlier this month I posted about feeling a bit overwhelmed with painting options, and this experiment is a good way to narrow things down a bit: I’m going to try edge highlighting before the wash on one shoulder, and after the wash on the other one.
My guess is that highlighting after the all-over wash will look better. Let’s find out!
First, the primer
I’ve used Armory spray-on primer for every miniature I’ve painted since the 1990s, with mixed results — not because it’s a bad primer, but because it’s a spray primer. They’re sensitive to heat, cold, and humidity, so unless you can spray indoors your “priming year” can be quite short.
So: brush-on primer. I’m trying white Vallejo surface primer (paid link) because it has good reviews. My experience with their matt varnish (paid link) over the past few weeks has been excellent, so I’m expecting the primer to be solid.
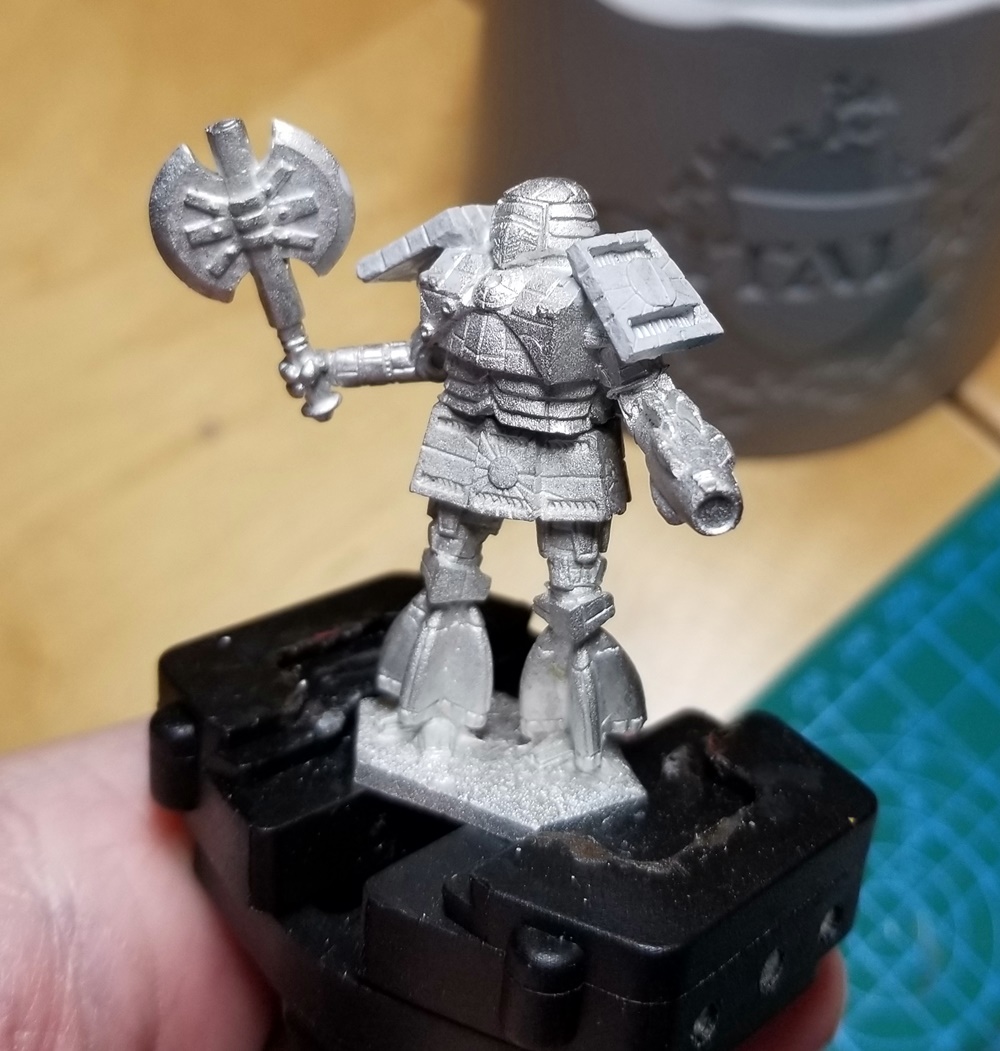
After a single thin coat, including a follow up with an “empty” brush to pop bubbles and deal with pooling (just like I do with the varnish, and with washes/shades), you can barely see the difference between the primed shoulder pads and the bare metal. I suspect I need to do a second thin coat, but either way I know I should let it cure overnight.
The next morning I could see bare metal in a couple of spots I’d primed, so: too thin. I put on a second coat and left him to cure again.
Then I thought, what the heck: I’ll single-coat the head and sloppily single-coat the ax blades, giving me two more tests in one curing session.
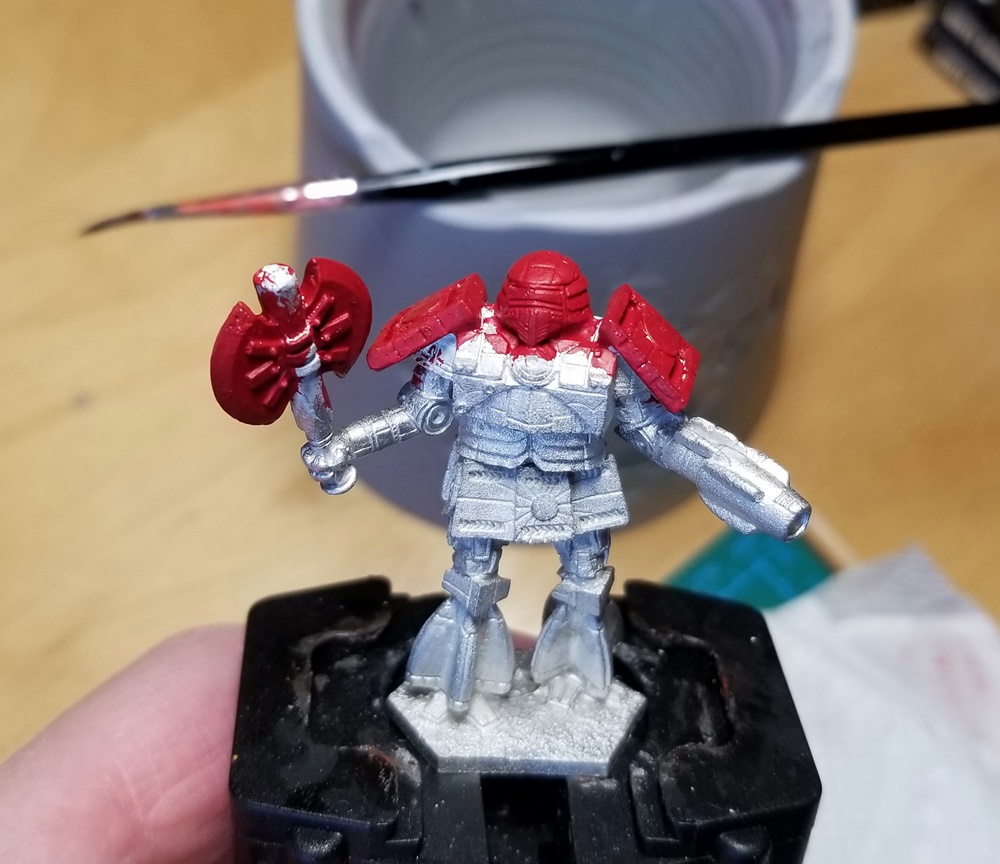
A few hours later I wondered why I was doing a full cure for a paint test — let alone one that’s keeping me from tackling Squad Karios! So I grabbed my Mephiston Red base and Evil Sunz Scarlet layer and went to work.
One thinned Mephiston Red base coat later, here’s how ol’ Ti Ts’ang looks.
Right off the bat, this stuff is much easier to paint over than my old spray primer. I don’t know if it’s the nature of spray primer, bad technique (overspraying), or the seven-year gap between priming and painting, but when I was finishing up my Terminators I found myself fighting the pebbly/fuzzy texture of the primer. My money’s on me applying it poorly, but whatever the case it wasn’t fun to work with and it overwhelmed some of the model’s details.
Three primed bits enter
In terms of one coat of Vallejo primer vs. two coats, there’s a clear winner: one well-applied coat.
- The shoulder pads got two coats, and I can see the primer overwhelming some of the finer lines and details. It’s not awful, but it’s not great.
- The sloppy single coat on the ax blades left a bubble or two here and there, but smothered no details.
- The properly applied single coat on the head (no bubbles) didn’t annihilate any details and was just as easy to paint over as the other two areas.
In hindsight I think I forgot to stir the primer for the first coat on the shoulder pads; I distinctly remember stirring it for the head and ax. Eh, my conclusion would hold even if I’d stirred it: two layers of primer plus a layer of paint is too much.
To the Emperor’s highlighting salon, brothers!
First, the pre-wash highlight areas.
Evil Sunz Scarlet is subtle. I don’t have GW’s recommended color for a second-layer highlight, Fire Dragon Bright, so I grabbed my closest analog for another experiment: Wild Rider Red, my drybrush color for my Space Hulk Terminators.

That’s much less subtle! My line is pretty bad, but even though the paint is notably orange the actual color pops nicely.
Time to shade
Next up is an Agrax Earthshade wash.

Evil Sunz Scarlet 
Wild Rider Red
Pre-wash, the Evil Sunz Scarlet looked too subtle to my eye. But post-wash, it’s more visible. Still somewhat subtle, but not bad.
But look at the contrast between it and the Wild Rider Red — and between the Wild Rider before and after the wash. The Agrax knocked the orange right out of it, but it still pops noticeably more than the Evil Sunz.
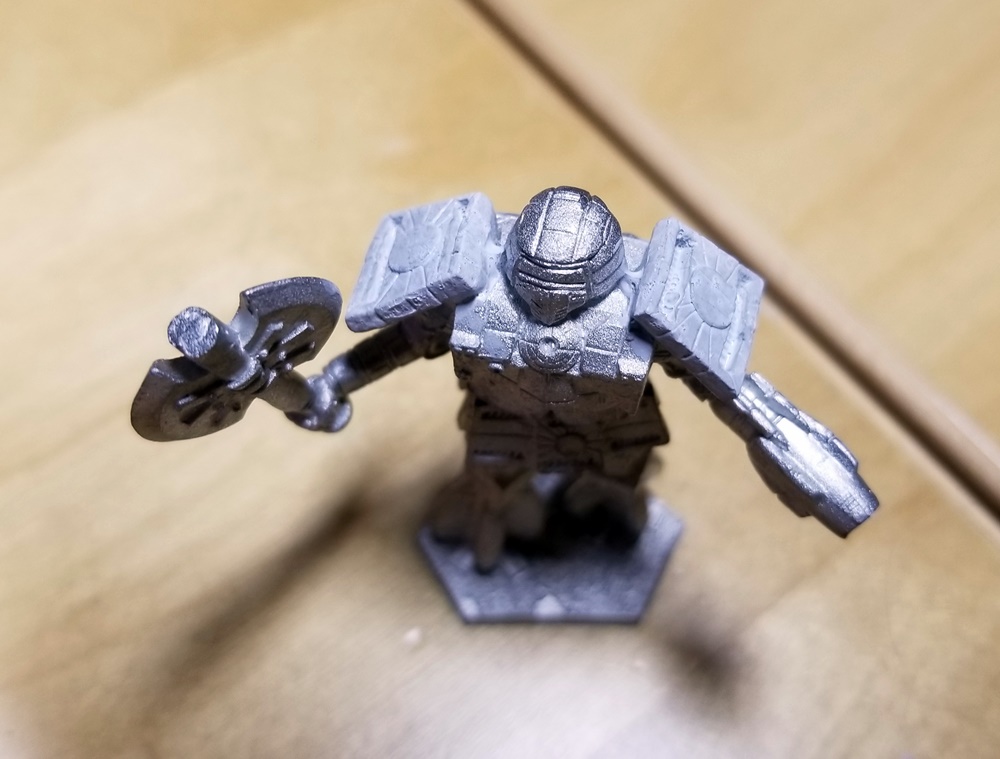
I don’t think he knows about second highlight, Pip
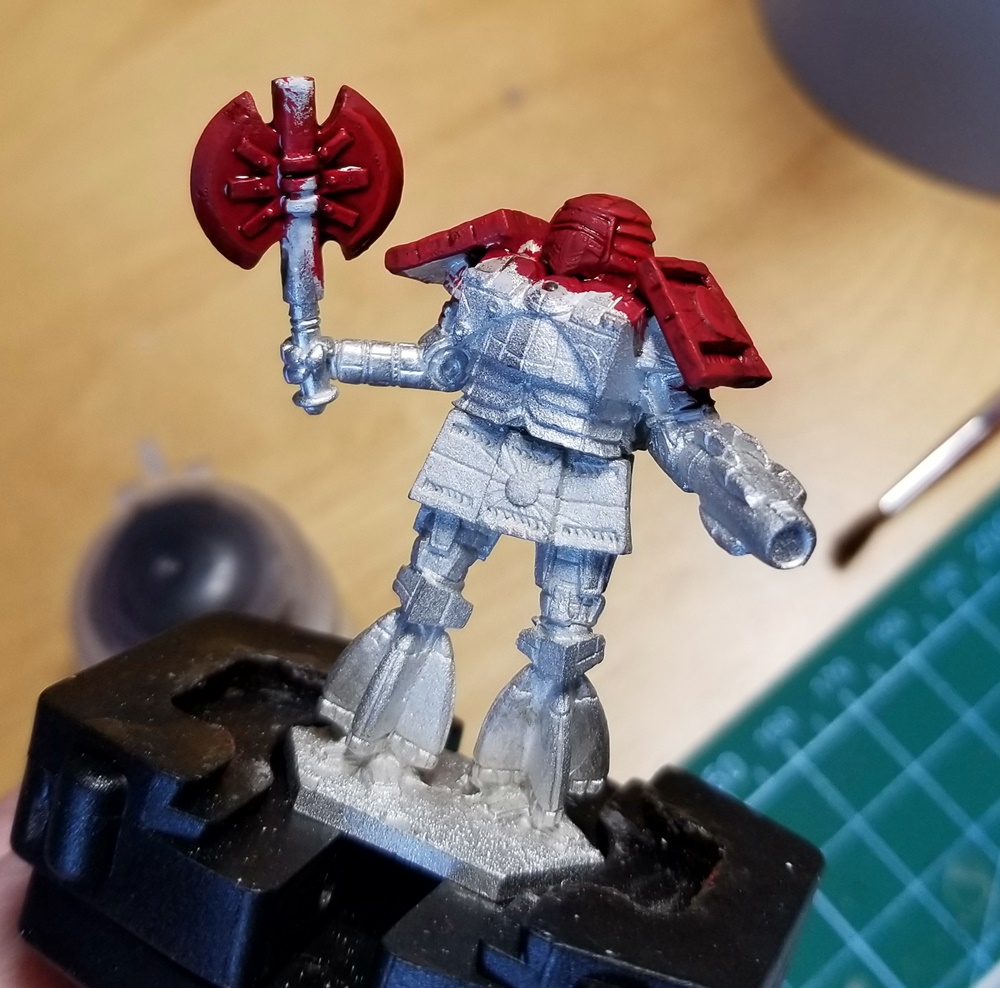
Okay, after a few minutes of drying time it’s the final stage: a single edge highlight on the bits that have been base coated and washed, so I can compare those effects (and the two different highlight colors).
In the head/shoulders photo, the left half — as you look at it, not the model’s left — was highlighted after shading; the right half was highlighted before shading.
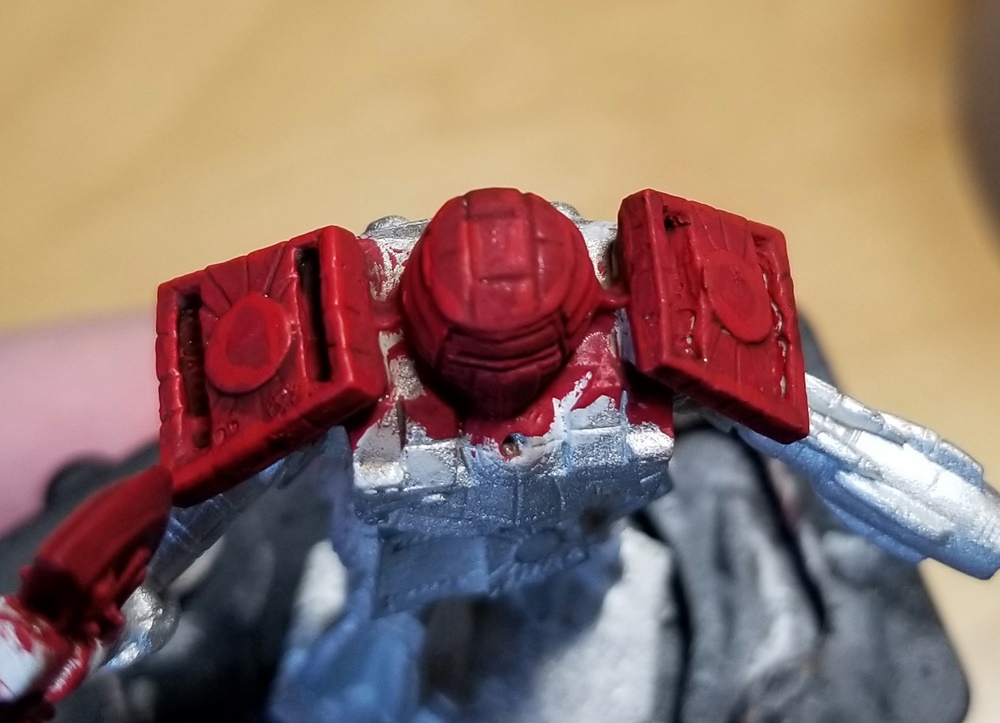
I can see why GW recommends shading before highlighting, and that color combination. Particularly at arm’s length, the post-wash highlighted portion pops more and has clearly been highlighted. The pre-wash side is more muted, and at arm’s length I can’t even tell it has highlights.
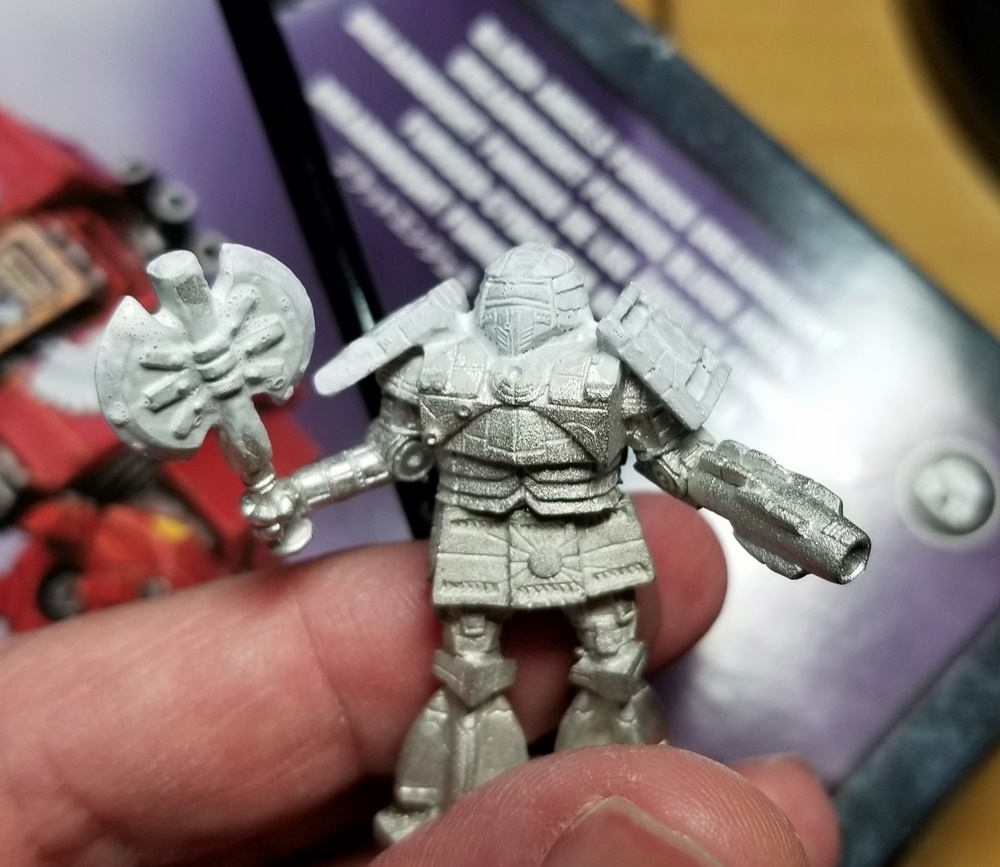
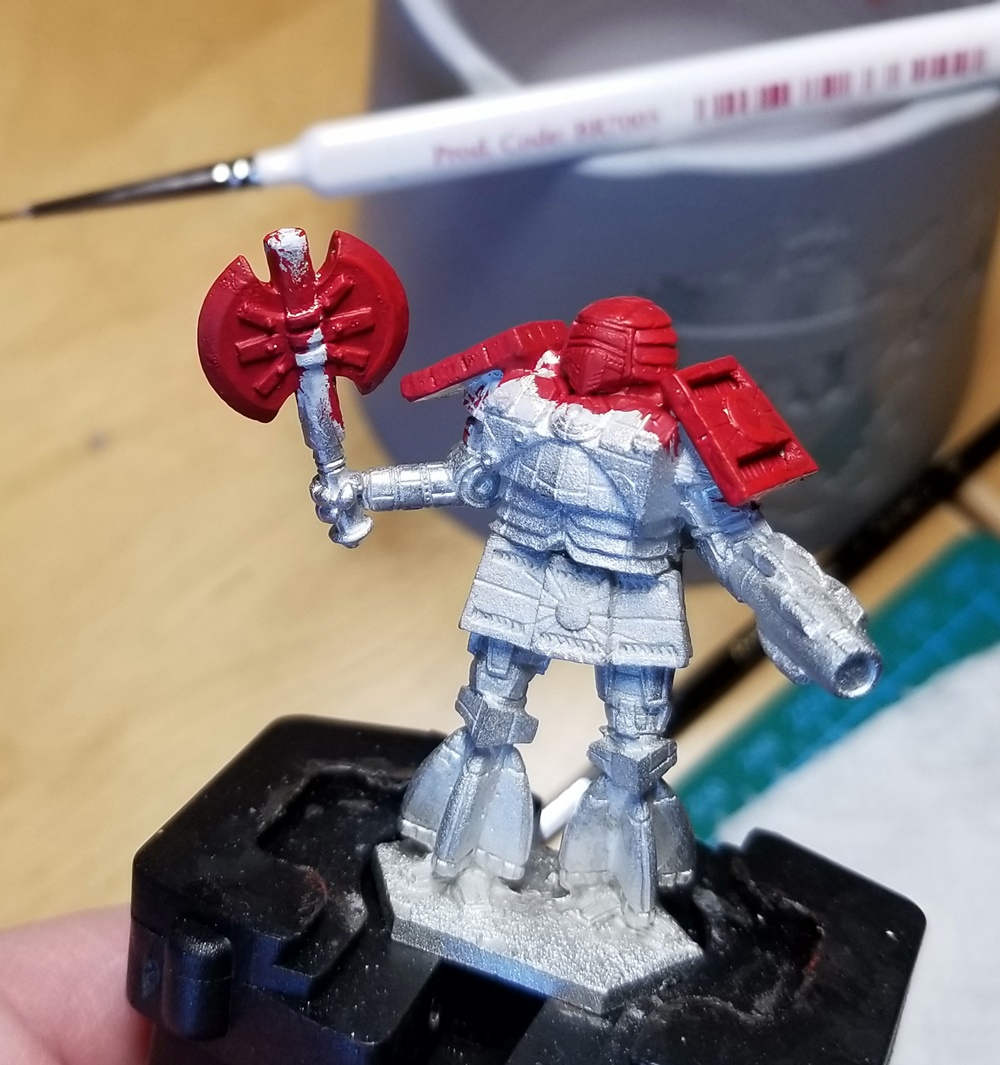
Let’s peek at the ax. On the front of the ax, left is post-wash highlighting and right is pre-wash (again, the photo’s right/left). On the back, it’s reversed: left is pre-wash, right is post-wash.

Front of ax (Evil Sunz Scarlet) 
Back of ax (Wild Rider Red)
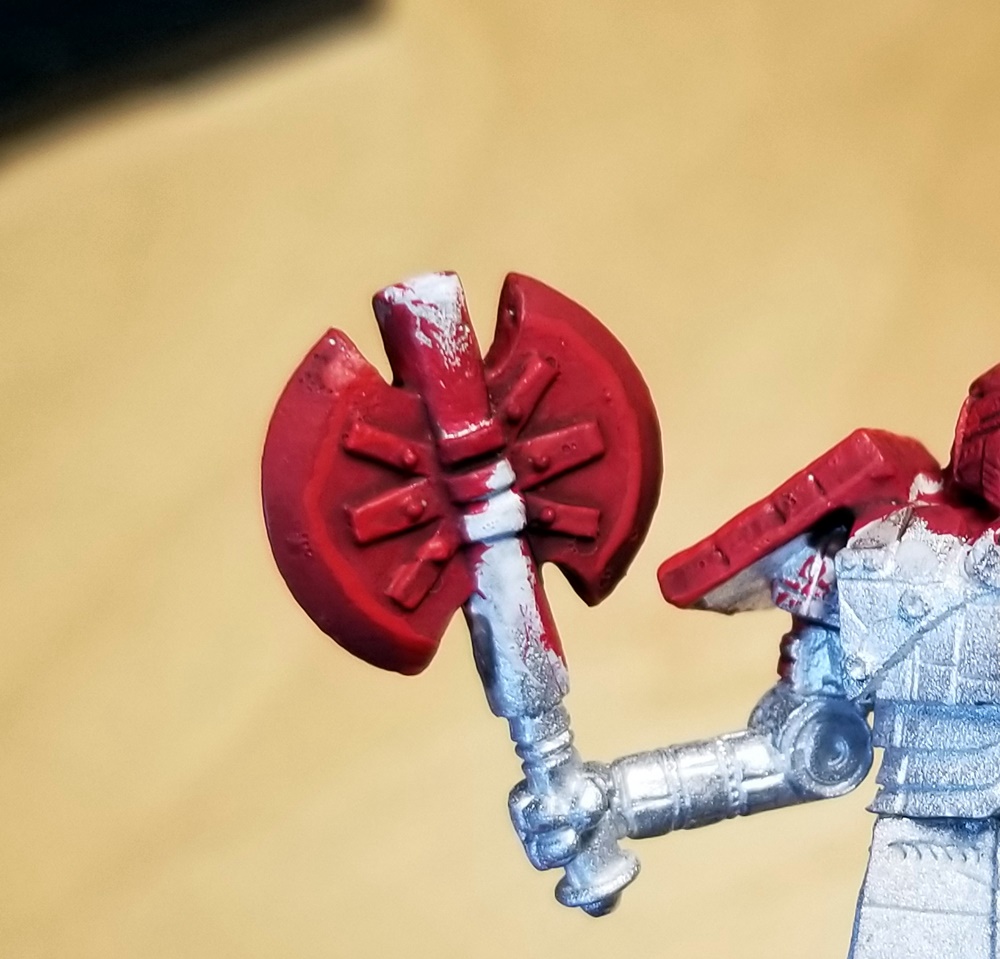
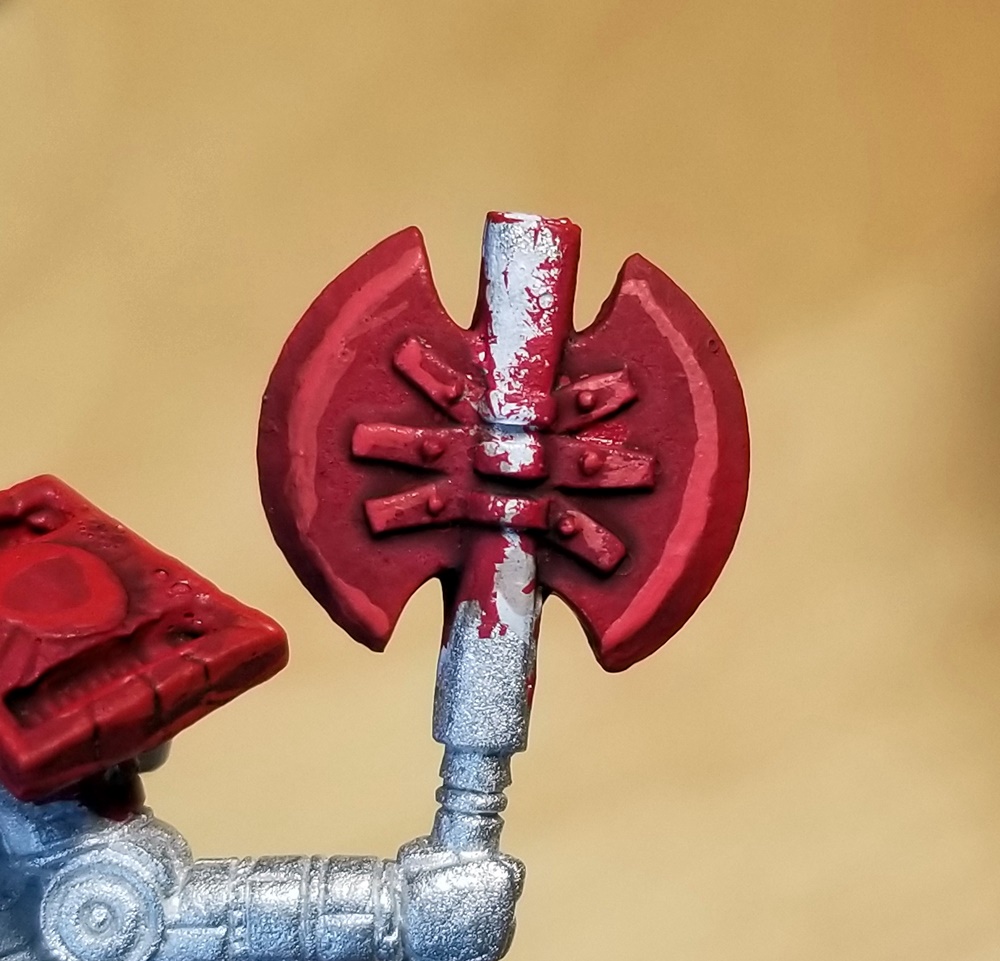
In the photo, the Evil Sunz Scarlet pre/post look about the same. At arm’s length, I can tell the pre-wash side has been highlighted — unlike the head and shoulders — but I still prefer the half that’s been highlighted after the wash.
The back is too orange in both versions. Even though 40k minis — where I’ll be trying out the combo of wash and highlighting I land on here — are pretty over-the-top, this blade looks downright cartoonish. That’s not inherently bad, but it’s not the effect I’m after.
One last data point, since I’ve got a freshly painted Blood Angels Terminator from my Space Hulk set handy.
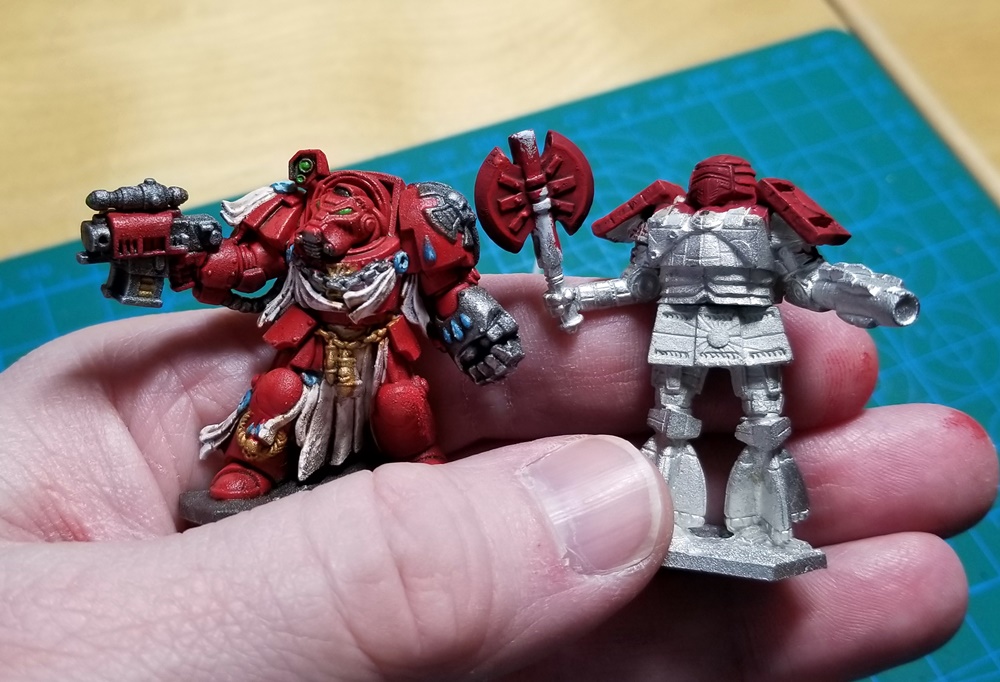
I prefer the GW-approved color combo to my old one (which I was expecting), and I prefer the edge highlighting to drybrushing. Even though my edge lines suck! That’s something I can work on.
Conclusions
Summing up this whole little experiment:
- One coat of Vallejo primer, stirred and applied with care
- Edge highlight my base coat of Mephiston Red in Evil Sunz Scarlet after the Agrax Earthshade wash
- For crisp edges, like armor plates, I prefer edge highlighting to drybrushing
And hell, I may even take a crack at doing a second finer edge highlight in Fire Dragon Bright, too. Time to paint some Blood Angels!