Categories
Blood Angels Space Marines Deathskulls Orks Kill Team Miniatures Warhammer 40k

Our first Kill Team game: Deathskulls Orks vs. Blood Angels

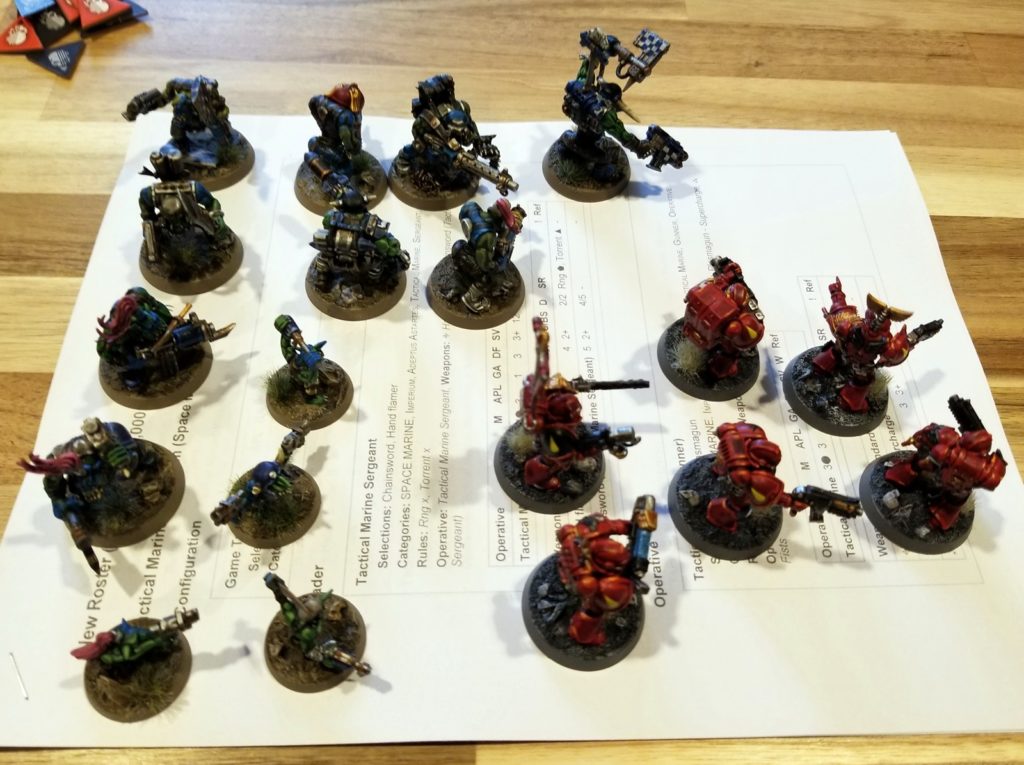
One June 21st, Lark and I played our first game of Kill Team, and it was a blast. This was also the first time I’ve ever played a minis game where I’d painted everything on the table.

Skrudd’s Krumpas on the left, Squad Karios on the right

I got out all the valid options I had for two teams, Greenskins (two Boyz fire teams) and Astartes (one Tactical Marine fire team), Lark picked the Orks, and then we each knocked together a team in BattleScribe based mainly on which minis looked the coolest.

All of my model options for these two teams

Like playing BattleTech with my kiddo for the first time, this whole experience was an absolute joy. It would have been a joy even with Lego people and cereal boxes, but having everything painted was the cherry on top. We both found it immersive to play with painted minis — honestly, I’m still shocked how much of a difference it makes.

The final teams, Skrudd’s Krumpas vs. Squad Karios

A light battle report

We played a learning game, leaving out equipment and secondary objectives; I figured we had enough rules to think about for a first game without those. I set up the board based on feedback from r/KillTeam about my test layout, making sure both teams could deploy in cover, no single vantage point could dominate the board, and both halves were similar.

I picked Loot and Salvage for the mission, since it seemed straightforward: long-edge deployment, simple objectives.

The board setup

Lark took some of these photos, but we were just passing my phone back and forth so I’m not sure which ones. If it’s a good photo…it’s probably one of Lark’s!

Half of Srkudd’s Krumpas at deployment
The other half
Most of Squad Karios at deployment
My other two Marines
Plasma + vantage point seemed like a good idea
We tussled over this objective for about half the game

In this mission, you score 1 VP every time you loot an objective. Lark was really good at trading Gretchin for 1 VP (a good trade!). My Marine’s toughness kept all of them alive for the first Turning Point.

All tied up at the end of the first Turning Point, but no Marine casualties yet
Second Turning Point, Ork view
Second Turning Point, Marine view
Orks moving in
Ork Boyz with ‘eavy weapons

I had to pick Sergeant Karios as my leader — he was the first Blood Angel I finished back in 2020. I forgot he was in my case for my first 40k game, so this Kill Team match was the sarge’s first deployment.

One of the key fights in the second Turning Point
Squad Karios hogging objectives
This guy survived a lot of fire
This Boy and his Big Shoota put in the work
As did this Marine and his Heavy Bolter
Mr. Pink Hair cleaning out objective 5
Mr. Pink Hair (we both really liked this guy, and he was fun to paint)
I can’t remember who had a very bad day here, but based on the number of dice the shot had to be from Lark’s Big Shoota or my Heavy Bolter
Skrudd, near death but tough as nails

We called the game partway into the third Turning Point. We cleared every objective, but I cleared more in the second Turning Point.

End of the second Turning Point, during which Lark wiped out my Plasma guy

Lark and I both had a great time with this match, and we’re already looking forward to our next one. Lark’s a sharp kid with a real wargaming spirit, and an excellent opponent.

It’s been three months since we first planned to play, partly because I’m a pretty slow painter. Deciding not to wait until the teams we originally picked — Novitiates and Corsairs — were done, and instead to play with forces I already had on hand, was a good call. Playing trumps not playing!

Post-match thoughts

I missed some stuff in the rules, no surprise there. The biggest thing was not being able to select an action more than once during an activation — part of why we cleared all six objectives (18 loot actions) in less than three Turning Points. That’s what learning games are for, though, and after one play we both had a pretty solid grasp of the game.

With the benefit of hindsight and one play worth of experience, this match-up was a challenging one for Lark’s Greenskins. If I were to do it over with these two teams, I’d recommend that the player with less wargaming experience play the Marines: They’re good at everything, quite tough, and you don’t have a pile of models to worry about.

This board probably had too many relatively clear fire lanes (which also benefitted my Marines more often than it did Lark’s Orks), and felt like it needed one more piece of medium/large terrain. (When I set up the board for my second game, a couple days later, I worked on remedying that.) KT boards are more art than science, and I can see how every iteration will make it easier to spot the potential hang-ups in a given layout.

End-on view of our board for this game

Kill Team combines 40k and Necromunda into a tight, rich package that’s relatively easy to learn, quicker to play than 40k, and full of tactical and strategic depth.

I also dig that I’ve reached the point where I can provide all the stuff for a complete game: board, terrain, two teams, etc. I can’t do that with 40k, and won’t be able to for ages. All of that combines to make KT much easier to get to the table than 40k.

As I write this post I’ve already played a second KT game, also a blast. Kill Team is shaping up to be one of my favorite games.

Out now: The Unlucky Isles

The Unlucky Isles [affiliate link], the first system-neutral guidebook for my Godsbarrow fantasy campaign setting, is now on DriveThruRPG.
Categories
Blood Angels Space Marines Finished miniatures Lightbox photos Miniature painting Miniatures Warhammer 40k

Squad Karios: complete!

I built my first Blood Angel, Sergeant Karios, on March 11. I finished Squad Karios, 2nd Company, 1st Squad, last night, on April 8. My army is officially under way!

Fire up the Emperor’s holy Auspex

I’m experimenting with the white background in my lightbox, and so far I like it.

Squad Karios, 2nd Company, 1st Squad

These are the most detailed paint jobs I’ve ever done, and they’ve been an absolute blast to work on. Might as well give them the full lightbox treatment!

First five
First five, rear view

I built these guys with a sub-squad leader, in case I want to split them into two five-man squads for a game. He’s in the center, just like Sergeant Karios (above).

Second five
Second five, rear view

Painting pace

Almost a month to paint 10 minis doesn’t sound too speedy, but that wasn’t all I did between 3/11 and 4/8: I also assembled, based, and primed 5 Scouts; assembled and partially based 10 Primaris Infiltrators and 5 Terminators; and assembled my first Dreadnought. So as a measure of my painting speed, it’s not a terribly useful one.

More representative is somewhere between how long it took me to do the final three — which was three days — and my typical painting speed in March, which was 16 in 31 days, or about one model every two days. I look forward to getting faster at it as I start being more confident in my brushstrokes, etc.

I’m also looking forward to my next painting project: Squad Cain, my converted Scouts. They’re already based and have a bit of paint on them here and there.

Squad Cain

Heck, given that these guys are simpler sculpts than the tactical squad I just did, I might be able to keep up my 1/day pace — or even knock out all five by Sunday.

Out now: The Unlucky Isles

The Unlucky Isles [affiliate link], the first system-neutral guidebook for my Godsbarrow fantasy campaign setting, is now on DriveThruRPG.
Categories
Blood Angels Space Marines Finished miniatures Lightbox photos Miniature painting Miniatures Warhammer 40k

Sergeant Karios: my first finished Blood Angel

I finished my first Blood Angel!

Sergeant Karios, Second Company, First Squad

Twenty-six paint colors. Terrain. A tuft. Decals. 7-8 hours of work. And loads of new-to-me techniques: texture paint; highlighting (as opposed to drybrushing), including two layers in some areas — on top of the base coat and wash, of course; decals; multi-step basing. He was so much fun to paint!

Left side
Rear view
Right side

To date, this is the best paint job I’ve ever done. And about an hour after applying the sealant, I realized that I’d painted the lower edge of his torso armor like a wee black belt, to hold up his space-loincloth and grenades . . . when it should actually be red. Such is life! He’ll be unique among his brethren.

Finishing my first Marine makes my Blood Angels army feel real.

Out now: The Unlucky Isles

The Unlucky Isles [affiliate link], the first system-neutral guidebook for my Godsbarrow fantasy campaign setting, is now on DriveThruRPG.
Categories
Blood Angels Space Marines Miniatures Warhammer 40k WIP it good

WIP it good: decal time

As I amassed the hoard of plastic that will become my Blood Angels army, I learned about decals. Most of what I knew about them was that as a kid, I tore, mangled, and misapplied them at basically every turn.

My research led me to Micro Set and Micro Sol (paid link), the twin weapons in the modeler’s arsenal for putting tiny decals on tiny figures — and especially on curved or irregular surfaces. They’re both decal softeners; softer decals become more fragile, but also better able to conform to curves and whatnot.

I might be able to freehand a Blood Angels chapter emblem in, like, 2027

I watched three YouTube videos about putting on decals, and browsed a few posts, and the funny thing is that people don’t really seem to agree on how to do it. Take the videos:

  • One person scored the decals with a hobby knife and uses only Micro Set, and never touched the decal with anything but a brush or that knife
  • One used like 8 million layers of Micro Sol; the process appeared to take an hour or two with lots of drying time between coats
  • One used both Set and Sol, and a Q-tip, and did the whole thing in one coat of each and like two minutes

All of their decals looked great when they were done.

And the posts? Gloss varnish before and after; no, only after; no, gloss before and matte varnish after; only after turning three times widdershins and never under the light of a full moon . . . you get the idea.

The little near-identical bottles themselves also make things a bit confusing: Sol recommends starting with Set and then using Sol; Set says to use only Set unless you really need Sol. But Sol is for irregular surfaces, which sounded like my use case — so I just followed the directions on the Micro Sol bottle.

Sergeant Karios, Second Company

I went with Second Company for my first squad because I like the pop of yellow and — for some reason — the decals for Second Company seem to be the most common.

And there’s another peculiarity: GW seems to have largely gone away from decals that aren’t for Ultramarines. The only Blood Angels transfer sets I have came out of my Dreadnoughts — even this kit, an explicitly Blood Angels tactical squad, doesn’t have a sheet of transfers in it. When those run out, I’ll be relying on Ebay.

Anyhoo, next came the banner.

Long may it wave

The Micro Sol bottle says to let it dry and see how they turn out, and then apply more Sol as needed (with drying time between coats); as needed, prick any bubbles that form. With a reasonably smooth coat of primer and paint these two decals both seemed to have gone on okay, but I could see a couple little spots where they hadn’t settled down perfectly. So I hit those spots with some more Sol, then let them dry again.

When all’s said and done, I’ll varnish over the decals when I seal the whole mini. These weren’t hard to do at all — huzzah!

Out now: The Unlucky Isles

The Unlucky Isles [affiliate link], the first system-neutral guidebook for my Godsbarrow fantasy campaign setting, is now on DriveThruRPG.
Categories
Blood Angels Space Marines Miniature painting Miniatures Space Hulk Warhammer 40k

A month as a miniature painter: February-March 2020

Since I got back into miniature painting — and actually into it for the first time, really — on February 22, I’ve gotten quite a bit done:

I also put together a painting area on my desk, including paint racks and a lamp and lightbox, and added a host of Citadel pots and tools to my arsenal.

My WarpedMindGames paint racks
My TaoTronics painting lamp

I’ve got a 2,000-point Blood Angels army to paint during quarantine, all mapped out in BattleScribe. My baseline was my favorite units in 40k and units that looked fun to paint until around 1,500 points, and then 500 points of units that looked fun to paint but also supported what I already had. “Paint the army you love and don’t worry too much about the ebb and flow of the rules” is my mantra.

Along the way I’ve grown as a painter: used brush-on primer, wash, and sealant for the first time; experimented with edge highlighting; improved my detail painting and drybrushing; learning to make terrain bases; stepped up my assembly game with new tools; and played around with different workflows to find the one that’s right for me. I’m not going to knock anyone’s socks off with my paint jobs, but I’m having fun and loving the hobby.

All of my Space Hulk Terminators
Squad Karios
A converted Scout with a Skitarii Ranger head
Terrain bases on Squad Karios

Yore also turned 10 this year, and crossed the 300-post line last week in my flurry of miniatures-related posting (here’s #300). Traffic has doubled and I’m having a blast blogging again — and I’ve discovered the joy of the #warmongers community on Twitter, a tremendous source of inspiration, motivation, and camaraderie.

If you’re reading this I hope you enjoy Yore, and thank you.

Out now: The Unlucky Isles

The Unlucky Isles [affiliate link], the first system-neutral guidebook for my Godsbarrow fantasy campaign setting, is now on DriveThruRPG.
Categories
Blood Angels Space Marines Miniature painting Miniatures Warhammer 40k WIP it good

WIP it good: full-on highlighting for the first time

After sticking to base coat > wash > drybrush for my Space Hulk set, with just a bit of dabbling in edge highlighting here and there, I committed to fully incorporating highlighting into my painting toolkit with my Blood Angels.

I was pretty nervous about actually doing it for the first time. After base coating and washing Sergeant Karios, I already had about five hours invested in this model. What if I royally screwed him up?

Base-coated and washed
Rear view

Highlighting rocks

It turns out that highlighting is a lot of fun!

Just the gold bits done

It was a bit nerve-wracking at times, but the color progression GW recommends is designed to get lighter in pretty gradual steps. Even when I messed up a bit, it wasn’t too bad — and even not being much good at it yet, I still like the effect.

Everything but the red and magenta done

I’m really digging how the crispness of the highlighting contrasts with the more organic quality of the drybrushing on the base. That should help the mini stand out and make the base feel more like real terrain at the same time.

I also got to do a bit of freehand, since I don’t have any Second Company decals small enough for the banner. Here he is in his almost final state — just a few touches left to do:

Just Pink Horror, two decals, base edge, and varnish to go!

Every color under the sun

Back when I was painting my Space Hulk Terminators, I noted that Brother Goriel required 10 base coat colors. That seemed like a lot! But here I am painting Sergeant Karios, mostly following Citadel’s current painting guide, and I’ve used 25 colors (with one still to go, as my final highlight for magenta is in the mail):

  • Red: Mephiston Red > Agrax Earthshade > Evil Sunz Scarlet > Fire Dragon Bright
  • Gold: Retributor Armour > Reikland Fleshshade > Auric Armour Gold > Liberator Gold
  • Black: Abaddon Black > Eshin Grey > Dawnstone
  • Metal: Leadbelcher > Nuln Oil > Stormhost Silver
  • Parchment/white cloth: Rakarth Flesh > Agrax Earthshade > Pallid Wych Flesh > White Scar
  • Magenta: Screamer Pink > Carroburg Crimson
  • Eyes: Moot Green > Agrax Earthshade > Moot Green
  • Yellow: Flash Gitz Yellow

Plus the base:

  • Terrain: Astrogranite Debris > Drakenhof Nightshade > Grey Seer (drybrush)
  • Skulls: Corax White > Agrax Earthshade > Corax White (drybrush)
  • Rocks: Grey Seer > Agrax Earthshade > 50/50 Corax White/Grey Seer (drybrush)

I have about 6.5-7 hours of work into Sergeant Karios. I’m a slow painter! And highlighting takes me a long time because it’s new; drybrushing is a quick, refreshing process by comparison. But every few minis, I get a bit faster at some step or another; I’m learning.

Out now: The Unlucky Isles

The Unlucky Isles [affiliate link], the first system-neutral guidebook for my Godsbarrow fantasy campaign setting, is now on DriveThruRPG.
Categories
Blood Angels Space Marines Miniature painting Miniatures Painting tools Warhammer 40k WIP it good

WIP it good: painting Sergeant Karios

This past weekend I worked in a bit of painting time. Somehow painting my first Blood Angels model feels more like the official start of my army than any of the preceding steps — buying, assembling, priming, and basing.

Audiobook as painting soundtrack

I’m listening to the audiobook of Guy Haley’s Dante (paid link), narrated by Gareth Armstrong, while I paint; so far I’m loving it.

I’ve never listened to an audiobook before, and it’s fascinating to me that three things are happening simultaneously while it’s on: I’m enjoying the book (Armstrong is a great narrator); it’s keeping me company while I paint, much like background music would; and neither book nor painting is distracting me from the other to the degree than I can’t comprehend the book or focus on my painting.

In fact, on that last front, paying attention to the book is actually helping me get into the Zen-like, relaxed-but-focused state in which I like to paint.

Fetch the Emperor’s bucket of Mephiston Red

As ever, Sergeant Karios is first into the breach.

For the Emperor and Sanguinius!

Compared to painting my Space Hulk Terminators, which had a fairly thick, years-old coat of spray primer and a poorly applied, and equally thick, base coat of red covering most of each model, this is night and day. Karios has my worst coat of brush-on primer, as he was first and I was still getting the hang of it, but it’s so nice and thin compared to the Terminators — and thinning my paints, using a proper fine brush, and focusing on the details are also smoothing the road.

Slow and steady: red done, magenta done, starting on gold

There’s also a definite quality difference between the cheap ZEM brush I’ve been trying out for base-coating and my better Citadel and Army Painter brushes. The curled tip on my ZEM brush is going to stay curled, so it’s been relegated to “open areas and spots where I need to poke between things” duty, leaving my better brushes for actual detail work.

Base edge color test

Along the way I took a poke at a Marine’s base with Mechanicus Standard Grey, and while not bad it’s too dark and too tonally close to the terrain color. Fortunately I’ve got more gray on hand now, and I have a hunch Danwstone will be perfect.

Sergeant Karios, fully base-coated

And on Sunday night, just as the light outside starting becoming too dim for detail work, I finished base-coating my first Blood Angel! Sergeant Karios still needs a full touch-up pass before his wash — but shit, that feels good.

Out now: The Unlucky Isles

The Unlucky Isles [affiliate link], the first system-neutral guidebook for my Godsbarrow fantasy campaign setting, is now on DriveThruRPG.
Categories
Blood Angels Space Marines Miniature painting Miniatures Painting tools Warhammer 40k WIP it good

WIP it good: Squad Karios bases, ZEM brushes, Citadel texture paints, Squad Dolos assembled

I know I’m posting a lot these days — I’ve been blogging for almost 15 years: posting twice a day, for one person, is a lot! — but I’m deep in the joy of this extended moment, of being a novice miniature painter falling in love with this hobby. Everything is new for me right now, even little things — like today’s new little things, blending paints and following a basing recipe.

Plus, you know, the whole family is stuck at home — like yours probably is, if you’re reading this around the post date and not years later. Not to make light of the situation, but late February has turned out to be a serendipitous time to get back into painting miniatures.

The larch

Before diving into today’s WIP post, I want to wish everyone reading this well. I hope you and your families are safe and weathering the COVID-19 pandemic as well as possible.

Yore isn’t a news blog, or really a serious blog at all most of the time. It’s a creative outlet, it’s my hobby space, it’s something I work on when it’s fun. I figure you’ve got COVID-19 stuff coming at you from a million angles, so I’m going to keep doing what I do here: talking way too much about miniatures.

Stay safe out there!

Infiltrators, assemble!

After giving myself what I suspect was a glue-induced headache last night, I changed up my assembly routine a bit. Instead of trimming and gluing in small stages, which is more fun, I’m trimming every piece and then assembling them all at once.

The final four Infiltrators

I’m also sticking newly-glued minis in the bathroom with the window open and the fart fan running. So here’s a bathroom shot of Squad Dolos, fully assembled:

Squad Dolos

Sergeant Dolos is front left; the sub-squad leader (pointing hand) is back center. Since my current Blood Angels list doesn’t have room in it for either of the Infiltrators’ special units, the comms guy or the Helix Adept, I had to get a bit creative with the mini that the kit assumes will be the comms guy. (Weirdly, you don’t get the Helix Adept mini in this kit; it’s only in the Shadowspear box, I believe.) I used two Incursor arms, which are included because this kit lets you build either; he’s the sub-squad leader.

ZEM brushes

I also picked up some inexpensive brushes, a ZEM detail set (paid link), since I’m still pretty bad at taking care of my brushes. I’m getting better! But I’m still not great. These are under $2 each, as compared to a $5-$6 Army Painter brush — and available for delivery, which is handy since my family is sheltering in place for who knows how long.

My new ZEM brushes: 0, 10/0, 2, and 3/0

I used the 0 today and quite liked it. It’s got more bristle tension than some of my other similarly sized brushes, which is handy. After a short painting session, though (just skulls and rocks on 10 bases), the tip looked like this:

From what I’ve read, that “tip curl” is a hallmark of cheap brushes in general and cheap synthetic brushes in particular. Still not a bad brush for the price, but I’m now doubting how much I’ll like the finer-tipped ones — since a curl in those can really wreck detail work.

Basing Squad Karios

My first squad has a post tag of its own (they all do; so far that’s Dolos and Cain), in case you want to follow their journey from box of plastic to fearsome painting Space Marine infantry. Today’s step on that journey, now that their primer is cured, is to paint the little rocks and skulls I glued onto their bases and then apply texture paint.

Sergeant Karios, my test pilot

I don’t have a medium gray in my paint stash at the moment, and I want these rocks to be lighter than the texture paint (Astrogranite Debris) but darker than the drybrush color I’m going to use (Grey Seer). So: it’s blending time!

I did a 50:50 blend of Corax White and Mechanicus Standard Grey, thinned it with a bit of water, and went to town.

Rocks: done!

I use a dry palette, so I had to mix up a new batch after about five guys — which is fun, because the little variations in my batches will ensure that my rocks don’t all look like they came from Rocks ‘R’ Us. It tickles me to no end that the best way to get actual rocks to look like they belong with a miniature is . . . to paint them to look like rocks.

Next up were the skulls, in Corax White, followed by a quick Agrax Earthshade wash on them and the rocks.

Rocks and skulls: done

And after that, the texture paint. I gather than Citadel has reformulated this stuff in the past few years, and merged it into their Technical line (it’s no longer actually called Texture), with one of the results being that you can apply it with a brush. But as soon as I opened my pot of it, I was glad I had the Citadel Texture Spreader (paid link): the Astrogranite Debris is a thick, slightly dry paste.

I used the small end of the spreader for all of these. The large end looks ideal for wider bases, but on these I needed the little paddle.

Sergeant Karios

This stuff is fun. Like, really fun. I’m applying it now so I can wash and drybrush without ruining my minis’ legs, but lots of folks apply it last. Using the tiny end of the spreader I was able to manipulate the paint easily enough that I’d have felt just as comfortable doing with a fully painted mini.

After each one, I ran my finger around the edge of the base to corral any loose grit. (Once the whole mini is done I’ll paint the base edges, of course.)

Three down

This paint also feels like cheating. It’s a bit like the magic that occurs when you apply a wash to a base-coated miniature — poof, it suddenly looks a million times better.

Squad Karios, set to dry overnight

Even having not done the finishing steps yet (wash the texture paint > drybrush it and the rocks/skulls > possibly highlight the skulls > add tufts), these are already the best-looking bases I’ve ever done. Miles ahead of my past efforts with just glue and little rocks — and that’s 100% down to this paint. I love this stuff!

That’s probably it for tonight’s hobby session — but damn, this one felt good. As a proof of concept for my “plains of Armageddon” basing recipe, the rocks don’t stand out as much as I’d like — though I’m betting a nice light-colored drybrush will help — but otherwise I’m calling this concept proven. I can’t wait to see what it looks like after the whole process is complete!

Out now: The Unlucky Isles

The Unlucky Isles [affiliate link], the first system-neutral guidebook for my Godsbarrow fantasy campaign setting, is now on DriveThruRPG.
Categories
Blood Angels Space Marines Miniature painting Miniatures Painting tools Warhammer 40k WIP it good

WIP it good: first time using brush-on primer

Priming minis used to stress me out because spray primer is so finicky, and I’ve ruined minis using it wrong. I’ve switched to brush-on primer (Vallejo white primer, paid link) . . . and apparently it still stresses me out. I think it’s because it feels too easy to mess up, and unlike a painting mistake it’s not trivial to fix.

Time to learn how to brush on primer!

Destiny awaits, brothers

After a couple of minis, I’d figured out a few things. One, this stuff dries faster than varnish. With the varnish, I can quickly do the whole miniature and then backtrack to pop bubbles, eliminate puddles, etc. With the primer, the top half of the mini is dry before I’ve finished the bottom half. So I learned to tackle a section, backtrack, and then tackle the next section.

Two, it’s less forgiving than the other two new approaches I’ve used since I got back into miniatures: brushing on wash/shade and varnish. This Vallejo primer is quite good about “self-correcting” — many bubbles will pop on their own, it settles into cracks a bit as it dries, and a thin coat works nicely. But if I dab it on too thick in, say, the vents on a Space Marine backpack and don’t notice it right away, I can’t fix it; with shade and varnish, it’s fixable for some time.

Three, I primed my first couple like they owed me money and I was going to beat it out of them with my brush. As a result, I over-primed them a bit. Once I figured out to put less on the brush and apply it with a lighter touch, the whole process went more smoothly.

Halfway there

As ever, I started with Sergeant Karios — the first mini in my Blood Angels army that I built, and the first for every stage of the process. Even if I mess him up, I like that he’ll always be special because he was the test pilot.

Sergeant Karios, the first to be primed

By my last, things were looking better: a lighter, smoother coat; many fewer bubbles and puddles; and less like an explosion in a cake frosting factory.

The last one I primed
This Squad Karios is now fully operational

The saving grace here — I hope — is that I just finished painting a dozen Terminators that I’d 1) over-primed, 2) with spray primer, making them fuzzy, and 3) bounced around in a Plano box for six years after priming them, and they turned out okay. I can see some bubbles and pooling on my Blood Angels (note to self: Space Marine pauldron edges like to collect primer), but they look better than those Termies did.

Fingers crossed for the painting stage! I’ll be starting with the bases, and I have to say that putting together this post, and seeing Squad Karios up close in photos, makes me more optimistic than I was as I primed them.

Out now: The Unlucky Isles

The Unlucky Isles [affiliate link], the first system-neutral guidebook for my Godsbarrow fantasy campaign setting, is now on DriveThruRPG.
Categories
Blood Angels Space Marines Miniatures Warhammer 40k WIP it good

WIP it good: basing Squad Karios, part one

I’ve got a post queued up for later this week about my basing recipe, but tonight I tucked into the first step. Gotta see if this works, and the best way to do that is to try it.

Sergeant Karios was the first model I built in my Blood Angels army, and he was my starting point tonight as well. (My plan is to paint him first, too; screw trying out new techniques on an “expendable” generic Space Marine.)

Sergeant Karios, who could easily have killed that Ork using only his nipples
From the back

I’m using a little tub of Gale Force Nine Rocky Basing Grit and a box of Citadel Skulls (paid link), and gluing them down now rather than later so I can hit them with a coat of primer at the same time as the rest of the miniature. Superglue for the rocks, plastic glue for the skulls.

Squad Karios

It’s tempting to go wild with rocks and skulls, but 1) I have a concept in mind, and “wild” doesn’t suit it; and 2) I suspect it’s a bit like blood effects, which tend to look overdone about 90% of the time.

Advancing on an objective

Like base-coating, they don’t look amazing at this stage. They look a bit forced and artificial. But my hope is that once I apply texture paint — which will soften the edges of the rocks and skulls, and inevitably cover bits of them — followed by a wash, a drybrush, and some tufts, they’ll look natural and interesting. We shall see!

Tomorrow, when the light is better, I start priming these bad boys.

Out now: The Unlucky Isles

The Unlucky Isles [affiliate link], the first system-neutral guidebook for my Godsbarrow fantasy campaign setting, is now on DriveThruRPG.