Categories
Miniatures Warhammer 40k

New plan: Let the Wookiee (er, Combat Patrol) win

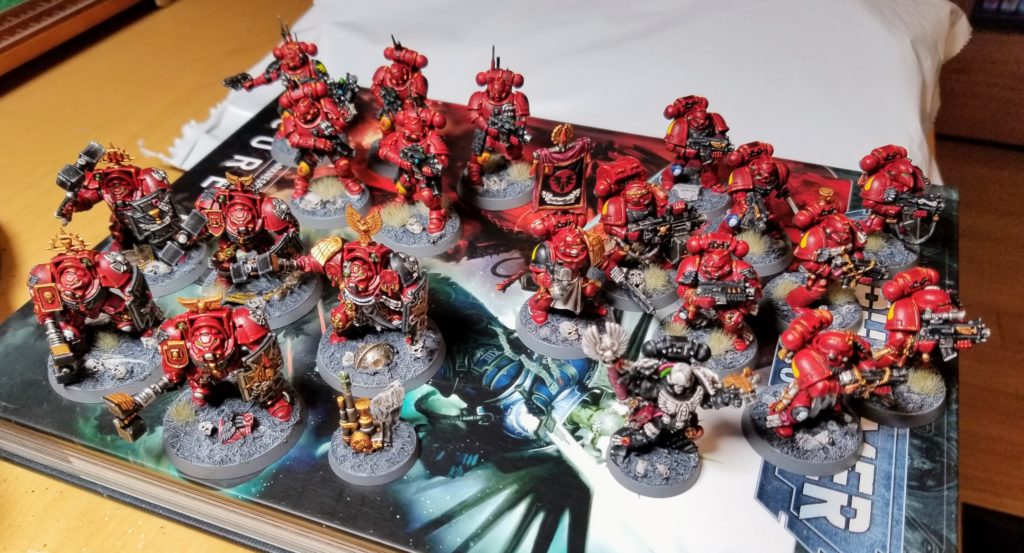
Thinking of painting goals for 40k solely in terms of 2,000-point armies can be daunting. I’m not sure why I’ve never committed to this simple early goal instead: finish a Combat Patrol.

500 points is a much less daunting prospect, and it still leaves room to paint a variety of models. I have 2,000 points of Blood Angels, which can be sliced up multiple ways to create Combat Patrols — but my Deathskulls Orks, Custodes, and Leagues of Votann armies are nowhere near complete. A concrete, play-focused sub-goal would likely have helped me there.

My one finished army to date, 2,000 points of Blood Angels

Hell, I could field a few different painted Ork Combat patrols…except I don’t have any painted HQ options. If I paint Moonkrumpa or my Weirdboy, bam: instant Combat Patrol. Realizing that was what got me thinking about setting a short-term Combat Patrol goal for all three of my unfinished armies.

None of these Combat Patrols involve buying new models. They’re listed in order of how quickly I can complete them, quickest to slowest.

One of many possible CPs I can make out of my Blood Angels army: Squads Dolos (rear), Barakiel (left), and Karios (right), led by Chaplain Arrius (front)

Deathskulls Orks

The smallest goal, paint my simplest HQ option:

  • Weirdboy, “Warpmek” Nakk (a converted Age of Sigmar Weirdnob Shaman)

With my painted Boyz, Grots, Kans, Trukk, and Deff Dread, there are at a handful of viable Combat Patrols I can make with the addition of just my Weirdboy.

Moonkrumpa cries out, “Paint me!”

Adeptus Custodes

Finish painting 3x of these Custodian Guards, who are mostly painted:

  • Custodian Guard Squad, Inkaef, Halfden, Konstantyn, Baptiste, and Adomako (5x Sentinel Blade and Storm Shield)

And then paint these 4x models (all their gold is painted and washed, and their bases are done):

  • Captain-General Trajann Valoris (Warlord)
  • Custodian Guard Squad, Telvaer, Anselm, and Sadiki (3x Guardian Spear)

I think with the changes in 9th I need to glue Misericordia to some of my custard lad models; they weren’t free when I built this army.

Last seen in…holy shit, 2021. It feels like a year ago, but it’s been two years!

Leagues of Votann

I have precisely zero of these guys fully painted, and only a few partially base-coated. I also don’t own any of my favorite models for this faction, because Hearthguard were impossible to find when I started acquiring this army. This is the fuzziest goal — I don’t even have names for my models yet! — and the furthest from completion.

Finish painting 5x Hearthkyn (based and primed), and then paint another 5x of them:

  • Hearthkyn Warriors (7x Warrior, 1x Warrior with Magna-Rail Rifle, 1x Warrior with EtaCarn Plasma Beamer, lead by 1x Theyn with Concussion Gauntlet and Autoch-Pattern Bolt Pistol).

Finish painting this squad of Beserks (based and partially painted):

  • Cthonian Beserks (4x Concussion Mauls, 1x Mole Grenade Launcher; plus the 2x Mole Grenade models)

And paint an HQ option (unassembled):

  • High Kâhl (Rampart Crest, Mass Gauntlet, Autoch-Pattern Combi-Bolter)
Dang, I lost motivation so hard that this is the only photo I have of my WIP Votanni…and it’s the very first one I took

Hither and thence

That’s 26 models, ignoring the fuzz factor (the Mole Grenade team is two minis on one base, etc.).

If I’m in a good groove, I can take one squad of five troops from sprue to sealed and ready to play in a week, although two weeks is more realistic. Some of these models are considerably more complex than Joe Space Marine, notably Moonkrumpa and Trajann, so 26 models would take me something like 5-10 weeks to paint.

Under three months — good groove permitting! — to go from one finished Combat Patrol to a whopping four would be awesome.

But the obvious step one is to go from one CP (Blood Angels) to two by painting a single model: a Deathskulls HQ.

6/19/23 update: Well, maybe not thence. Now that I’ve read up on the details of Combat Patrols in 10th Edition, my approach in this post isn’t viable anymore. Combat Patrols are These Specific Minis With Special Datasheets, played against one another.

I can’t see GW sneaking rules for custom Combat Patrols into the core book; the updated CP mode is in lockstep with the dedicated CP boxes. There’s nothing wrong with just making 500-point armies and playing 40k, of course, but from what I’ve read the current edition isn’t balanced around that option.

That said, “Have an achievable shorter-term goal” is still a good approach. Maybe that goal is to paint 1,000 points (the new floor for vanilla 40k) while ensuring that a viable Kill Team is created in the process. A thousand points is like six months of painting for me, assuming I stay focused; the Kill Team portion would only take maybe a month, making it the initial goal.

So having just started working on Grey Knights, maybe I paint a squad of 5x Brotherhood Terminators first because I love them, paint a 10-strong Strike Squad next and make sure their wargear lines up with Kill Team, and then finish off the remaining 500 points for a viable 1,000-point 40k army.

Digging Yore? Check out my book!

The Unlucky Isles [affiliate link], the first system-neutral guidebook for my Godsbarrow fantasy campaign setting, is available in print and PDF.
Categories
Deathskulls Orks Finished miniatures Kill Team Miniature painting Miniatures Tyranids Warhammer 40k

My 2021 and 2022 in miniature painting

In early 2021, I did a year-end retrospective photo for 2020 — the year I got back into miniature painting. I painted 97 miniatures that year, and I had a blast; returning to an old hobby I’d never quite clicked with (it’s complicated) was a perfect lockdown activity.

By contrast, 2021 saw my enthusiasm flagging. I started the year strong, but finished just keeping my hobby streak alive. I didn’t do a year-end photo.

2022 was about the same as 2022. I wasn’t planning to do a photo for last year, either, for pretty much the same reason: I figured it’d be disheartening.

But in December I got back into BattleTech, and also saw how close I was to finishing some killer 40k terrain pieces, and got excited to crank some stuff out. So I finished the year stronger than expected, and that led me to get off my butt and take retrospective photos for 2021 and 2022.

Everything I painted in 2021

In 2021, I painted Deathskulls Orks for my Waaagh!, Moonkrumpa’s Megalootas

I painted 15 models in 2021: two Killa Kans, Skraggit (left) and Stikkit (right); a Deff Dread, Facepeela; my Taurox Trukk conversion, Da Fancy Wun; and a squad of Boyz, Thragg’s Deff Ladz.

2021 was my first time trying an ambitious conversion, mashing together a Taurox with an Ork Trukk; I documented the whole process in a five-post series. (Here’s part one.) 2021 also marked the first time I used green stuff as well as the first time I magnetized any models. (Facepeela’s lower arms are magnetized.)

As I got these minis off the shelf for their photo, it was like seeing old friends. I’m not an amazing painter, but every mini I finished in 2021 brought me joy — and they still do. Skraggit and Da Fancy Wun are two of my favorite models I’ve ever painted.

Everything I painted in 2022

I set out to finish a Kill Team board’s worth of terrain in 2022, and while I didn’t quite get there I came pretty close.

All of the 40k terrain I painted in 2022, plus five Genestealers and a mantis

In 2022 I painted 25 models: 18 pieces of 40k/Kill Team terrain, 6 Genestealers (for Kill Team), and a giant mantis as a Christmas gift for Lark.

Terrain feels all fast and exciting at first, with a big ol’ sprayed-on primer and base coat in one, and a big ol’ wash. And then the details start to add up, and add up, and it’s not a breezy summer morning anymore. But it’s still fun!

I enjoy painting terrain. It’s a great palate cleanser, with big brushes and bold sections and — with the vibe I’m going for — plenty of excuses to weather with gusto.

It was also fun combining two 40k terrain lines, Manufactorum and Mechanicus, into what I think is a cohesive dystopian manufacturing facility. Both incorporate tea/bone and dark red, and I’ve built all my stuff to be durable, interoperable, and still offer a decent amount of customization for layouts and variations.

Here’s a top-down shot showing one possible layout.

Most of my finished 40k terrain

All of the walls/railings on the gantries are placed so that pieces can still connect in a couple places. Ladders are placed and oriented with the same goal in mind. And all the ground-level pipe connection points are tea/bone, so (hopefully) the two terrain sets blend into one another.

I guess technically I’m combining the Munitorum line as well, but those containers, crates, and barrels are so plug-and-play it hardly counts. I do them in colors not present in the other stuff, so they’ll stand out.

I’m glad I got all this stuff out an photographed it. 2021 and 2022 combined didn’t match my output in 2020, but I painted some stuff I’m proud of — and hopefully I’ll get to use it eventually.

And I got a surprise in January: Lark expressed an interest in playing 40k and Kill Team. I’m pretty sure I can cobble together two Kill Teams or two 500-point armies, so if I finish my last few pieces of terrain — a huge gantry/tank combo, another ruined building, a sacred radiator, and some scatter terrain — the two of us could get some games in this year. That would be awesome!

Digging Yore? Check out my book!

The Unlucky Isles [affiliate link], the first system-neutral guidebook for my Godsbarrow fantasy campaign setting, is available in print and PDF.
Categories
Deathskulls Orks Finished miniatures Lightbox photos Miniature painting Miniatures Warhammer 40k

Mukkit’s Murda Mob: now a full complement of 3 Killa Kans

I started Killa Kans two and three — Stikkit and Skraggit — back in April, and finished them up on Thursday night. They join Mukkit, my final mini of 2020, to form Mukkit’s Murda Mob, which bring my Deathskulls army up to 591 points.

The Killa Kans kit is incredible — just absolutely packed with modularity and personality — and I had a great time with these two (as I did with my first Kan).

Waaagh!

Since I have a better lightbox now, I figured I’d roll Mukkit in as well and have the whole gang in one photoshoot.

Here’s the whole mob, at what I hope are their golden angles:

Mukkit’s Murda mob, L to R: Stikkit, Mukkit, Skraggit

I crossed my fingers when I painted each Kan a different shade of blue, but now that they’re all in one place I like that effect. In combination with my other units, it looks suitably hodgepodge for Orks.

And here’s each Kan individually:

Mukkit
Skraggit
Stikkit

…And then shots of the whole mob from all four sides.

Head-on
Left side
Rear view
Right side

The space-snail Skraggit is about to stomp on is from an Age of Sigmar kit, the Squig Herd. Wanting to use him prompted me to pose Skraggit mid-stomp, creating Skraggit as a character at the same time. Here’s his close-up:

Squeesh

I made a little slimy trail for him by forming a shallow trough in the texture paint, applying extra Agrax Earthshade to that area, and then skipping it when I drybrushed the rest of the base. It shows up best from above:

Slimy

Next up is my Oldhammer project: 10 vintage ’80s/’90s metal Boyz, include 2/3 of the Goffik Rok band, with a little light kitbashing to bring all their wargear up to a reasonable WYSIWYG standard for 9th Edition. Too rowdy to be led by a Boss Nob, they’re oldsters who don’t play by the rules — and love to play their looted ‘oomie instruments. Their draft name is Deff Metal Mayhem.

Digging Yore? Check out my book!

The Unlucky Isles [affiliate link], the first system-neutral guidebook for my Godsbarrow fantasy campaign setting, is available in print and PDF.
Categories
Deathskulls Orks Finished miniatures Lightbox photos Miniature painting Miniatures Warhammer 40k

Putting my finished Taurox Trukk conversion in the new lightbox

I finished my Trukk! I built Da Fancy Wun back in February, and worked on lots of other stuff at the same time (painted 11 Boyz, built two Kans and a Dread, converted my Warboss)…but it still feels like I’ve been working on this Trukk forever. Back of the napkin, I’d say it took me somewhere between 35 and 45 hours from sprue to varnished and ready for the table.

This is the final post in a five-post series documenting this Trukk. Assembly is in part one and part two, the color guide is in part three, and a few WIP shots are in part four.

Many thanks again to Hobbyistgirl for her conversion (build process and painted Trukk), which was my inspiration to try this and my guide for large portions of the assembly process. Her Trukk is awesome!

Regular readers might notice that there’s no shot of Da Fancy Wun in casual light. That’s because I got a new lightbox (full rundown later in the post), and can now take photos good enough that they abrogate the need for a casual shot.

Da Fancy Wun, my converted Taurox Prime/Trukk, at its golden angle
Front view
Left side
Rear view
Right side
Top view

The Emperor’s eye grows larger

After a year-plus of steady painting, and some struggles with my first lightbox — notably taking photos without the lower half of each mini in shadow, and straining to squeeze full 10-model squads into it — I decided it was time to upgrade. I went from 12″x12″x12″ to 16″x16″x16″, which doesn’t sound like a big jump but is actually so large that I’m very glad it folds up nicely, and from one fixed ring of lights in the top to two repositionable light bars.

This FOSITAN lightbox (paid link) cost about $60 (three times what my smaller DUCLUS box cost), and it’s totally worth it.

Every interior surface is shiny silver, but dimpled so that it provides reflectivity without hotspots. You can shoot from the front or top, and the two light bars can clip onto the edges in either shooting configuration. Those bars also tilt, and if you want to diffuse the light when shooting from above there’s a translucent white square (with a hole in the middle) you can add between the bars and the object you’re photographing.

Unlike the DUCLUS, it doesn’t offer multiple color temperatures — but it does offer a lovely neutral white, and that was the only temperature I used on the old box anyway. The bars are dimmable and it includes several rather nice plastic backdrops; after a few test shots, I’m currently using the lowest setting and the grey backdrop.

I couldn’t resist reshooting Thragg’s Deff Lads, who I felt got especially short shrift in their lightbox session, along with a mixed-unit group.

Thragg’s Deff Ladz
Da Fancy Wun, the Deff Dread “Facepeela,” a boy from Thragg’s Deff Lads (left), a Boy from Skrudd’s Krumpas (rear), and one of Runt-eata’s Grots (right)

The only problem is that now I want to reshoot every lightbox photo I’ve taken, and that doesn’t sound like fun just now. So I probably won’t! But I’m going to enjoy better lightbox pics going forwards.

Da Fancy Wun brings me to a pretty respectable 476 points (9th Edition rules), with 35 models painted (32 infantry, 3 vehicles). Next up is probably two more Killa Kans.

Digging Yore? Check out my book!

The Unlucky Isles [affiliate link], the first system-neutral guidebook for my Godsbarrow fantasy campaign setting, is available in print and PDF.
Categories
Deathskulls Orks Miniature painting Miniatures Warhammer 40k WIP it good

WIP it good: Ripfist, Skraggit, Stikkit, smoother magnetization, endlessly kitbashing Moonkrumpa

I’ve learned some lessons about drilling, magnetization, and efficient assembly over the past 14 months, and I applied all of them to “Ripfist” Gorg, my second Deff Dread for Moonkrumpa’s Megalootas.

Had I done things this way with “Facepeela,” his build would have gone much more smoothly!

Ripfist the Deff Dread and the two Killa Kans I just finished building, Stikkit (center) and Skraggit (left, about to stomp on an adorable monster snail from the AoS Squig Herd kit)

Drill bullet holes before assembly

Yeah, it works fine afterwards — but doing it first allows me to exert as much force as I like on the piece, while holding it wherever I like, without worrying about breaking an assembled miniature.

Magnetize before assembly, too

Soooo much easier this way! It involves drilling, so the above applies here as well. But working with a single loose piece also means less stuff I might accidentally glue together — and I can clean up the inside of the holes before putting the model together. My first Deff Dread, Facepeela, still has a couple shavings rattling around inside his body.

Ensure cross-compatibility

The whole point of magnetizing my two Deff Dreads (two…so far!) is to enable weapon-swapping one each model, but by matching polarities on both models I can also freely mix and match between them. While building Ripfist, I carefully checked (and re-checked, and re-re-checked, and re-re-re-checked) each magnet against Facepeela and the component of Ripfist that I was magnetizing.

I also paid attention to what went where. So Facepeela has his KMB on the right and Ripfist has his on the left. If I want one of them to have two KMBs, they’re both ready to accept that swap.

Facepeela (painted) and Ripfist’s pieces, ready to check magnet compatibility and get underway (and one of my busiest work area pics to date!)

Trim, clean up, glue

With larger models, I’m in the habit of clipping pieces off the sprue, tidying them up, gluing them, and then starting on the next section while the first section dries. But with the two Killa Kans I just built, I tried clipping 100% of the parts, then sanding/filing 100% of the parts, then gluing the model all at once — and dang, but that’s both easier and more fun!

Ripfist trimmed, sanded, and ready for section-by-section assembly

Moonkrumpa: never actually finished

It’s becoming a bit of a running personal joke that I’m constantly tinkering with Moonkrumpa. This time around the impetus was building the other Warboss in my army, “Bigtoof” Skragga (to get a Morkanaut into my list, I needed two detachments), and this incredible, dynamic sculpt screams Warboss in a way that Moonkrumpa doesn’t.

Even with Moonkrumpa 3.0’s height, banner poles, looted wargear, bulk, and customized base, it isn’t immediately clear at a glance which of the two is my Warlord. Based on an idea I saw on Reddit, I starting tinkering with him again.

Bigtoof (left) and Moonkrumpa (right)

Having done more kitbashing — and a full-fledged conversion — since I first built Moonkrumpa, I’m a bit more confident about it now. My bits box has more stuff in it, too.

This kitbash does mark the first time I’ve significantly altered the silhouette of the original model, and you could certainly argue that I’ve strayed from WYSIWYG wargear by adding a second claw — and I’m not sure how I feel about that! The original Big Mek in Mega Armour mini is bulky, but doesn’t have a huge “wingspan,” whereas — by design — my version sprawls to the top, front, and sides.

It’s not “suddenly, he’s Ghazghkull,” though, and it feels consistent with a rule of thumb I saw on Reddit: Your Warboss should be the largest infantry model in your army. To boot, I can always take the stratagem Da Biggest Boss for 1 CP (making him literally a bigger boss), or give him Super Cybork Body to represent the Killa Kan arm in game terms.

More importantly, it’s a fun kitbash, it brings me joy, and it’s exactly what the Mek leader of a Mek-driven Waaagh! should have going on.

Moonkrumpa 4.0

Now there’s no mistaking who’s in charge here:

Moonkrumpa (left) and Bigtoof (right)

As I was wrapping up this revision and re-kitbash, I looked at the time and realized that I’d been at it for five hours! But I couldn’t have done it all up front, when I first built Moonkrumpa, because I didn’t know as much about Orks, my army, or kitbashing when I started this army. Even though it’s meant more work modifying him after the fact, it’s been a fun process.

Hulkling update!

My bonsai tree, Hulking, dropped a few leaves during his first couple of days with me — which Alysia said was probably just because he was adjusting to the new environment. She was right. After a little adjustment period, not only is Hulkling not dead, he seems to be thriving.

A freshly watered Hulkling

I’ve had to prune new shoots several times, and more are always popping up. I’ve got a little routine for where to place him during the day for the right amount of sunshine, including rotating which side faces the window, and he seems quite content.

Digging Yore? Check out my book!

The Unlucky Isles [affiliate link], the first system-neutral guidebook for my Godsbarrow fantasy campaign setting, is available in print and PDF.
Categories
Deathskulls Orks Miniature painting Miniatures Warhammer 40k WIP it good

WIP it good: Da Fancy Wun, my Taurox Trukk conversion

I finished Da Fancy Wun last night, so while the varnish is curing I figured I’d post the WIP photos I took along the way.

This is the final post in a five-post series documenting this Trukk. Assembly is in part one and part two, the color guide is in part three, and the finished product is in part five.

Bottoms of wheels base-coated, shaded, and varnished (so the paint won’t rub off the spikes while I work on the rest)
Clown car aesthetic coming together
The Squig is probably my favorite part of this Trukk
Fully base-coated, waiting for touch-ups (with my amateur green stuff kintsugi on the mug in the background)
Touched-up and ready for shading
With vehicles, I always start with the underside

There are three great milestones in any miniature-painter’s life: drinking your brush-rinsing water (I haven’t done this, but I’ve come closer than I’d like), shaking an open pot of paint (check!), and spilling an entire bottle of Citadel shade paint.

Inky ghost says hi
This was the point where I worried I’d gone too dark with my shading
Fully shaded, starting in on highlights

Overall I’m pretty happy with how Da Fancy Wun turned out. There are things I’d do differently on my next Trukk, but that’s always the case. I’m looking forward to getting it into my new, larger lightbox to see what it looks like up close.

Digging Yore? Check out my book!

The Unlucky Isles [affiliate link], the first system-neutral guidebook for my Godsbarrow fantasy campaign setting, is available in print and PDF.
Categories
Deathskulls Orks Miniature painting Miniatures Warhammer 40k

Converted Taurox Trukk color guide

This Trukk — Da Fancy Wun — is an experiment in more than one way (it’s my first conversion!), and on the color front I’m trying two things: four recipes for blue on the same model (Trukk parts, Taurox body, the gunner’s armor bits, and the signature blue fender and gunner’s war paint); and splashes of colors that are uncommon or unseen in the rest of my army (so far), like gold and dark red, for a bit of a “rusty, ramshackle clown car” aesthetic.

This is the third post in a five-post series documenting this Trukk. Assembly is in part one and part two, a few WIP shots are in part four, and the finished product is in part five.

Da Fancy Wun fully base-coated and touched up, waiting for shading (March 2021)

I’ve pulled the Taurox Prime recipes straight from GW, twiddled a bit; most of the others are from GW’s site or White Dwarf. As always, shades/washes are in italics.

Worth noting: I painted, washed, and sealed the metal and rubber on the very bottom of all six tires (and let the sealant fully cure) before working on the rest of the Trukk, so as to avoid rubbing off the paint every time I set it down. This proved to be a good idea — and I wish I’d done the whole tire, not just the bottom, because I rubbed all the paint off many of the rivets on the tires over the course of painting the rest of the model.

Also worth noting: I highlighted the rubber portions of the tires before deciding how to weather them, and the weathering approach I chose basically erased all of those highlights. A step to skip next time!

  • Taurox body: Russ Grey > Agrax Earthshade > Thunderhawk Blue > Fenrisian Grey
  • Taurox gold: Retributor Armour > Agrax Earthshade > Gehenna’s Gold > Auric Armour Gold
  • Taurox red panels: Khorne Red > Agrax Earthshade > Wazdakka Red > Squig Orange
  • Trukk parts blue: Macragge Blue > Agrax Earthshade > Calgar Blue > Fenrisian Grey
  • Trukk tire rubber: Abaddon Black > Skavenblight Dinge > Stormvermin Fur
  • Trademark blue fender: Caledor Sky > Drakenhof Nightshade > Teclis Blue > Lothern Blue
  • Metal: Leadbelcher > Nuln Oil > Ironbreaker
  • Brass/bronze: Warplock Bronze > Agrax Earthshade > Brass Scorpion
  • White glyphs/decorations: Celestra Grey > Agrax Earthshade > Ulthuan Grey > White Scar
  • Ork gunner: From my Boyz color guide, skin #6 (Caliban Green base), blue #3 (Thousand Suns Blue base), black pants, brown shirt, and Zandri teeth/nails.
  • Squig skin and NOS tanks: Mephiston Red > Carroburg Crimson > Evil Sunz Scarlet > Wild Rider Red
  • Squig eyes: Averland Sunset > incidental but helpful Carroburg Crimson wash when I do the face > Yriel Yellow
  • Squig teeth and nails: Zandri Dust > Seraphim Sepia > Ushabti Bone > Screaming Skull
  • Squig gums: Screamer Pink > Carroburg Crimson > Pink Horror > Emperor’s Children
  • Fuel tank: Averland Sunset > Agrax Earthshade > Yriel Yellow
  • Headlights: Moot Green or Averland Sunset > Agrax Earthshade > Moot Green or Yriel Yellow
  • Roll bar wraps: Zandri Dust > Seraphim Sepia > Ushabti Bone > Screaming Skull
  • Severed head flesh: Rakarth Flesh > Druchii Violet > Pallid Wych Flesh > White Scar
  • Severed head hair: Dryad Bark > Agrax Earthshade > Gorthor Brown > Baneblade Brown
  • Weathering and embellishments: These steps all happen after the rest of the mini is 100% done (including highlights); not every Ork uses all of them:
    • Checks: Macragge Blue and Corax White; I wrote a little guide for these
    • Chipping: Apply dots of Leadbelcher on the high points, edges, and surfaces where paint would naturally have been worn off
    • Battle-damaged edges: Tiny dot/line of Rhinox Hide > mirror the same shape with a line underneath it of whatever blue base coat I used for that area (Warhammer TV reference video)
    • Bullet holes: Highlight the edges of the hole in the appropriate color (e.g. Calgar Blue), then apply Leadbelcher to make it look like the paint was blown away
    • Built-up rust In spots where it can accumulate over a long period, such as on and around bolts, apply thinned-down Skrag Brown
    • Rusty streaks: Thinned-down Skrag Brown > thinned-down Fire Dragon Bright (like I do on my 40k terrain)
    • Verdigris: Nihilakh Oxide
    • Grime: Sponge on Rhinox Hide
    • Caked-on grime: Typhus Corrosion
    • Dusty, dirty tires: Thinned-down 50/50 Dryad Bark/Zandri Dust > thinned-down Baneblade Brown in the deep crevices > Tyrant Skull drybrush > Seraphim Sepia pin wash to reestablish the crevices (I followed this Way of the Brush tutorial, but modified it based on my colors on hand and used water instead of Lahmian Medium; this approach isn’t ideal for the metal/rubber combo tires on the Trukk, though)

I have to varnish Da Fancy Wun in two stages — tires and undercarriage first, curing for 24-48 hours upside down, and then the rest — so it’s going to be a few days until I can get it into my (new!) lightbox for some photos. It’s been a fun ride!

Digging Yore? Check out my book!

The Unlucky Isles [affiliate link], the first system-neutral guidebook for my Godsbarrow fantasy campaign setting, is available in print and PDF.
Categories
Deathskulls Orks Finished miniatures Lightbox photos Miniature painting Miniatures Warhammer 40k

At long last, Thragg’s Deff Ladz! Plus six variations on Ork skin

I built the first of Thragg’s Deff Ladz (my second mob of Boyz for my Deathskulls Ork army, Moonkrumpa’s Megalootas) on January 17th, and have chipped away at them slowly but surely for the past two months. Since I’ve mostly painted rank-and-file Orks so far, this 98-point unit brings me up to 356/2,000 points and 34 finished models.

Back in February, after I abandoned the notion that I was going to paint these lads in two batches; painting 11 minis at once kind of bogs me down, but I can’t argue with the logic of it

I’m not painting at the same pace in 2021 that I did in 2020. And that’s okay! Even if I only do 5-10 minutes in a given day, my hobby streak remains unbroken (today is day 387) and those few minutes are still more than the zero minutes I was putting in for many, many years.

Part of it is that after a year in isolation, the prospect of actually playing 40k still seems like it’s probably 8-12 months away. I’m still enjoying miniature painting as a hobby, but now I have one finished 2,000-point army — the goal of finishing a second feels less urgent. So I’m taking it easy, not gunning the engine and risking burnout.

Along the way, I also picked up a second paint rack. My whole paint library is now accessible, with room to spare. I’m an organized person, by and large, and this appeals to me greatly!

Man, I picked a weird-ass angle for this shot

Anyhoo, time for some Boyz! Let’s fire up the ol’ lightbox.

Get stuck in, you gits!

Thragg is in the center; my favorite in the mob is on the far right, biting that Space Marine dagger blade-in because Orks are not so bright
Rear view of the first five
The second batch; I also like the rightmost mini a lot
Rear view of the back six

And as always, a casual shot (a mix of natural and artificial light):

All 11 of Thragg’s Deff Ladz

Ork skin tones

With Thragg’s Deff Ladz complete, I’ve now used all six skin tone recipes that are currently in my main Ork color guide (plus 3/5 of the recipes I use for Deathskulls blue, and both of my teeth/nails options). The Ladz are a mix of two quite different schemes, one based on Castellan Green and the other on Caliban Green. I love the Caliban version; they start out super-dark green (with a black wash) and highlight up to a very cartoony look.

Now that I’ve tried them all, I took four photos showing each of the six colors, all in the same order (which is the order in which they currently appear in my color guide). So in terms of base paint > shade paint, that’s:

  1. Waaagh! Flesh > Biel-Tan Green
  2. Waaagh! Flesh > Athonian Camoshade
  3. Deathworld Forest > Athonian Camoshade
  4. Deathworld Forest > Biel-Tan Green
  5. Castellan Green > Athonian Camoshade
  6. Caliban Green > Nuln Oil
It took some doing to find one of each with no war paint on their left arms!
Same models, but in a full-body view
And again, but this time in a casual shot with different lighting
Same lighting, full-body view

Recipes 1 and 2 are almost identical to one another; ditto with 3 and 4; really, I have four major recipes with two variations. The variations only differ in which shade paint is used, and unless they’re side by side and you know to look for it that difference is hard to spot. But I like variety in my motley crew, and even just counting the four “main” recipes I’ve got quite a bit of it in my army (all tied together, I hope, by their shared palette of secondary colors and especially by their war paint).

Similarly, my blue recipe built on Kantor Blue is quite similar to the default Macragge Blue version (at least the way I wash and highlight them). But Thousand Suns Blue makes for a vibrant and quite distinctive finished product; I really like that one.

Next up is Da Fancy Wun, my Taurox/Trukk conversion, which is currently primed, partially painted, and waiting for the sealant on the bottom-most wheel spikes to cure.

Digging Yore? Check out my book!

The Unlucky Isles [affiliate link], the first system-neutral guidebook for my Godsbarrow fantasy campaign setting, is available in print and PDF.
Categories
Deathskulls Orks Miniatures Warhammer 40k

Converting a looted Taurox Prime into an Ork Trukk, part 1

One of the things that drew me to Orks for my second 40k army was the conversion potential — which goes double for the Deathskulls, who are notorious for looting stuff before the battle has even ended. When I was looking for Trukk conversion ideas that I thought I could pull off, I came across two awesome posts by Hobbyistgirl where she converted and then painted up a Trukk built around a looted Taurox.

I’ve dabbled in kitbashing but never done any proper conversion before, so this project was a bit daunting — but also quite exciting. Uncharted waters!

This is the first post in a five-post series documenting this Trukk. Further assembly is in part two, the color guide is in part three, a few WIP shots are in part four, and the finished product is in part five.

Spoiler alert: this photo is from the end of part one

Gits love maffs

Grab a shaker of salt for this bit, because holding pieces in place to measure things isn’t the most exact science, and I’m not building a stock Trukk and Taurox just to have them on hand for easy measurements. That said, my measurements/notes for the salient dimensions are as follows:

  • Length:
    • Trukk maximum (ram in place) is 6 1/8″, but the ram is optional so 5 3/8″ is also a legal size
    • Taurox with bumper but without rear door (which I know I wouldn’t be using) is 4 1/4″
  • Width:
    • Trukk measured at the widest point on the side armor plates is 3 1/8″
    • Taurox at the rear bumpers (skipping the tread units because I know I won’t be using the rear ones) is 2 5/8″
  • Height from bottom of wheel/tread to top of chassis:
    • They’re damn near identical at the highest point in the rear, so I didn’t measure

The beauty of Hobbyistgirl’s conversion is that she neatly solves two problems at once: Since the Taurox is too short, lengthen it with the Trukk bed; and since it’s too narrow, widen it by including the stock Trukk bed’s side armor. The height difference is negligible, so that’s not a problem.

I want an Ork instead of a turret, so my Trukk will be about 1/2″-3/4″ higher — in the cab area only — than a stock Trukk. The tallest parts of the stock Trukk are the roll bars and raised boarding ramps, and those will still be about the same height as usual.

As always, my goal is to do nothing that could be considered modeling for advantage. My aim is to preserve the dimensions and silhouette of the Trukk as closely as possible, and if in doubt to err on making it too large (which is a disadvantage, as it’s harder to fit behind cover).

Commence flailing about

It took me a surprisingly long time to actually glue two things together and start this project, because one significant screw-up could mean wasting two costly model kits on a failed project. I did a ton of noodling, test-fitting, measuring, and fiddling before putting glue to plastic.

When I did start, though, I started with what I knew and loved about the foundation of Hobbyistgirl’s conversion: the Taurox cab.

Taurox cab and chassis plus Trukk bed

I cut the sides of the cab at the same point she did, and then I roughed them up a bit so it would look like the Orks had done a crude chop job. I left the engine housing off because I’m doing it differently than she did; that step comes later.

I used the same two Trukk bed pieces she did to seal the open back of the cab (I have no interest in painting the interior), and snipped what I suspect is the same chunk out of the top one so I could “slot” the Taurox roof right into it. The bottom one needed a bit of shaving to sit flush. (Later on, I’ll cover the gaping holes with Ork scrap.)

Trukk bed pieces, with the top one modified to accommodate the Taurox roof
Top view showing how the Taurox roof slots into the Trukk bed

I played with tons of ways to attach the wheels, and ultimately decided that I didn’t like the idea of this fairly heavy kit being held on by tiny contact points on the chassis. So I settled on combing the chassis from both vehicles.

By cutting the Trukk chassis in half, removing most of the lateral supports from the center, and then flipping the Trukk axles upside down, I got the height and amount of glue contact I wanted. Mind you, this Trukk now has the ground clearance of an overladen minivan…but then again, 1) it’s Orks, 2) it just has to look right, and 3) Orks have a unit that’s a teleporting dragster with basically zero ground clearance. It’s fine.

I started by filling the gap between Trukk bed and Taurox chassis with a couple of Taurox bits I’d trimmed off earlier.

Does it look like crap? Yes, indeed it does

Then I added shims of scrap plastic (center supports from the Trukk chassis) where the rear portion of the Trukk chassis was going to go.

I circled the bits of shim that I added to the chassis

Next I glued on the chassis, then the axles (upside down, relative to how the Trukk kit wants them used).

Shimmed rear portion of Trukk chassis with Trukk axles flipped upside down

For now, the wheels are just friction-fit; I’ll glue them on later so I can position them correctly — because, unsurprisingly, with all the shit they have bolted onto them they’re not uniformly round.

I wanted to keep the oil drum, and it fits, so I glued the front Trukk chassis in place with that bit intact. (I also left the front ends untouched, in case they’re helpful in mounting the bumper later on.) Then I dropped in the front axle, picking the orientation that made it level with the rear wheels (even though the mechanics of this piece now make no sense in the real world).

I had to shave the boxed area with my hobby knife to get it to sit snugly around the protrusion on the Taurox chassis

I set it down to make sure all six wheels touched the level countertop, and that the Trukk itself was reasonably level (it’s not perfect).

We’ve come full circle

I wanted zero chance I’d break anything off while fiddling with my next steps, so at this point I let the undercarriage dry and cure overnight.

Next up is the front end, which I’ll be building around the big-block Trukk engine. The bed will be framed out per the Trukk kit, and I’ve already test-fitted the Ork gunner, his pintle mount, and the Wreckin’ Ball, so that should be pretty straightforward as well.

Digging Yore? Check out my book!

The Unlucky Isles [affiliate link], the first system-neutral guidebook for my Godsbarrow fantasy campaign setting, is available in print and PDF.
Categories
Deathskulls Orks Finished miniatures Lightbox photos Miniature painting Miniatures Warhammer 40k

First finished mini of 2021: Facepeela, Ork Deff Dread

My first mini of the new year (although, having been completed on January 23rd, “new” is a bit of a stretch) is my first Deff Dread, “Facepeela” Snarg. Facepeela is also the first model I’ve ever magnetized, a process that was not without its problems…leading to this also being the first model I’ve ever done that incorporates green stuff (Kneadatite).

Facepeela brings my Waaagh! up to 308 points. Still a ways to go!

I heart big and stompy

“Facepeela” Snarg’s Golden angle
Front view
Left side
Rear view
Right side

I also experimented with using mostly natural light (no lightbox) and just a piece of printer paper as a backdrop. It’s more, well, natural than the lightbox, but I don’t think I have this technique quite figured out yet. Here’s Facepeela’s golden angle shot that way:

Golden angle, mostly natural light, piece of paper as a backdrop

This kit was fun to build and paint, validating my choice to make my first Ork army list about 50% vehicles — including a second Deff Dread, three Killa Kans, and a Morkanaut. Not too surprising, as it’s basically a super-sized Killa Kan — and that’s one of my favorite 40k kits I’ve ever built.

Just for fun, here he is alongside a sampling of the Orks I’ve painted so far:

Facepeela, Mukkit, and a few of Skrudd’s Krumpas and Runt-Eata’s Grots

Green stuff for a green lad

The necessity for green stuff came about when, as I was working on highlights, I noticed that the secure position for his lower saw arm — the position in which it stayed in place the best, resisting drooping — only worked because the arm was braced against the socket, scraping paint off the edge every time I snapped it in place. I tried Blu-Tack, and that was fine, but I didn’t like the idea of leaving a blob of it on there forever.

Blithely assuming that green stuff was just easily-moldable putty that would dry into something about as hard as plastic, I decided to go that route instead.

Turns out, green stuff is incredibly sticky, not terribly easy to work with, and dries semi-soft. But it did the job better than Blu-Tack, as it’s hard enough to stay in place and can be primed/painted/varnished. I didn’t take any pictures of that process (because it was pretty frustrating), but it was basically: apply green stuff in a blob much larger than needed, just in case; let it cure overnight; trim it to fit with a hobby knife, slowly, testing the fit with every trim; prime and paint normally; two coats of varnish (and two in the socket, too).

My second Dread isn’t using this arm, so I might build the arm again, drill it better this time around, and replace the one currently on Facepeela. Or not! It works, and unless you’re looking for it the ugly blob of green stuff isn’t noticeable.

Deff Dread color guide

My Deff Dread’s base includes one bit not found on my usual list. Color-wise, apart from that, it’s just a bigger Killa Kan.

  • Demon skull horns: Zandri Dust > Seraphim Sepia > Ushabti Bone drybrush

I like Facepeela’s static, menacing pose, but I don’t want two of it; my second Deff Dread will probably be posed raising one leg, about to gleefully stomp on something. Not sure what, but maybe a grot. We shall see!

Digging Yore? Check out my book!

The Unlucky Isles [affiliate link], the first system-neutral guidebook for my Godsbarrow fantasy campaign setting, is available in print and PDF.