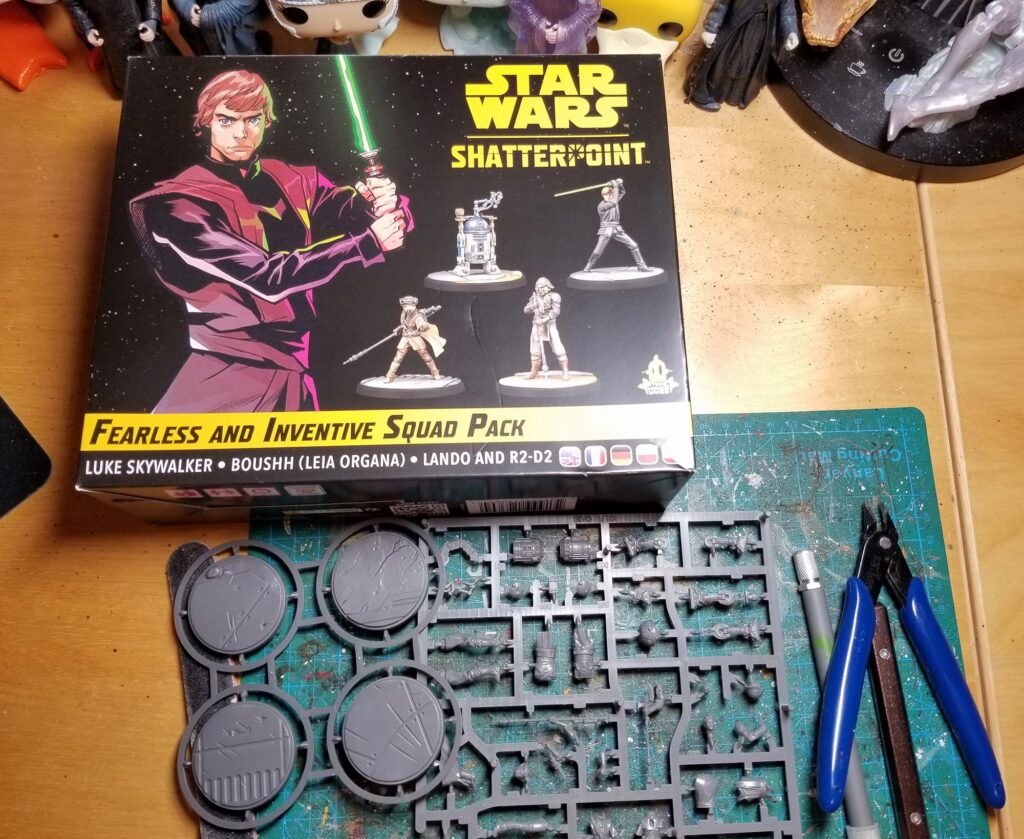
Categories
BattleTech Godsbarrow Miniature painting Miniatures Miscellaneous geekery Old school Old School Essentials Tabletop RPGs Warhammer 40k

2022 end-of-year hobby wrap-up

2022 has thrown the Ralyas a couple pretty hard curveballs, but so far we’re doing [whatever you’re supposed to do in baseball when someone pitches you a curveball] and managing pretty well. I usually focus on hobby stuff here on Yore, though, so I figured it was time for a little 2022 wrap-up — all highlights, no lowlights, and a few surprises.

The Unlucky Isles

One of my biggest hobby milestones for 2022 was starting up Halfbeard Press and publishing my first Godsbarrow sourcebook, The Unlucky Isles [affiliate link]. I’ve never had a well-developed fantasy campaign setting of my own before (which has always made me feel like a bad gamer), and having Dormiir to work on and explore and expand has been a delight.

The Unlucky Isles print proof

I work on Godsbarrow every single day — sometimes just a word or sentence or two, sometimes much more — and have been doing so since March 16, 2021. I’m often hard on my own work, so I’m honestly still a bit surprised I still love this setting as much as I do. (Hell, I’m more jazzed about it now than I was when I started out.)

I’m proud of doing as much of the work on The Unlucky Isles as possible myself, which was one of my goals; I did everything but the artwork. That includes some stuff I’ve notably never done in a professional capacity, like layout and cartography.

And I’m not sitting still: I’m about 25% done with the manuscript for Godsbarrow Guidebook 2: The Gilded Lands. It’s a little while away yet, but it’s coming!

Two Godsbarrow campaigns

Hobby-wise, the only thing that tops publishing a Godsbarrow book for me is running two campaigns set in Dormiir. This is one of those quintessential GMing experiences — designing your own world and then running games there — that I’ve just never had until now. I’ve run games in homebrewed settings before, but those worlds were never more than a sketchy map and some rough concepts; Godsbarrow is much more fleshed-out.

Both of these games are ongoing, and I’m having a blast with both of them. The first Godsbarrow campaign started up in July: a Dungeon World [affiliate link] hexcrawl set on the island of Bal Acar, which I’m running for two of my best friends, Rustin and Greg — the first explorers of Godsbarrow. This game feels like all the best parts of exuberant high school D&D — just weird-ass exploration and shenanigans, all signal and no noise.

Our Google Jamboard map from the first couple sessions

In November my kiddo, Lark, expressed an interest in playing D&D — a moment I’ve been preparing for my whole life. Lark picked Godsbarrow as our setting, and after some discussion we landed on Old School Essentials [affiliate link] for the system.

Lark and I starting up our Godsbarrow campaign

It’s impossible to overstate how cool it is to be gaming regularly with Lark. We’ve previously played a couple of sessions, but nothing ongoing; I never wanted to push this hobby on Lark. We’re having an absolute blast — and, again, I can’t overstate how much that means to me. (This is also another of those quintessential gaming experiences that I’m just chuffed about.)

Wargaming

Lark and I have also been playing Car Wars 6th Edition — Lark’s first proper wargame — and having a great time with it. I pitched CW because we’ve played tons of board games together over the years, and I thought the minis and zaniness of Car Wars would interest Lark. Sixth Edition is superb, and just the right rules weight for us.

That’s led me to delve back into my wargaming roots, which stretch all the way back to having huge naval battles with my dad, all spread out on my bedroom carpet, when I was maybe 10-12 years old. I re-acquired Renegade Legion: Centurion, which was one of the first full-fat wargames I played (circa age 12-14), because it seems like one Lark might enjoy.

And then, to my complete surprise, I stumbled across an RPG.net thread about BattleTech just the other day and learned that 1) there’s now a fast-playing alternate version of the rules, Alpha Strike, and 2) there’s also a huge range of plastic ‘Mechs available. After a bit of research I pitched that one to Lark, got an enthusiastic yes, and ordered the core AS box.

My old BattleTech minis from the 1990s and 2000s

This hasn’t been a banner year for miniature painting, which is understandable given my focus on Godsbarrow and real-life stuff. With 40k (and Kill Team), my motivation has been sapped by not wanting to play with strangers during the pandemic, so I’ve done tons of painting and never gotten to use the fun toys I’ve painted. Even the return of my beloved space dwarves, which were my intro to Warhammer 40k many years ago, hasn’t shaken me out of my painting doldrums.

I’m hoping that some comparatively easy-to-paint BattleMechs, which — and this is key! — I’ll immediately be able to use in a game, are just the shot in the arm my painting hobby needs at the moment.

Ranma 1/2

No segue, but I can’t do a wrap-up post without noting that this was the year I finished Ranma 1/2, one of my all-time favorite manga series — which I started in 1992. I’ve read a shit-ton of manga this year, which has been a lot of fun.

Revisiting the Star Wars prequel trilogy

I decided it was time to revisit and reevaluate the prequel trilogy, all of which I previously rated ½ (which I think marks the first time I’ve voluntarily rewatched any ½ films), for three reasons.

One, I was surprised how much I enjoyed the first couple episodes of Obi-Wan Kenobi, and I wanted to see if I might like the prequels now, decades later. (Andor had the same effect, but for Rogue One.)

Two, I’ve based some of my identity as a Star Wars fan on hating the prequels. I wanted to try to appreciate them on their own terms rather than, when they clash with my expectations, simply assuming my expectations are perfect and therefore the films are the problem.

And three, 20+ years later I’m a different person, I love the Star Wars universe even more than I did back when these films came out, and my appreciation for the Old Republic, Galactic Republic, and Clone Wars Eras has grown. I’ve spent dozens of hours playing Star Wars: The Old Republic and engaging with prequel content in other media, and I’ve enjoyed it.

I wound up liking or loving all three prequel films. Reviews/comments, with spoilers, are on Letterboxd: Episode I, Episode II, Episode III.

Mastodon

I said earlier in the year that Mastodon felt the most like Google+ of any G+ replacement I’ve tried, but it wasn’t until the first Twitter exodus that it really took off. My feed is full, it lacks virtually all of the toxicity of Twitter, I’m having fun gaming conversations and learning about cool stuff there — the whole nine yards. It feels like it’s going to stick for enough folks to provide a real hobby haven, too.

#dungeon23

The #dungeon23 challenge doesn’t kick off until January 1, 2023, but it was — thankfully! — announced much earlier, giving me time to noodle about it, decide to do it, and come up with a framework I think will help me succeed.

Dungeon23 logo created by Lone Archivist and released under a CC BY 4.0 license

I’m going to write Godsbarrow’s first dungeon, the Black Furnace. I’ve got my ducks in a row and I’m excited to get rolling!

Yore’s 10th anniversary

This blog turned 10 years old back in August, making it my the longest-running ongoing thing I’ve ever done online. My quiet approach, erratic non-schedule for posting, and eclectic mix of hobby stuff haven’t done wonders for attracting an audience — but I write Yore primarily because I want to write it, so that’s okay by me.

At the same time, I’m thrilled whenever anyone mentions enjoying Yore, comments on a post, or uses what I’ve shared here. If that’s you, reading this, thank you! Knowing Yore is useful to other folks is a big part of why I keep at it.

Here’s to a 2023 with more hobby milestones, and maybe — hopefully! — with fewer curveballs. Happy holidays!

Out now: The Unlucky Isles

The Unlucky Isles [affiliate link], the first system-neutral guidebook for my Godsbarrow fantasy campaign setting, is now on DriveThruRPG.
Categories
Story games Tabletop RPGs

Mapping with index cards, and Jedi Blackbird

John Aegard has produced some really cool stuff, including two resources that jumped out at me: Jedi Blackbird, a Star Wars hack of Lady Blackbird, and a collection of tips for running a Dungeon World one-shot.

Jedi Blackbird

Jedi Blackbird is more structured than its inspiration, but only a little. That’s a good thing: Lady Blackbird is brilliant, but I want a hack of it to do something more than just reskin the characters and call it a day. Jedi Blackbird does more.

It’s still every bit as delightfully brief: two pages of sparse background, one page of GMing notes, and the characters. Boom.

The added structure comes from the premise:

NOW, word has arrived from the distant Outer Rim that the renegade padawan ORDO VALLUS has established a holdfast on the junk world of KONDU. The Jedi Council has hastily dispatched three Jedi aboard the starship BLACKBIRD. Their mission: to bring Vallus back to the Jedi Temple on Coruscant, where he will stand trial.

Vallus has an agenda; it’s covered in the GMing notes. The PCs are on a mission, and on a specific planet, which fits well for Star Wars. But beyond that, things are wide open — there’s no plot to follow, no rails to ride. (JB tweaks more things about LB than just the setting and structure, too; those are also in John’s notes.)

I’ve already printed this out and added it to the folder full of zero-prep games that rides in my gaming bag.[1]

Index card mapping

I dig Dungeon World, and John’s tips for fitting a satisfying, emblematic DW experience into a typical four-hour convention event slot look good to me. But what really grabbed me was his mapping technique, which uses index cards.

Here’s why this sounds amazing:

The map will be a grid of index cards arranged where everyone can see. […] A map made of cards is super flexible and totally lets you earn your Draw Maps While Leaving Blanks merit badge. See, if you want to add a location between two other locations while you’re in the middle of play, you can just insert a card in between those two locations.

This turns the map into a pointcrawl, a variation on a hexcrawl that uses more abstract mapping and travel rules, on the fly.[2] Which is brilliant!

For a longer-term game, pin the cards to a corkboard or stick them to the table (or a portable surface) with poster putty (paid link). Or hell, just take a picture of the map and rebuild it for each session (until it gets large enough to need a more streamlined solution).

This is one of those mapping techniques I can’t believe I’ve never thought of using before. It has so many applications to different types of game, and it’s right up my alley.

[1] I suspect I’ll write a post about that folder before too long. I love zero-prep grab-and-go games!

[2] The pointcrawl series on Hill Cantons is a great look at this style of play.

Out now: The Unlucky Isles

The Unlucky Isles [affiliate link], the first system-neutral guidebook for my Godsbarrow fantasy campaign setting, is now on DriveThruRPG.
Categories
PbtA Story games Tabletop RPGs

The Star Wars World RPG rocks

My group played our second session of Star Wars World this past weekend, and this unofficial Apocalypse World hack by Andrew Medeiros is now my favorite Star Wars RPG.[1]

One of the things I look for in a PbtA game is interesting playbooks, and SWW has those in spades. When I was choosing one, I “narrowed down” the field to a half-dozen, all of which were equally appealing. Every single one feels like Star Wars, and you’ll immediately know which iconic characters they reference.

That feel carries through to the reskinned moves, the Force mechanics, and then straight on into actual play. With no prep needed (or desired), a Star Wars story unfolds during play, full of pulpy action, careening from frying pan to fire to frying pan again.

My two benchmarks for licensed property RPGs are:

  1. Does it feel like [Star Wars]?
  2. Is it also the kind of game I enjoy?

I’ve played plenty of licensed property games that hit #1 but miss #2, and I don’t play them anymore. Star Wars World hits both targets.[2]

To play, you’ll need a copy of Apocalypse World — SWW consists only of the basic moves, playbooks, XP triggers, and a countdown clock sheet. It assumes you already know how to play AW, and have a good understanding of how PbtA games generally run. It borrows from Dungeon World (paid link) as well, and passing familiarity with DW might be helpful.

I’d love to see Andrew strip out the Star Wars IP and artwork, apply a light gloss (“When you call on the Energy . . .”), fold in the full rules, add MC advice and examples of play and all that good stuff, and publish SWW as a complete game.

There’s a Google+ Community for the game if you have questions about it. For the moment, at least, the game itself lives on Google Drive.

Star Wars World is a slick, competent hack that works beautifully in play. I highly recommend it.

[1] I’ve played lots of WEG Star Wars and Fantasy Flight Star Wars, and tried out Saga Star Wars. I’ve never played d20 System Star Wars (Saga is pretty close, though) or Star Worlds (which is another unofficial AW hack).

[2] Stay on target!

Out now: The Unlucky Isles

The Unlucky Isles [affiliate link], the first system-neutral guidebook for my Godsbarrow fantasy campaign setting, is now on DriveThruRPG.
Categories
Old school Tabletop RPGs

One choice, two consequences

Over on Monsters and Manuals, David McGrogan (author of the excellent Yoon-Suin, one of the starred recommendations on my big list of RPG stuff on Lulu) wrote a neat post about a rule of thumb for sandbox games: Two Problems for Every Solution.

David shares an example from his campaign that explains it well:

For example, in one of the games I am running, the PCs solved the disappearance of a group of villagers – but as a result of this they now have a vengeful demigoddess to deal with and a magic potion to track down, not to mention having to act as a go-between for two power centres and becoming entangled in an apparently unrelated issue to do with the enchantment of a young noblewoman.

Emergent play with a high degree of player agency is my jam, and I love this rule of thumb. It reminds me of last Sunday’s Star Wars World session, which makes sense because, as David points out, Star Wars is full of solutions that only beget new problems.

One bad roll popped us out of hyperspace in the wrong place, and we crashed our ship. We survived, and learned of a settlement not far away . . . full of dangerous poachers, and about to be attacked by angry natives. Problem > solution > problem, problem, and so forth. It’s a good fit.

For where I’m at in terms of sandbox experience, though, I’d like to offer up a related, but not identical rule of thumb: one problem, two consequences.

Making meaningful choices which have meaningful consequences is a hallmark of sandbox play (and other sorts of game with no predetermined plot), and “problem” is just another way of saying “meaningful consequence.” Reminding myself that choices ripple, and those ripples don’t lead to a single new choice, or consequence, or problem, should help my sandbox stay vital and alive.

When I’m stumped for how the world might react in my DCC RPG hexcrawl campaign, I’m going to keep both of these rules of thumb in mind.

Out now: The Unlucky Isles

The Unlucky Isles [affiliate link], the first system-neutral guidebook for my Godsbarrow fantasy campaign setting, is now on DriveThruRPG.
Categories
Books Tabletop RPGs

The Art of Star Wars: The Force Awakens is great gaming fuel

My wife, Alysia, got me The Art of Star Wars: The Force Awakens (paid link) for my birthday, and it’s a fabulous book.

(The rest of this post contains spoilers for the film.)

I enjoy these sorts of books as a fan, but I also dig them as a gamer. I’ve written about using non-RPG books as gaming resources and creating campaigns based on art books on Gnome Stew, and it’s a topic that’s near to my heart — like Star Wars itself.

As a gaming resource, what I like most about The Art of Star Wars: The Force Awakens is the concept art that didn’t get used directly in the movie, which occupies most of the book. (The further along you get in the book, the more things start to look like the movie.)

If you’re looking for quick visual inspiration for a Star Wars game, concept art is awesome.

Need a cool environment? Try this cantina on for size (larger version):

How about some characters for the PCs to meet?

Or cool ships plus a nifty set-piece location, like these vertically-oriented craft and the lightsaber-slashed Jedi statue “graveyard” (larger version):

I’d be remiss if I didn’t share my favorite illustration from the book, which requires one from the preceding page to set it up. Here’s proto-Rey in an X-Wing, with the top popped, using her lightsaber to tear something apart:

And what’s she demolishing? A Star Destroyer, that’s what (larger version):

I hope that winds up in Episode VIII or IX! Just looking at that picture makes me want to dust off WEG Star Wars (paid link) and start up a campaign.

The whole book is that good, all the way through. If you like Star Wars gaming, give The Art of Star Wars: The Force Awakens (paid link) a look.

Out now: The Unlucky Isles

The Unlucky Isles [affiliate link], the first system-neutral guidebook for my Godsbarrow fantasy campaign setting, is now on DriveThruRPG.
Categories
Miscellaneous geekery

The world’s largest Jawa

Jawas are one of my favorite Star Wars aliens, and making a Jawa costume for Halloween 2010 sounded like fun. Looking at the one commercially available option, I wasn’t thrilled; for $60, it looked pretty meh. Once I got into researching better options, I knew I had to give making my own Jawa costume a shot.

Here’s the finished product — the World’s Largest Jawa.

Partly because I was reading The Making of Star Wars at the time, I became fixated on making it as screen-accurate as possible, working towards the 501st Legion‘s standards for serious costumers as spelled out on the Krayt Clan website. There’s a lot of great info online about making a Jawa costume (some of which I’ve linked to below), but most tutorials and threads focus on making one for your kids. I wanted to be the World’s Largest Jawa (at 6’0″ and around 195 lbs.), so I had to tweak things to create an adult-sized Jawa costume.

It was a hell of a lot of work, so I figured I’d document it here in case I could save other folks some time and heartache. Going this route took Alysia and I about 20 hours (10 for the robe and hood, 10 for everything else not counting dyeing time) and cost around $200.

That’s not cheap, but a) it’s cheap compared to many screen-accurate costumes, and b) it’s an investment in a costume you can wear for years to come. The robe and bandoliers are quite durable; even if I have to replace the shoes or mask down the line, it will be relatively easy and inexpensive to do so.

Online Resources

I spent hours researching this costume, so I’m sure I forgot to include some awesome sites on this list — but I did keep track as I went, so this should be most of them. I’d also like to thank the folks on the Krayt Clan forums for their advice; Krayt Clan is the official branch of the 501st Legion for “denizens of the galaxy,” which includes Jawas and Tusken raiders.

Complete jawa tutorial
Harlan’s Workshop’s jawa outfit tutorial
Jawa costume thread on The Dented Helmet
TD8733’s jawa costume tutorial
Jawa on a shoestring
Keep to the Code thread on weathering
Krayt Clan’s official costuming requirements for jawas
Krayt Clan’s reference photos
Star Wars Trader’s prop reviews
TK1336’s jawa tutorial
TK409’s mask tutorial
TK409’s robe pattern

Materials and Supplies

Here’s a complete list of what Alysia and I used to make this costume, including some stuff you likely already have (like electrical tape) for completeness’ sake. You’ll also need a sewing machine and someone who can sew (thanks, Alysia!).

There are lots of ways to skin this cat, but I can only speak to the materials I used — this approach worked for me, and I was happy with the results.

Costume Components

7.5 yards of natural monk’s cloth. This was $7/yard at Wal-Mart, the cheapest I could find (it’s $10/yard at fabric stores). I could have gotten away with 7 yards, maybe even 6, but I’m 6′ tall and wanted to some room for error (monk’s cloth shrinks a lot, too). Pre-dyed monk’s cloth is crazy expensive and might not actually be the right color; dyeing is easy and cheap.

1 yard of non-shiny, breathable black fabric. $6 at the fabric store. I wanted the furry/textured stuff I’d seen in online tutorials, but couldn’t find anything similar. I wound up using the stuff I picked up to cover the mask as well as make the cowl; if you find something better to cover the mask, you still need breathable cowl fabric.

1/2 a yard of black cotton fabric. About $3 at the fabric store. This is the hood liner.

A pair of dark brown jersey cotton gloves. $1 at Lowe’s. If you can find convincing fur to put on the cuffs, rock on; I couldn’t find any I liked, so I skipped that element.

Bandoliers. There are lots of options for these, but I went with a bandolier (a replica 1903 .303 five-pouch bandolier, $45 + shipping from IMA), a wide, dark brown belt ($20 at Sears), and a replica ammo pouch (WWII Mauser pouch, $18 + shipping on eBay). This is a middle-of-the-road approach: the bandolier and pouch are screen-accurate; the belt isn’t, but it does keep costs down. Using leather as opposed to vinyl makes for much more convincing weathering and looks better overall. If you’re tooling a custom ion blaster holster, buying two bandoliers, etc., expect to spend more.

Crappy plastic goalie/Jason mask. About a buck at a local grocery store around Halloween.

2 1″ diameter plastic toy pods from a vending machine. These were ubiquitous when I was a kid, but surprisingly hard to find these days. $0.25 apiece at a grocery store; buy four in case you screw up a couple. These are the shells for the eyes.

Pre-wired orange LED “Jawa eyes” with a battery pack. $10 on eBay. The wiring is supposed to be pretty easy, but I’m not an electrical guy.

Crappy shoes or boots. $25 duck boots from Wal-Mart are pretty close to the real thing, but I just used an old pair of Vans from the basement to save money. You’re going to glue fabric to these, and if the robe is long enough no one will see whether they’re shoes or boots.

Supplies

2 bottles of RIT liquid dye in dark brown. $3 apiece, also from Wal-Mart. (I wound up buying four bottles so I could re-dye my fabric, but the re-dyeing didn’t actually help — two bottles was plenty.)

Large plastic tub with handles. 7+ yards of fabric takes up some room, and the handles make it easy to move. (The dye actually rinsed out easily, so you don’t need to buy a tub just for this purpose.)

A 1″ thick piece of soft craft foam. Around $4. Not every craft store carries the soft stuff, so you might have to poke around (I got mine at Hobby Lobby). It doesn’t matter what color this is — it goes inside the mask to give you some padding and create extra breathing room.

Hot glue gun and glue sticks. About $9. I wish I’d paid more than $6 for a better gun, but the crappy one I bought worked OK. Available at any craft store.

3′ of 14 guage coated wire. About $2 at Lowe’s. (Apparently 12 guage works just as well.) This is for shaping the opening of the hood.

150 grain sandpaper. A buck or two at Lowe’s; I needed two sheets to weather and distress the belt, ammo pouch, and bandolier. I also tried 100 grain and 220 grain; the former was too rough, the latter took forever.

Black electrical tape. About $2. This is for taping the wiring for the eyes to the mask (hot glue was way too messy).

Dark brown thread. $2 anywhere. I didn’t worry too much about matching the robe color perfectly (Jawas aren’t perfect).

Black shelf/drawer lining. $4 at grocery or craft stores. This is the stuff you lay in drawers to keep what’s in them from moving around — a kind of lightly tacky mesh. It goes over the eye holes to keep your eyes from being visible in the mask.

1 can of satin-finish spray paint, almond color. $4 at Wal-Mart; I used Krylon Satin Almond. This is used to spray sand/dirt stains onto the robe.

Jawas aren’t Perfect

The nice thing about this costume is that unlike other Star Wars costumes, Jawas aren’t shiny and perfect. They’re dirty upright rodents who steal shit, repair droids, and tool around the desert — not fashion plates.

This means your costume doesn’t need to be perfect to look good — and some sloppiness is desirable, in my opinion. One of the coolest things about the original trilogy is that everything looks dirty and lived in, and this suits Jawas perfectly.

Ideally, this costume doesn’t look like a costume — instead, it looks like something a Jawa has actually worn while kicking around on Tatooine. Here’s a much larger shot of the costume that hopefully illustrates that.

Dyeing the Fabric

First things first: Monk’s cloth shrinks like crazy, so you need to wash it (cold/cold) and dry it (delicates with a sheet of fabric softener) before doing anything else.

Since the monk’s cloth started out natural, it then needed to be dyed. I half-filled my plastic tub with hot tap water, and then threw in both bottles of RIT dye along with one cup of salt. I let it steep for an hour, agitating with a broom handle every 15 minutes, then threw it in the washer on cold/cold with detergent. Then I popped it in the dryer on delicate with a fabric softener sheet, just like before.

It came out with some blotchy and light spots, so I threw it back in the dye tub for another hour and then washed and dried it again. That didn’t eliminate the blotches, so after a bit of research I decided it was because parts of the cloth hadn’t been completely submerged. So I bought two more bottles of dye, used more water, and didn’t agitate it this time around; it still wasn’t perfect, but that was where I stopped.

I decided that the imperfections were actually just fine, since I was planning to dirty up the robe anyway — I thought some subtle blotches would actually look pretty cool, and as it turned out they do.

This whole process was less intimidating than I expected, and would have taken about four hours if I’d skipped the third dye bath (which wasn’t necessary). That wasn’t four hours of work, though, since it’s just steeping, washing, and drying.

Making the Robe

I picked up the McCall’s “Space Nomads” pattern for reference, but nothing in it is quite right for a Jawa robe. I think Alysia used the large robe pattern as a reference for the sleeve cutouts, but apart from that the pattern wasn’t helpful.

We wound up just throwing the whole bolt of fabric over my head and adding a little extra on each end for good measure; that was about 5 yards total, leaving 2.5 yards for the other soft parts (sleeves, hood, and shoe/boot coverings).

Then Alysia cut a 12″ lateral slit for my head in the center, pinned the fabric where it should fall from my shoulders, and cut out holes for the sleeves. For the sleeves, she threw spare fabric over my arm and pinned it so it flared a bit. I wanted a frayed hem and sleeves, so she sewed a reinforcing stitch 1″ from the edges and left it at that.

I then laid the robe in the grass, stretched the hem so it lay flat, and sprayed on the sand/dirt/weathering around the hem. After letting it dry for a few minutes, I flipped it over and did the other side; then I hung it to dry in the garage. (I wanted to just go roll in the desert dirt, but it was waaay too cold by this point in the year.)

Start to finish, the robe took about six hours to sew and 20 minutes to spray paint. (Monk’s cloth is thick and hard to work with, so be prepared for things to take longer than expected.)

The Hood

The hood sucks to make — it’s fiddlier than it looks. Alysia draped fabric over my head and we spent quite a bit of time estimating the right size to get the perfect opening. The cowl portion needs to cover the neck slit in the robe and drape a bit in the front and back, but not too much.

We opted for the simplest closure, just a piece of velcro in the front. I’ve seen screen-used Jawa costumes with this closure, as well as ones with flaps that overlap in front.

She then lined the front portion with black cotton fabric (which enhances the effect of the eyes and helps keep you from seeing the mask), folded over the outer edge around the opening and sewed it up to accommodate the wire, and ran a reinforcing stitch around the hem. To keep the wire from poking through, she put a U-bend in each end.

The hood requires a bit of adjusting to get it to drape properly, and a bit more to get the opening to look right. Once it’s on, though, it looks great and stays in place.

Start to finish, this took four hours.

The Mask

I followed TK409’s excellent mask tutorial, diverging only a bit from it, so this section will be brief.

I couldn’t find the right fuzzy stuff to cover the mask, so I just used some textured cotton/poly fabric. I glued on the neck cowl and separate head cowl, then covered the front of the mask with strips of fabric. Since the goal is never to see these, it’s kind of a Plan B: If you do see the mask, it should look rough, like the rest of the costume. The two cowls contribute to this as well.

I used electrical tape to keep the LEDs for the eyes in place, but I wish I’d found a better solution. I padded the cheekbones (which provides clearance for the LEDs) and forehead, which makes it a bit more breathable. Some folks install a CPU fan, but I couldn’t see how there’d be enough room for that in my mask. I wound up just taping the battery pack to the top of the mask, since I wanted the whole unit to be self-contained; I left the little door accessible for battery changes.

Once it was built, I realized I could have dropped amber vase gems into the ends of the eye capsules to create a more natural effect, but it was too late. If I did this again, I’d go that route or source some 1″ diamater vase gems (which I couldn’t find locally in time) and skip the capsules entirely.

The mask took about two hours to make.

The Shoes

Since I was working with a normal pair of shoes (Vans with laces), I put them on, made them a bit loose, and then double-knotted the laces. That way I could glue cloth to them and would still be able to just slip them on and off.

Using a triangle of monk’s cloth that could just about cover the whole shoe, I first glued it along one edge of the shoe so that it lay just above the sole line. I wanted it to make the shoe invisible but not drag any fabric on the ground; to be screen-accurate, I would have needed to fully wrap the shoe, including the sole (and it would have needed to be a boot, of course).

To make it look less like a bootie, I cut leftover pieces of monk’s cloth into strips and covered the whole thing in a hodgepodge fashion. To simulate wear, I sprayed sand-colored paint around the edges.

All told, this step took about an hour.

Weathering

I covered simulating weathering on the robe and shoes above — this section is about weathering the bandolier, ammo pouch, and belt. There’s a certain amount of letting go and saying “Fuck it” to this part of the costume. I had to take this awesome thing Alysia and I were working so hard on, and which cost quite a bit, and mess it up, which felt weird at first. But messing it up the right way is the thing that takes this costume — which is relatively simply in appearance, if not in construction — over the top.

After doing a bunch of research online, the biggest takeaway seemed to be that in order to weather something authentically, you have to consider how it would actually be used and then beat the hell out of it. I started by sanding all of the high points and edges — the spots where these items would naturally wear.

I erred on the side of caution, sanding a little instead of a lot and then returning to further distress some areas once I got the hang of it. Thinking how authentic the costumes in the Lord of the Rings trilogy looked, I also erred on the side of subtlety overall; like Lucas did in shooting ANH, I wanted the weathering to just look right, and therefore to disappear — IE, everything should look well-used, not artificially (or over-) weathered. Reading The Making of Star Wars, which goes into all that stuff, was a big help.

After I’d done all of the sanding, I basically just beat each piece up for 30 minutes. I rolled and unrolled fastener straps (the heaviest-used parts of the bandolier and pouch) and belts; twisted belts into a coil in one direction, then the other; folded belts the long way, and then back; rolled everything up and stood on it; crumpled things in random directions; broke in all the surfaces; made the pouches less perfectly squared off; and generally just had a good time — this was a lot of fun, and I think it turned out well.

To achieve a naturally weathered and beaten-up look that I was happy with took me an hour per piece, so three hours total.

What I Skipped

While a droid caller, second bandolier (in place of the belt/pouch combo), and ion blaster with custom holster and power pack would have been awesome, I didn’t have the time or want to spend the money to do all that stuff this year. Using an actual Enfield rifle with grenade cup for the blaster, a Kobold flash unit for the caller, and a custom-made holster would have been expensive. I didn’t even know where to start for the power pack.

The slightly less expensive route is to use resin kit versions of the caller and blaster, which I found on eBay for around $20 and $60 respectively. Those would need a non-crappy paint job to really shine, though.

I also would have liked to be able to find convincing fur to stick on the wrists of the gloves, and to have had the time to do natural weathering on the robe and leather bits — IE, go roll around in the dirt — but I couldn’t make that happen this time around.

What It’s Like to Wear

This costume provoked great reactions — people loved it. After the amount of time, work, and money involved in making it, that rocked.

Most folks found the mask creepy, and it seemed to have about a 50/50 chance of frightening small children. My daughter Lark didn’t know what to make of it at first, but once I took off the hood and mask and she saw it was me, she got excited because she knew it was me under there.

On the flipside, it’s insanely hot to wear. The robe is heavy, which isn’t too bad, but the hood and mask combo gets miserable after about 10 minutes, as it features monk’s cloth, liner fabric, a cowl, and a fully covered mask you exhale into constantly.

Thanks for Reading!

I’m not a costumer, and in fact I usually really half-ass my Halloween costumes, but I’m glad for whatever put a bug up my ass about giving this costume a shot. It was a lot more work than I or Alysia expected, but it looks great and, I think, has most of the subtleties and authentic elements that make up a good screen-accurate Jawa costume.

I hope this tutorial was useful to you!

Out now: The Unlucky Isles

The Unlucky Isles [affiliate link], the first system-neutral guidebook for my Godsbarrow fantasy campaign setting, is now on DriveThruRPG.