Categories
Blood Angels Space Marines Kill Team Miniature painting Miniatures Warhammer 40k

The paint-play-paint motivation cycle (and a Chaplain color guide)

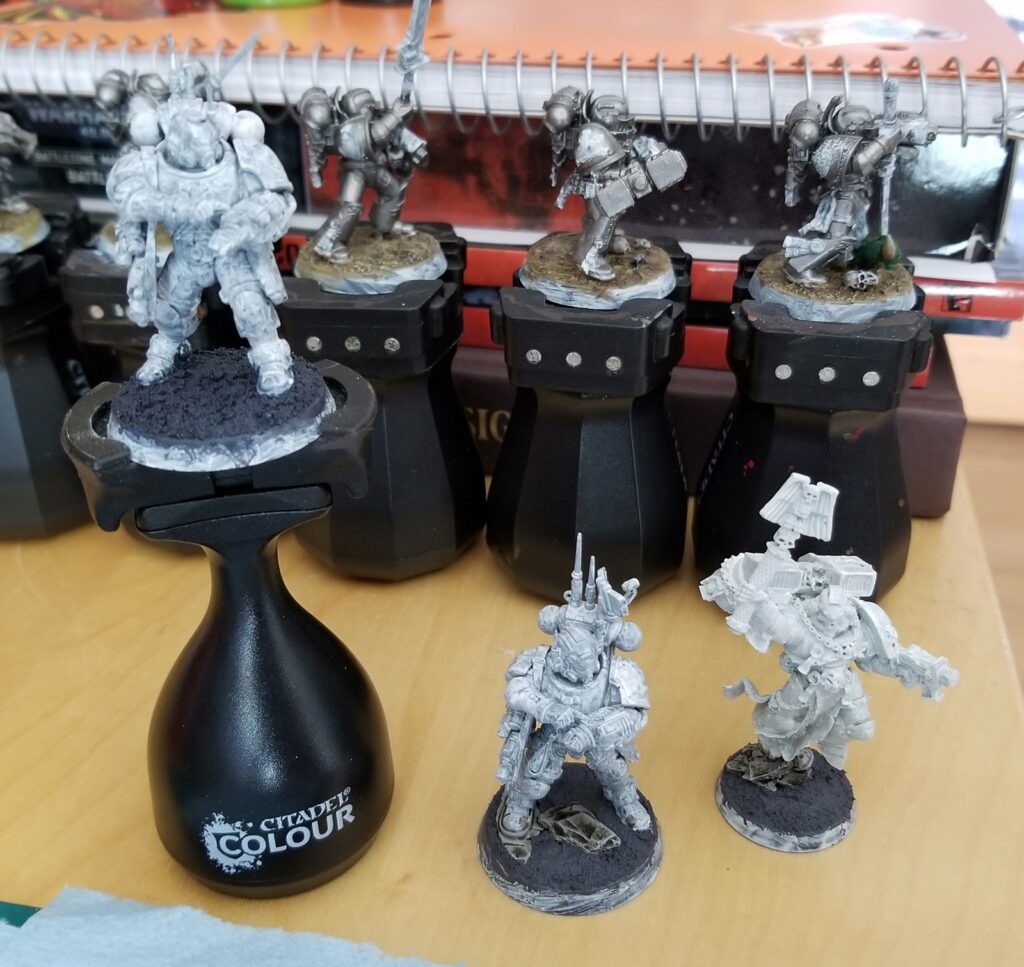
“I’ll get to play with these” has been a powerful motivator since I got rolling in 2020, and I’ve always speculated that “I played and I like/didn’t like X, I need to paint some Y for my next game” would be similarly powerful.

Kill Team has produced that cycle for me, except instead of X being my team and Y being something new for my team, Y is just more teams. Every time I play, especially when I’m “curating” the whole experience in home games (providing the board, terrain, minis, rules, etc.), I want more options available.

That cycle has now kicked into gear with my Blood Angels, my largest and oldest 40k army. I’ve played two short games, enough to get an idea of what I like in play and what I wish I could field, and now that I’ve got a larger game — 1,000 points! — on the calendar for this week, I’m scrambling to paint three minis so I can field them right away.

Helix gauntlet and comms array Infiltrators on the left, Chaplain on the right

I want a sixth Infiltrator to form a complete kill team (joining the five I already have painted), and he and a seventh have the wargear I didn’t model on my Infiltrator squad because it wasn’t free in 8th or 9th and I needed the points. Now that it’s free, and I’ve seen that Infiltrators are fun to play, the helix gauntlet and comms array should come in handy.

I had to kitbash the helix gauntlet, which doesn’t come in the kit. Google turned up a great idea on Funnyjunk, of all places: use the comms array guy’s arm, shave down a couple of grenades for the medical lights, and add a needle. I had an extra comms arm; I trimmed off an Infiltrator backpack antenna for the needle.

I’ve also shied away from fielding my Death Company lads because of their mechanics: They’re not as good without a Chaplain, but they have jump packs and my Chaplain, Arrius, does not. So it’s time to paint a jump-chap, and hey I have this resin guy just hanging around…

Hello, resin, my old “friend”

Chaplain with jump pack color guide

Same base as my other Blood Angels, of course, and as always these recipes are based on the GW studio recipes with some tweaks. Nothing is drybrushed unless noted.

  • Armor: Abaddon Black > Eshin Grey > Dawnstone
  • Metal: Leadbelcher > Nuln Oil all-over wash> Stormhost Silver
  • Armor gaskets and helmet tubing: Mechanicus Standard Grey > Nuln Oil all-over wash > Dawnstone
  • Gold: Retributor Armour > Reikland Fleshshade all-over wash > Auric Armour Gold > Liberator Gold
  • Skull mask: Celestra Grey > Drakenhof Nightshade all-over wash > Ulthuan Grey > White Scar
  • Eyes: Moot Green > Agrax Earthshade pin wash > Moot Green
  • Purity seal wax: Screamer Pink > Carroburg Crimson all-over wash > Pink Horror > Emperor’s Children
  • Parchment: Rakarth Flesh > Agrax Earthshade all-over wash > Pallid Wych Flesh > White Scar
    • Then scribble on it freehand in very fine Abaddon Black
  • Crozius handle: Khorne Red > Agrax Earthshade all-over wash > Wazdakka Red > 50/50 blend of Wazdakka Red/Kislev Flesh
  • Knee pad, shoulder pad, bolt pistol housing: Mephiston Red > Agrax Earthshade pin wash > Evil Sunz Scarlet > Fire Dragon Bright
  • Jump pack jets: Caledor Sky > Drakenhof Nightshade all-over wash > Temple Guard Blue > Baharroth Blue

It’s been ages since I painted a purity seal, and I’ve forgotten what color I used to scribble the freehand “writing” on the parchments. This time I wrote it down!

Out now: The Unlucky Isles

The Unlucky Isles [affiliate link], the first system-neutral guidebook for my Godsbarrow fantasy campaign setting, is now on DriveThruRPG.
Categories
BattleTech Miniature painting Miniatures

The best mini I’ve painted (so far)

This unassuming little Valkyrie represents a lot of firsts:

  • The first ‘Mech I’ve painted in 16 years
  • The first ‘Mech in my Long Nights mercenary company
  • My first time pin washing (instead of all-over washing)
  • Also my first time attempting proper edge highlighting
  • My first time trying to do a detailed pane of glass (the cockpit)
  • And currently the best miniature I’ve ever painted
Still needs decals, weathering (maybe), grass flocking, and a painted base rim

I started with the Valkyrie because it’s the plainest of the lance I’m currently painting, and the one I cared about least. I figured I’d goober some stuff up here before moving on to something cooler.

I’m taking a more subtle approach with my ‘Mechs than I generally do with my 40k minis, but I suspect this approach will bleed back into my general bag of tricks for painting. Patient pin washing following by equally patient edge highlighting is a really neat one-two punch.

In the Long Nights, this Valkyrie is piloted by Ragnar “Night Sweats” Thorpe, and I feel like I did him proud!

Out now: The Unlucky Isles

The Unlucky Isles [affiliate link], the first system-neutral guidebook for my Godsbarrow fantasy campaign setting, is now on DriveThruRPG.
Categories
Leagues of Votann Miniatures Warhammer 40k

It begins! I built my first Kin

My Leagues of Votann army box arrived today, so as is traditional I built my first unit: Yrsá the Unexpected, Theyn of Yrsá’s Boars, a squad of Trans-Hyperian Alliance Hearthkyn Warriors.

It’s too dark for good photos, so this one will have to do!

Like most Hearthkyn Warriors, Yrsá is a citizen-soldier — a miner, in her case. Yrsá is stubborn, tackles problems head-on, and is ferociously devoted to the Ancestors. Yrsá wields a Bolt Revolver and a Concussion Gauntlet. I sculpted (and I’m using that term extremely loosely) two crystals out of bits of sprue to go with my “alien moon” basing concept; those are visible in the foreground.

Her chosen name, “the Unexpected,” was in this case bestowed by her comrades in arms (rather than chosen by her) as a mark of respect. She has a knack for succeeding where others have failed, and for turning up where she’s least expected — which serves her equally well in mining and war. (It’s also a nod to how surprised I was when GW announced they were bringing back space dwarves.)

The codex calls out the largely ad-hoc nature of Kin fighting forces, so having Yrsá’s squad of Hearthkyn be nicknamed “Yrsá’s Boars” feels right to me. I’ve got nine more Hearthkyn to build for Yrsá’s Boars, but I’ll probably read some more of the codex before going much further.

As a dedicated, lifelong fan of dwarves of all stripes, I’m a happy camper — this is such a cool faction!

Out now: The Unlucky Isles

The Unlucky Isles [affiliate link], the first system-neutral guidebook for my Godsbarrow fantasy campaign setting, is now on DriveThruRPG.
Categories
Kill Team Miniature painting Miniatures Terrain Tyranids Warhammer 40k WIP it good

WIP it good: Tyranid Warriors and terrain

I’m currently working on three things in parallel, all at different stages: my second Hive Fleet Balaur unit for Kill Team, three Tyranid Warriors; a batch of Manufactorum terrain; and a couple of larger Sector Mechanicus terrain pieces.

Tom Servo of Finland watching over three freshly-glued Warriors

These guys were every bit as fun to build as my Genestealers. And despite having no names, no personalities, no quirky equipment — none of the stuff I’m used to using as my roleplaying hooks for how to assemble and paint an interesting figure — these models are packed with opportunities to convey intent (nom nom nom), motion, and character.

I’m honestly surprised how much I enjoy building and painting Tyranids.

My Tyranid Warrior Fire Team: Venom Cannon, leader, and weapon beast

Since I’m combining pieces from two lines, Manufactorum and Mechanicus, for my table, I started out with the Mechanicus stuff by just faffing about and seeing how it looks alongside my Manufactorum pieces.

I love how modular the Mechanicus terrain is

Alongside creating interesting terrain, my goal is to balance the modularity of the Mechanicus kits with a desire for durable, functional pieces I don’t need to fuss with.

These kits can be painted in pieces and assembled at the table, then broken down and reassembled a different way the next time. But some of the elements, like the railings, are going to mar whatever you attach them too — and in any case, that level of modularity seems like overkill to me.

So instead I built four anchor pieces, all of them fully assembled and glued — and all of them capable of being combined in lots of different ways. I left space for a Ferratonic Furnace under the octagon at the back, but glued my second furnace to the platform up front. The long gantries can each accommodate one or two of the larger Mechanicus tanks being slid under them, and almost all of the “mating” ends of the gantries and platforms can be mixed and matched.

This took a couple of hours, but I’m happy with how my pieces turned out.

My four anchor pieces (just press-fit at this stage, not glued)

After sleeping on my choices, I tweaked a couple things here and there, picked two to start with, and got them glued together.

The Ferratonic Furnace and platform will be glued together after I’ve sprayed them both (to make it easier to reach all the little crannies behind the ladder, cables, etc.)

Then I shifted gears and did the first wash on four Manufactorum pieces I’d previously primed, with an eye to finishing a full Kill Team board worth of terrain as soon as possible.

I’ve yet to figure out the secret of not being messy with terrain washes

It’s a weird angle, but this is my current overflowing work area: freshly washed Manufactorum pieces at the bottom, a mix of finished and WIP Tyranids and terrain in the center, and my first two huge Mechanicus pieces waiting for a dry day so I can spray them.

My desk hasn’t looked like this in months, and I love it!

Shifting from working on 2,000-point 40k armies to Kill Team squads has been just the ticket for getting me jazzed about painting again. It’s also helped me find something to focus on with terrain, since I’ve got a much shorter-term goal than filling a Strike Force board: one Kill Team board, which is maybe 4 large pieces, 2 medium ones, and a handful of little bits.

Out now: The Unlucky Isles

The Unlucky Isles [affiliate link], the first system-neutral guidebook for my Godsbarrow fantasy campaign setting, is now on DriveThruRPG.
Categories
Kill Team Miniature painting Miniatures Tyranids Warhammer 40k WIP it good

WIP it good: Tyranid Warriors and Genestealers

With my Genestealers’ initial base/wash/drybrush done, I based them and then tested some base rim options.

Doombull, Rhinox, Khorne, Squig
Wild Rider, Wazdakka, Doombull

Doombull Brown is the clear winner in my book, so that’s what I’ll be using for my Tyranids.

Genestealers based and with their full initial base coat in all colors; next comes touch-ups

I also took a box of Tyranid Warriors on vacation with me, and spent some quiet time trimming and filing them. I just wrapped up assembly on the first one (Venom Cannon, Boneswords, and Toxin Sacs), so now he’s in my impromptu drying station.

These minis are every bit as cool as I hoped they would be

Both Hive Fleet Balaur units for my first Kill Team are coming along nicely, and I’m in the groove. If I find myself in a painting mood, I could have my Genestealers completely wrapped up this weekend.

Out now: The Unlucky Isles

The Unlucky Isles [affiliate link], the first system-neutral guidebook for my Godsbarrow fantasy campaign setting, is now on DriveThruRPG.
Categories
Kill Team Miniature painting Miniatures Tyranids Warhammer 40k WIP it good

WIP it good: Genestealers

After letting the glue on the Genestealers I built last night cure overnight, finalizing my color scheme this morning, and writing a color guide for Hive Fleet Balaur, I sprayed these five bad boys:

Even though it was only about 40 degrees out, the rattle can still worked great

While they were drying (Citadel’s rattle cans really are paint-ready in 15 minutes; I love them), I nipped out to Mox for the four paints I was missing. Then I got my ducks in a row for a painting session.

I’d say pardon my dusty desk, but I hate dusting so my figures are almost always dusty

I’ve seen Genestealers painted basically all one color (like the current studio paint jobs for Leviathan) or about 50/50 (like the old Space Hulk models, with their blue bodies and pink hands), and I decided to split the difference. I’m giving them carapaces on their backs, basically from the tail joint up, and treating the rest of the body — including the carapace-like tail and chest/belly — as skin/body tone (whitish-pink).

Among other things, that will let me practice my mottling on these guys before doing it on my Warriors, who are larger and have more carapace areas to paint. I also don’t love the studio Leviathan scheme for Genestealers, which I find too monotone; expanding what counts as carapace lets me avoid that.

First wash applied; I love this unwholesome pink!

Post-drybrush, they’re not as off-white as the studio models, but they’ve definitely changed:

The main body now only needs its final Pallid Wych Flesh highlight

I decided to go back and re-reestablish the Carroburg Crimson in their vents and joints, but that didn’t magically make my drybrushing as adept as a GW studio painter’s work. Maybe the final highlights will balance things out a bit? We’ll see.

Base elements now finished, texture paint applied and drying

I took a closer look at some Leviathan nids in the 8e codex and White Dwarf #463, and I’m pretty sure some of them have a Pallid Wych Flesh drybrush over their Screaming Skull drybrush — so I gave that a shot. It makes a difference! In natural light, this guy reads much whiter:

After the second drybrush was applied

I’m going to call that “close enough for splinter fleet purposes” and move on. Time for some Naggaroth Night!

Quickly checking the compatibility of my two other primary base colors

Once I had the carapace roughed in, I threw a quick coat of Incubi Darkness — my other primary base color — on the claws so I could get a feel for how things will look down the road. Both colors will get darker before they get highlighted up, and I’m hoping the final layers will bring them tonally in line with the flesh while still keeping them dark enough for satisfying contrast.

Heck, how about a quick and dirty test to see what Warpstone Glow and Sybarite Green might look like?

I’m not sure glazing is worth the effort on small claws like these — simple layers look pretty solid

Oh yeah! It fits Balaur’s origins, the colors work together — I’m digging this. I can’t wait to see it with the mottling on the carapace!

This is the most painting I’ve done in about seven months, a full day of thinking about, writing about, and painting Tyranids. It feels good.

Out now: The Unlucky Isles

The Unlucky Isles [affiliate link], the first system-neutral guidebook for my Godsbarrow fantasy campaign setting, is now on DriveThruRPG.
Categories
Kill Team Miniature painting Miniatures Tyranids Warhammer 40k WIP it good

Testing Hive Fleet Balaur color schemes

After an evening of assembling Genestealers and thinking about paint schemes, I spent the rest of last night leafing through back issues of White Dwarf for Tyranid content.

My initial idea for Hive Fleet Balaur’s color scheme was the bi pride flag: pink, purple, blue. Along with the symbolism and the colors, I also like that it includes 2/3 of the classic Genestealer colors.

But the more pictures of gorgeously painted Tyranids I looked at, the more I found myself drawn to Hive Fleet Leviathan’s paint scheme: off-white body with unsettling pink undertones, like a snake’s belly; deep purple carapace; and dark red claws/weapons. No surprise from GW, but that is an outstanding color scheme with fantastic contrast and perfectly matched tones.

This gorgeous spin on Kronos on DakkaDakka gave me the idea to try green weapons/claws. A CatgutPainting video on patterned Tyranid paint schemes sold me on mottling, which I first saw on Javier Del Rio’s stunning Hive Tyrant in White Dwarf #463:

Miniature painted and photographed by Javier Del Rio, from White Dwarf #463

So I started pondering making Balaur a splinter fleet of Leviathan, and using Leviathan’s colors as my starting point. GW has done Leviathan at least two ways for their studio paint jobs, so I blended ideas from both of them for the body and decided to test Wraithbone base > 1:3 Screamer Pink:Lahmian Medium shade.

Still thinking about bright colors (something I haven’t yet done for 40k) and wanting to see how that would look next to a vibrant purple carapace (with pink dots/mottling still in my brain) and medium-to-bright green claws, I slapped some paint onto a piece of terrain. (I’ll be repainting this area whenever I circle back to terrain, and conveniently it’s already primed with Wraithbone spray.)

Here’s Wraithbone base coat, the Screamer/Lahmian wash, Xereus Purple, and Warpstone Glow.

Test colors

And here it is with a quick and dirty Screaming Skull drybrush over the body color, bringing the body closer to Leviathan:

Getting closer to “snake’s underbelly” whitish-pink

Now to test out mottling the carapace. I did some research and found that some folks do this with a toothpick or a dotting tool; this Doctor Faust tutorial is a good demonstration of one approach. My kiddo has a stash of dotting tools, so I borrowed a few different sizes.

Small and his buddy Real Small

Here’s a Genestealer Purple base mottled with Genestealer Purple and then Fulgrim Pink, with purple done using the larger of the tools above and pink done with the smaller one:

Mottling

Genestealer Purple isn’t much of a contrast (although for adding depth to mottling, that’s probably good), but Fulgrim Pink sure pops. It’s also clear I’m not good at this yet! But I do like the effect.

I threw Khorne Red into the mix and polled my wife and kiddo, and we all liked both options (red or green) but agreed they each give the model a different feel.

(optometrist voice) Green, or red? One, or two?

The more I look at the toxic green, the more I like it. The Leviathan lineage is clear from the identical body color and the mottled variation on the carapace color, the toxic green (coupled with the mottling) cements Balaur as its own thing, and the whole scheme should contrast nicely with my basing recipe: Stirland Mud texture paint, Reikland Fleshshade wash, Astorath Red drybrush (from the ever-amazing White Dwarf Basing Cookbook in the November 2016 issue).

Out now: The Unlucky Isles

The Unlucky Isles [affiliate link], the first system-neutral guidebook for my Godsbarrow fantasy campaign setting, is now on DriveThruRPG.
Categories
Kill Team Miniatures Tyranids Warhammer 40k WIP it good

Hive Fleet Balaur’s first model

The best way to get stuck in is to get stuck in, so after noodling about Hive Fleet Balaur, I got stuck in and built my first nid.

I think this is an older kit, but it’s a really good older kit
At first I wasn’t sold on the 25mm base, but once I got rolling I started liking how nimble it makes the Genestealers feel
All done! No names (which feels super weird!), so since I want to always be able to identify my first Tyranid I added a unique skull to his base.
I went for a wide, sprawling pose; the posability with four arms is a ton of fun

And a little while later, I’ve got a whole Fire Team built: 5 Genestealers, including some equipment choices (Feeder Tendrils on second from left, Flesh Hooks on fourth from left). I built the first two without even realizing that the Rending Claws on normal Genestealers never appear on all four arms — but in 2021 Kill Team, they can! A happy accident, as Bob Ross would say.

5/8 of my Kill Team

I already love these guys. This is going to be fun!

Out now: The Unlucky Isles

The Unlucky Isles [affiliate link], the first system-neutral guidebook for my Godsbarrow fantasy campaign setting, is now on DriveThruRPG.
Categories
Adeptus Custodes Miniature painting Miniatures Warhammer 40k WIP it good

Spraying my Custodes with Retributor Armour: notes to self

After enjoying the time savings from spraying my first batch of 40k terrain with Citadel’s Wraithbone rattle can — a primer and base coat in one — I decided to go the same route with my custard lads. They’re 90% gold; this is a potentially huge time savings.

So I built my entire army before painting any of them — something I haven’t done since I got back into painting in 2020. It’s only 26 models, so this seemed like the most logical approach.

2,000 points of Dread Host Custodes

As luck would have it, today’s weather was perfect for some spray painting.

3-2-1 RESPIRATE
Deep in the spray chamber, it’s kinda dark

Here’s what I found:

  • Retributor Armour, which is a metallic, doesn’t go on as easily as Wraithbone (which is not).
  • Compared to terrain, which, broadly, is flat and regular, miniatures are much fussier to spray paint. They’re covered in little nooks and crannies.
  • The Allarus Terminators are fussier than the Custodian Guards, because their pauldrons are overhangs and their little turtle heads make a “dead zone” for paint unless you hit that area from just the right angle.
  • Starting with them laying down is much easier than starting with them standing up. Many of the hard-to-reach bits are dealt with much more smoothly, and when you stand them up there’s just a bit of obvious touching-up to do.
  • My usual approach — spraying into an open box sitting on its side — doesn’t work nearly as well as just setting the figures on the top of the box and attacking them from all angles. (Outdoors, with no one nearby, and my goggles and respirator on, this isn’t a safety hazard.) With care, it’s not too hard to keep the paint on the box.
  • I thought one can would cover 21 infantry models and 6 bikes. It actually covered 14 infantry models (1 Trajann, 1 Vexilus Praetor, 6 Allarus, 6 Custodians) and the bases for the 6 bikes.
  • That took me about 75 minutes, including time spent waiting for stuff to dry, so spraying the other 6 infantry and all 6 bikes shouldn’t take any longer than that.
  • I can’t believe I used to do this without goggles and a respirator mask!

None of that has anything to do with the quality of Citadel’s rattle cans: Retributor Armour spray dries beautifully. Even if I have to brush-prime the odd crevice and touch it up with a spot of paint, I’ve still saved a ton of time here.

Look at their wee nameplates!

I opted to spray the Vertus Praetor bases because 1) why not? and 2) that way the rims and rocks won’t look different from the rest of the bases (which they might if I primed them white). Ultimately this probably wouldn’t matter much — but hey, shiny bases!

I’m honestly tempted to leave them like this

Now I need to wait for another can of paint to arrive in the mail before I can goldenize the rest of them — but in the meantime, I’ve got 20 bases to work on!

Out now: The Unlucky Isles

The Unlucky Isles [affiliate link], the first system-neutral guidebook for my Godsbarrow fantasy campaign setting, is now on DriveThruRPG.
Categories
Adeptus Custodes Miniatures Warhammer 40k WIP it good

Second squad of Custodes

I started building this squad of Allarus Custodians — the first three of 10 Terminators in my draft army list — last night, and finished it up this afternoon: Kanumba, Cathalan, and Adomako.

L to R: Kanumba, Adomako, and Cathalan, Allarus Custodians with Guardian Spears

As with my first squad, I stole the Shield-Captain’s build for one of them — Adomako — because I love the stance and how tall the model is with its upright spear. I’ve also got a pretty good sense now, after two Custodes kits, for how I can twiddle some of the monopose elements and do a bit of mixing and matching in order to keep them all distinct from one another.

I looked to Africa for two of their names: Ghana for Adomako, and Tanzania for Kanumba. The third, Cathalan, is an Old Irish name — a variation on Cathaláin.

While these kits have the awesome “turtle shell” vibe that defines Terminators (for me, at least), and huge presence, I think I still prefer the Custodian Guard models by a narrow margin. They’re still pretty boss kits, though — and I’m not sad I’ll be building more of them.

Out now: The Unlucky Isles

The Unlucky Isles [affiliate link], the first system-neutral guidebook for my Godsbarrow fantasy campaign setting, is now on DriveThruRPG.