
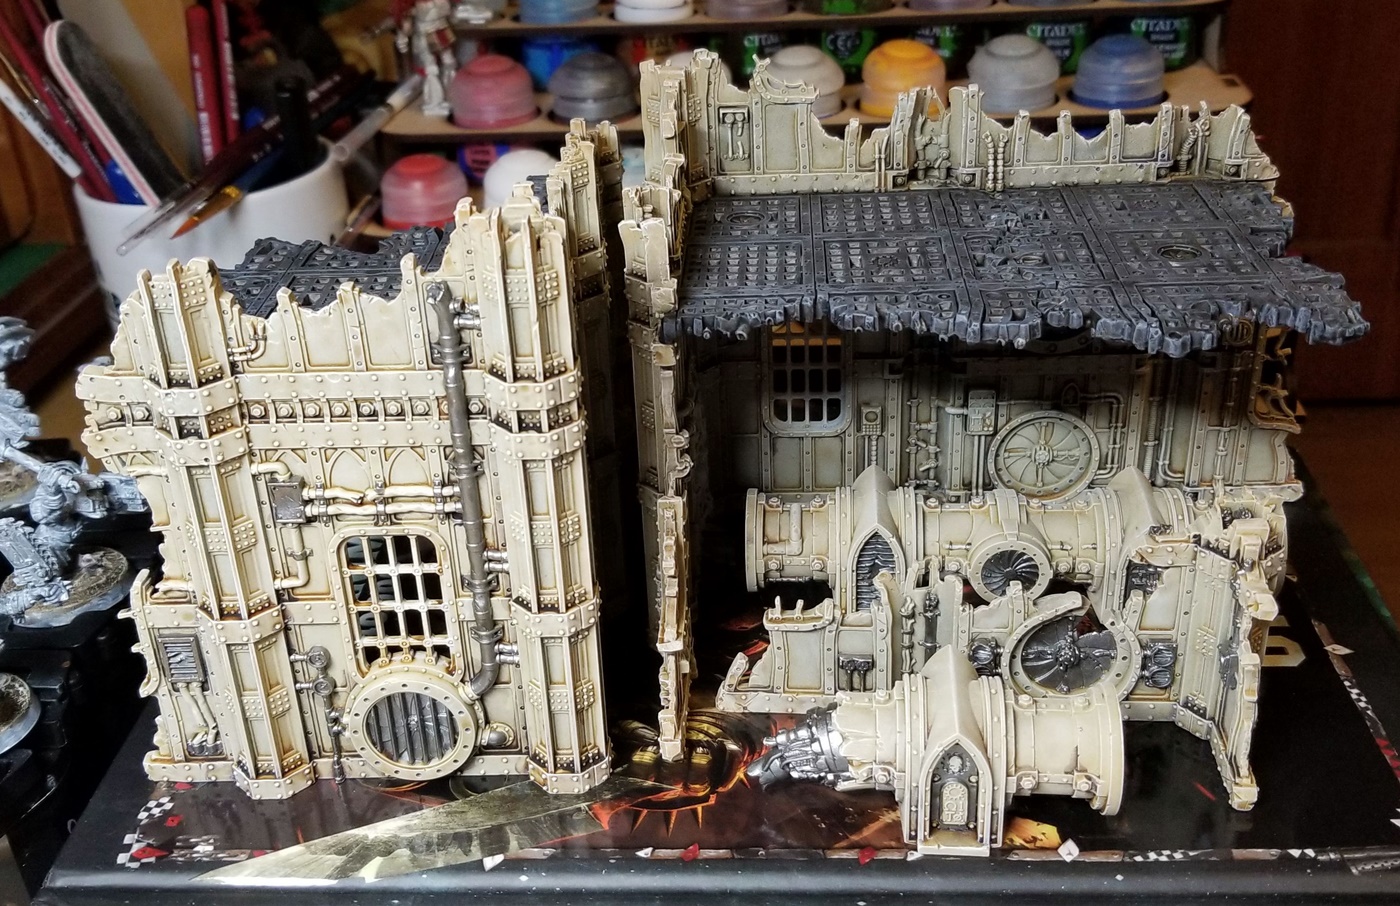
After assembling, priming/base-coating, and doing the initial wash on my Manufactorum terrain pieces, I tucked into the next steps — and realized it was time for a guide to those steps, and the colors I’m using, so that Future Martin can replicate it all on the next batch.
Warhammer TV reference videos
My primary guide is an excellent video on painting this exact terrain. I’m mixing in some of what Duncan does in this video about Imperialis terrain, too. For weathering, Duncan covers rust (second half) and Nihilakh Oxide in two other videos.
These videos are a tremendous resource and I love that GW makes them available. There’s no way I could approach the finished quality I want in my terrain without them.
Painting steps
Terrain is a different animal, so it requires different steps in a different order. This looks like a million steps, but it’s really quite a relaxing painting process; I’ve just broken it down, for my own benefit, because the process is different than the one I’ve spent the last nine months employing on my Blood Angels.
Step 1 basically takes the bulk of the terrain piece — the stone elements — to completion, which is done to avoid messily washing and drybrushing other stuff the wrong colors. Step 2 does the same for the floors, and so on. The final step, number 7, involves weathering that goes back over many of the areas completed in 1-6 — and apart from varnish, it’s genuinely the last step.
“Don’t overdo it” is my mantra for most of the steps. It’s easy to want the whole building to look super-grimy at the shading stage — and forget that there’s grime and character still to come, at later stages.
- Walls:
- Wraithbone spray, primer and base coat in one
- Seraphim Sepia wash almost everywhere; err on the side of “everywhere,” not “almost”
- Agrax Earthshade pin wash along the “bands” of the pillars, plus randomly anywhere else that would have gotten especially dirty while these buildings were in use (or weathered after they became ruins), notably under doors and junction boxes, as well as along conduits — and throw in some random spots, too
- Drybrush all Wraithbone areas with Tyrant Skull, in a circular motion; this is designed to go everywhere
- Then a lighter Praxeti White drybrush over that, in circular motions, pressing lightly and just hitting the high points
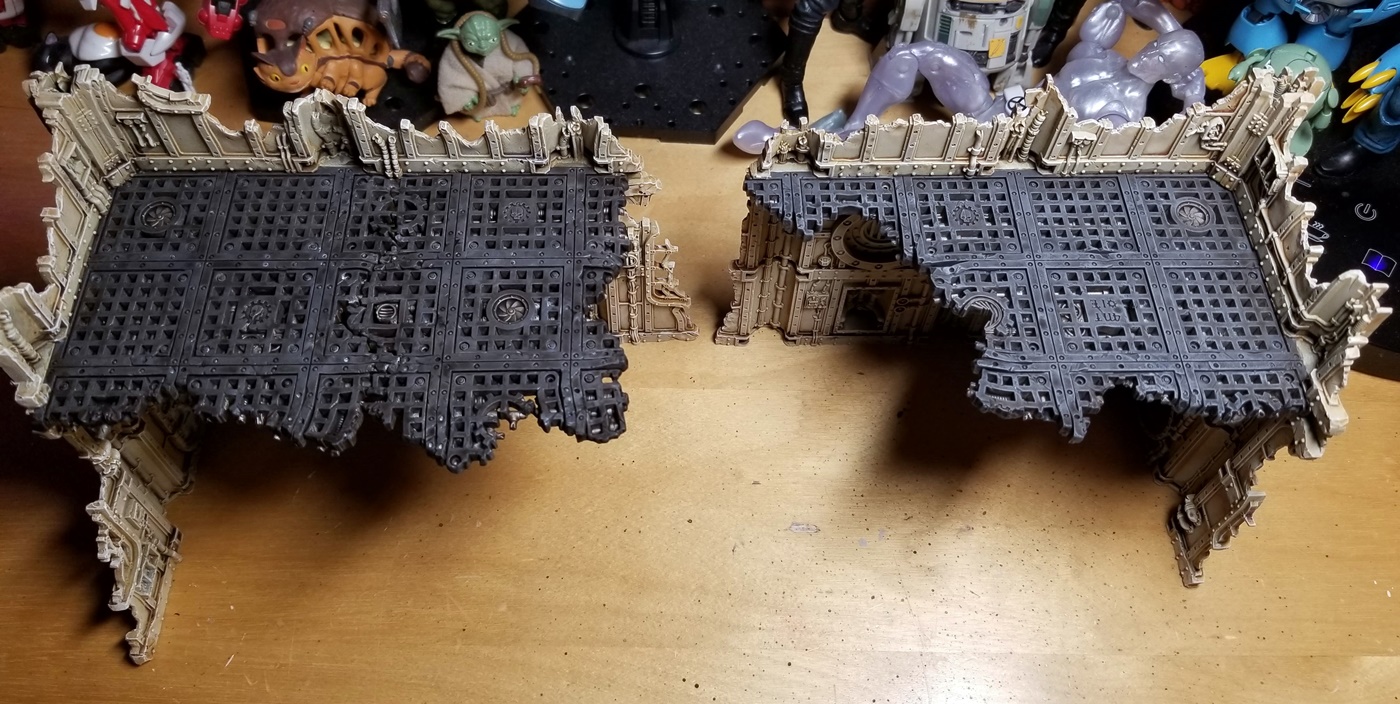
- Floors:
- Bung Leadbelcher into the holes in the floor (which hits the pipes and suggests that the floors are metal gratings with a coat of paint over them) > Mechanicus Standard Grey on the flat parts of the floor and the entire underside > Agrax Earthshade > Dawnstone drybrush the flat sections of the floor in circular motions, top and bottom
- Paint hazard stripes along the centerline of the floor with Averland Sunset (using 3mm Vallejo hobby tape for masking)
- Light drybrush with Celestra Grey on the top and edges, including the hazard stripes (skip the bottom)
- Bare metal: Leadbelcher > Agrax Earthshade > Ironbreaker drybrush > Necron Compound drybrush
- Red metal (doors, windows, tanks, accents): Khorne Red > Nuln Oil > Wazdakka Red drybrush > very light Squig Orange drybrush
- Red pipes: Khorne Red > Nuln Oil > Wazdakka Red drybrush
- Bronze: Warplock Bronze > Agrax Earthshade > Brass Scorpion drybrush
- Cog Mechanicum:
- White: Corax White > Apothecary White contrast paint > Praxeti White drybrush
- Black: Corvus Black > Basilicum Grey contrast paint > Eshin Grey drybrush > light Dawnstone drybrush
- Eye: Corax White > Khorne Red > Evil Sunz Scarlet
- Other little details (wires, etc.): Base coat in a single color (Averland Sunset, Macragge Blue, etc.) and vary these choices across the buildings (especially duplicates!); it sounds like heresy, but these truly don’t need any follow-up coats/layers/etc.
- Weathering:
- Rust: Thinned-down Skrag Brown > thinned-down Fire Dragon Bright
- Verdigris: Nihilakh Oxide in the crevices on bronze elements
- Chipping and damage: Sponge on Rhinox Hide, focusing on the blasted edges and torn-away elements, but also randomly putting it everywhere that feels right
This guide is written for the walls, but it applies to the pipes, sacred radiators, and whatnot as well. The only real changes are obvious stuff, like applying the Agrax Earthshade pin wash to different parts of the pipes.
Munitorum Armoured Shipping Containers, crates, and barrels
I based my approach to these on 1) the primary colors I hadn’t used yet, which 2) were available in rattle cans.
- Shipping containers, crates, and barrels: Pick one:
- Blue: Spray on Macragge Blue > Nuln Oil all-over wash > Altdorf Guard Blue drybrush > Calgar Blue drybrush
- Green: Spray on Death Guard Green primer/base coat > Agrax Earthshade all-over wash > Warboss Green drybrush >
- Grey: Spray on Grey Seer primer/base coat > Agrax Earthshade all-over wash > Ulthuan Grey drybrush > light White Scar drybrush on the high points
- Skulls: Pick one:
- Gold: Retributor Armour > Reikland Fleshshade all-over wash > Auric Armour Gold drybrush
- Silver: Leadbelcher > Nuln Oil all-over wash > Ironbreaker drybrush
- White: Corax White > Agrax Earthshade all-over wash > Praxeti White drybrush
- Vox box skull: Warplock Bronze > Agrax Earthshade all-over wash > Brass Scorpion drybrush
- Vox skull eye, box keypad, container vents, light housings, barrel spigots: Leadbelcher > Nuln Oil all-over wash > Ironbreaker drybrush
- Light glass: Caledor Sky or Averland Sunset
- Aquilas: Pick one:
- Black: Abaddon Black > Eshin Grey drybrush
- Gold: Retributor Armour > Reikland Fleshshade all-over wash > Auric Armour Gold drybrush
- Silver: Leadbelcher > Nuln Oil all-over wash > Ironbreaker drybrush
- Weathering: Mainly on the containers.
- Rust: Thinned-down Skrag Brown > thinned-down Fire Dragon Bright
- Bullet holes: Shade them with the rest of whatever surface they’re on, then at this stage just fill them with Leadbelcher
- Verdigris: Nihilakh Oxide in the crevices on bronze elements
- Grime and damage: Sponge on Rhinox Hide
I winged it on the green, which isn’t the most logical color combination — but looks like it has seen some shit (which fits my vibe) and is distinct from the green I use for the floors of my Sector Mechanicus terrain.
This is great, just what I needed. Thanks for sharing!
You’re most welcome! I’m glad it was helpful.